⚡ Key Facts
- Natural Instincts Prevail: According to the World Health Organization (WHO), the vast majority of births proceed normally without medical intervention; the primary role of an emergency attendant is to maintain hygiene, provide warmth, and monitor for excessive bleeding.
- Infection Prevention is Critical: The Centers for Disease Control and Prevention (CDC) notes that proper hand hygiene and sterile cord-cutting tools are the most effective ways to prevent neonatal tetanus and maternal sepsis in austere environments.
- Temperature Control Saves Lives: The American Red Cross emphasizes that newborns lose body heat rapidly; immediate drying and skin-to-skin contact are vital to prevent neonatal hypothermia.
- Postpartum Hemorrhage Risk: Uterine massage (fundal massage) immediately following the delivery of the placenta is a medically proven, non-pharmacological method to reduce severe maternal bleeding.
Imagine the scenario: a severe Category 4 hurricane has just swept through your region. According to NOAA warnings, the roads are completely washed out, power lines are down, and emergency medical services are stretched beyond capacity. In the midst of this chaos, a pregnant family member or neighbor goes into active labor. Panic might be your first instinct, but it is the enemy of preparedness. When you are faced with an unplanned home birth emergency, understanding the physiological process of childbirth can transform a terrifying ordeal into a manageable, empowering experience. The human body is inherently designed to give birth. When professional medical assistance is unavailable, your primary job is not to "deliver" the baby, but rather to support the mother, catch the newborn, and maintain a sterile, warm environment. Learn more in our medical preparedness guide.
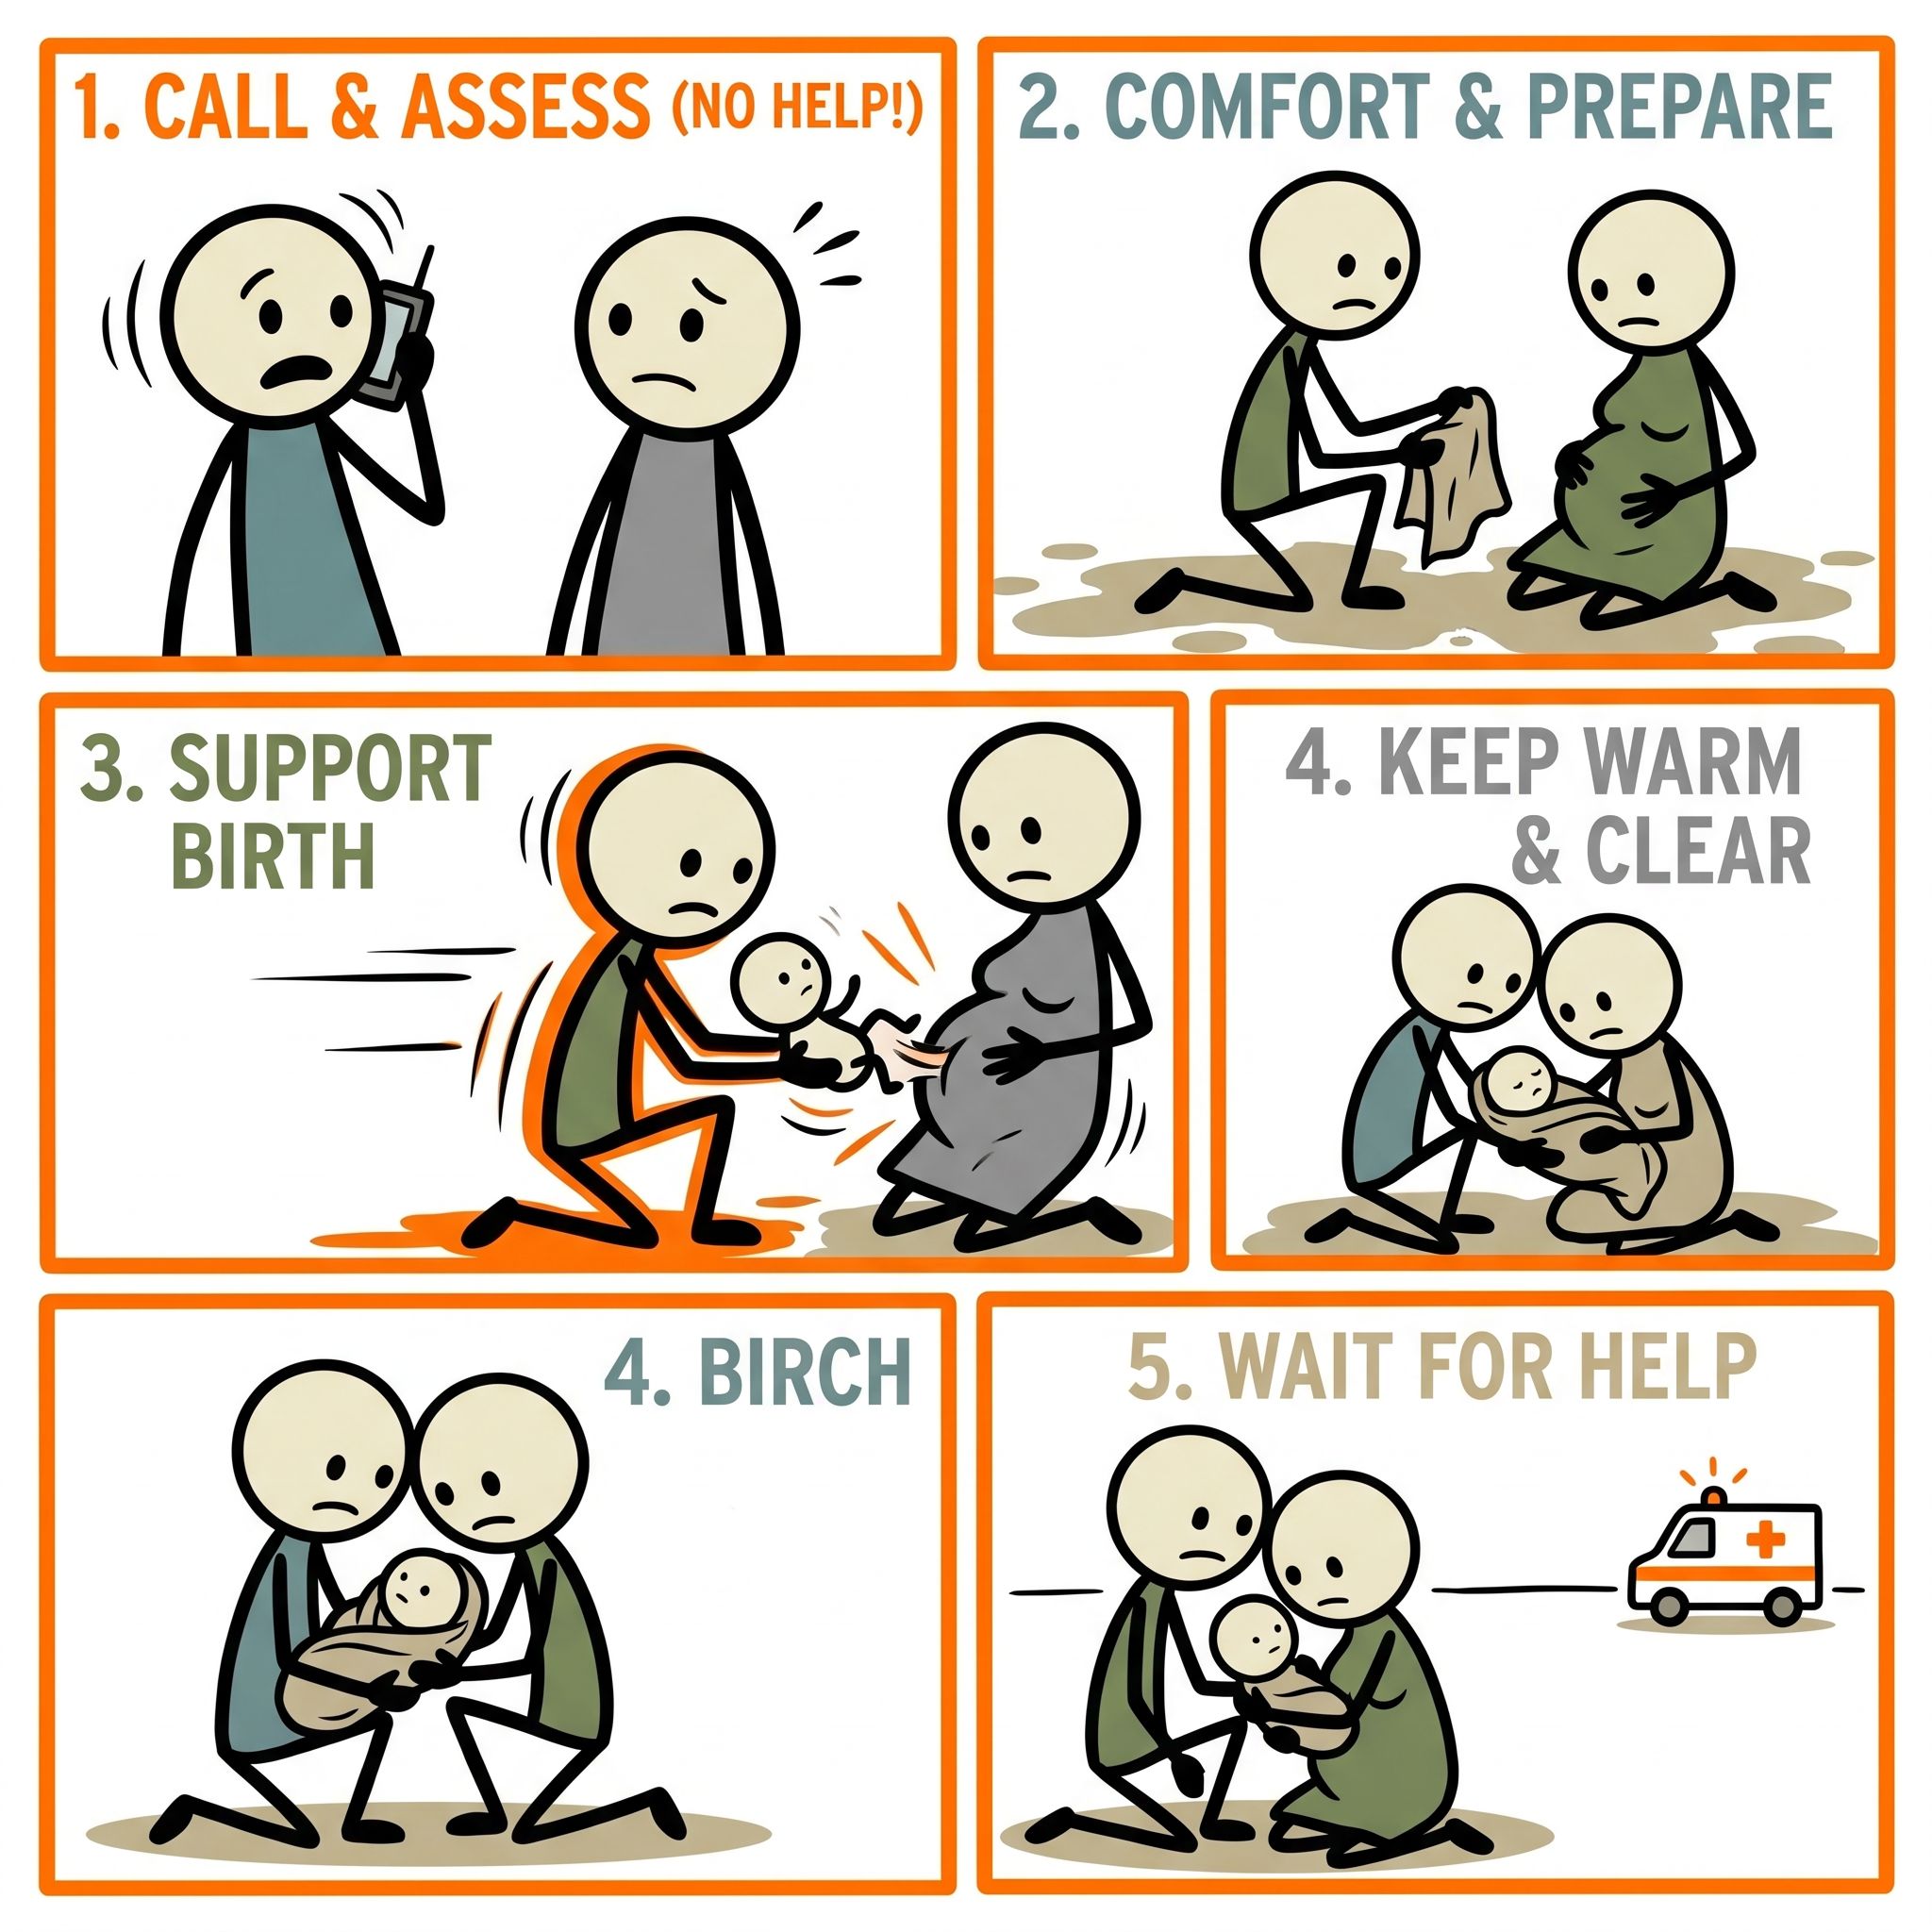
This comprehensive emergency childbirth guide is designed to equip you with the knowledge needed to handle an unexpected delivery. Whether you are isolated by a winter blizzard, trapped by floodwaters, or facing a grid-down scenario, knowing how to facilitate childbirth without medical help is a pinnacle survival skill. We will walk you through recognizing the undeniable signs of active labor, preparing an improvised delivery room, safely managing the newborn and umbilical cord, and providing critical postpartum care for the mother. Take a deep breath. You are capable of handling this. Review our bug-out evacuation guide for related steps.
Recognizing the Point of No Return: Signs of Active Labor
The first step in any emergency birth preparation is determining whether the baby is actually coming right now, or if you have time to wait for rescue. Labor is divided into stages, and early labor can last for days. During early labor, the mother may experience mild, irregular contractions, but she can typically talk through them. This is the time to finalize your preparations, contact emergency services if any communication lines are open, and gather your supplies. However, when early labor transitions into active labor, the situation demands your immediate, undivided attention. Learn more in our survival scenarios.
The 5-1-1 Rule and Contraction Tracking
Medical professionals and organizations like the American College of Obstetricians and Gynecologists (ACOG) use the 5-1-1 rule to identify active labor. This rule applies when contractions are 5 minutes apart, last for at least 1 minute each, and this pattern has been consistent for 1 hour. In a true emergency where you must deliver baby without doctor intervention, you need to monitor these contractions closely. Use a watch or a battery-powered clock to time the intervals from the start of one contraction to the start of the next. Learn more in our Protocol Survival app.
As labor progresses into the transition phase (the final phase before pushing), contractions will become much more intense, often occurring every 2 to 3 minutes and lasting up to 90 seconds. The mother will likely be unable to talk or walk during these surges. She may experience nausea, shaking, or extreme vocalization. This is a normal physiological response to the intensity of transition. Your role here is to remain a calm, grounding presence. Encourage deep, rhythmic breathing and reassure her that her body is doing exactly what it needs to do.
Physical Signs of Imminent Delivery
Beyond contraction timing, several physical signs indicate that birth is imminent and you must prepare to catch the baby. If you observe any of the following, do not attempt to move the mother to a hospital if roads are treacherous; stay put and prepare your space.
- Rupture of Membranes: Commonly known as the "water breaking." A sudden gush or a steady trickle of amniotic fluid means the protective sac has opened. Note the color of the fluid; it should be clear or slightly straw-colored. If it is green or brown, the baby has passed meconium (first stool) in utero, which will require you to be extra vigilant about clearing the baby's airway immediately upon birth.
- The Bloody Show: The passage of the mucous plug, often tinged with blood, indicates the cervix is dilating rapidly.
- The Urge to Push: The mother may suddenly announce that she needs to have a bowel movement or feel an uncontrollable, primal urge to bear down. This means the baby's head has descended into the birth canal.
- Crowning: If you look at the perineum (the area between the vagina and the anus) and see a bulging sensation or the top of the baby's head appearing during a contraction, delivery is happening now.
Emergency Birth Preparation: Setting Up a Clean Environment
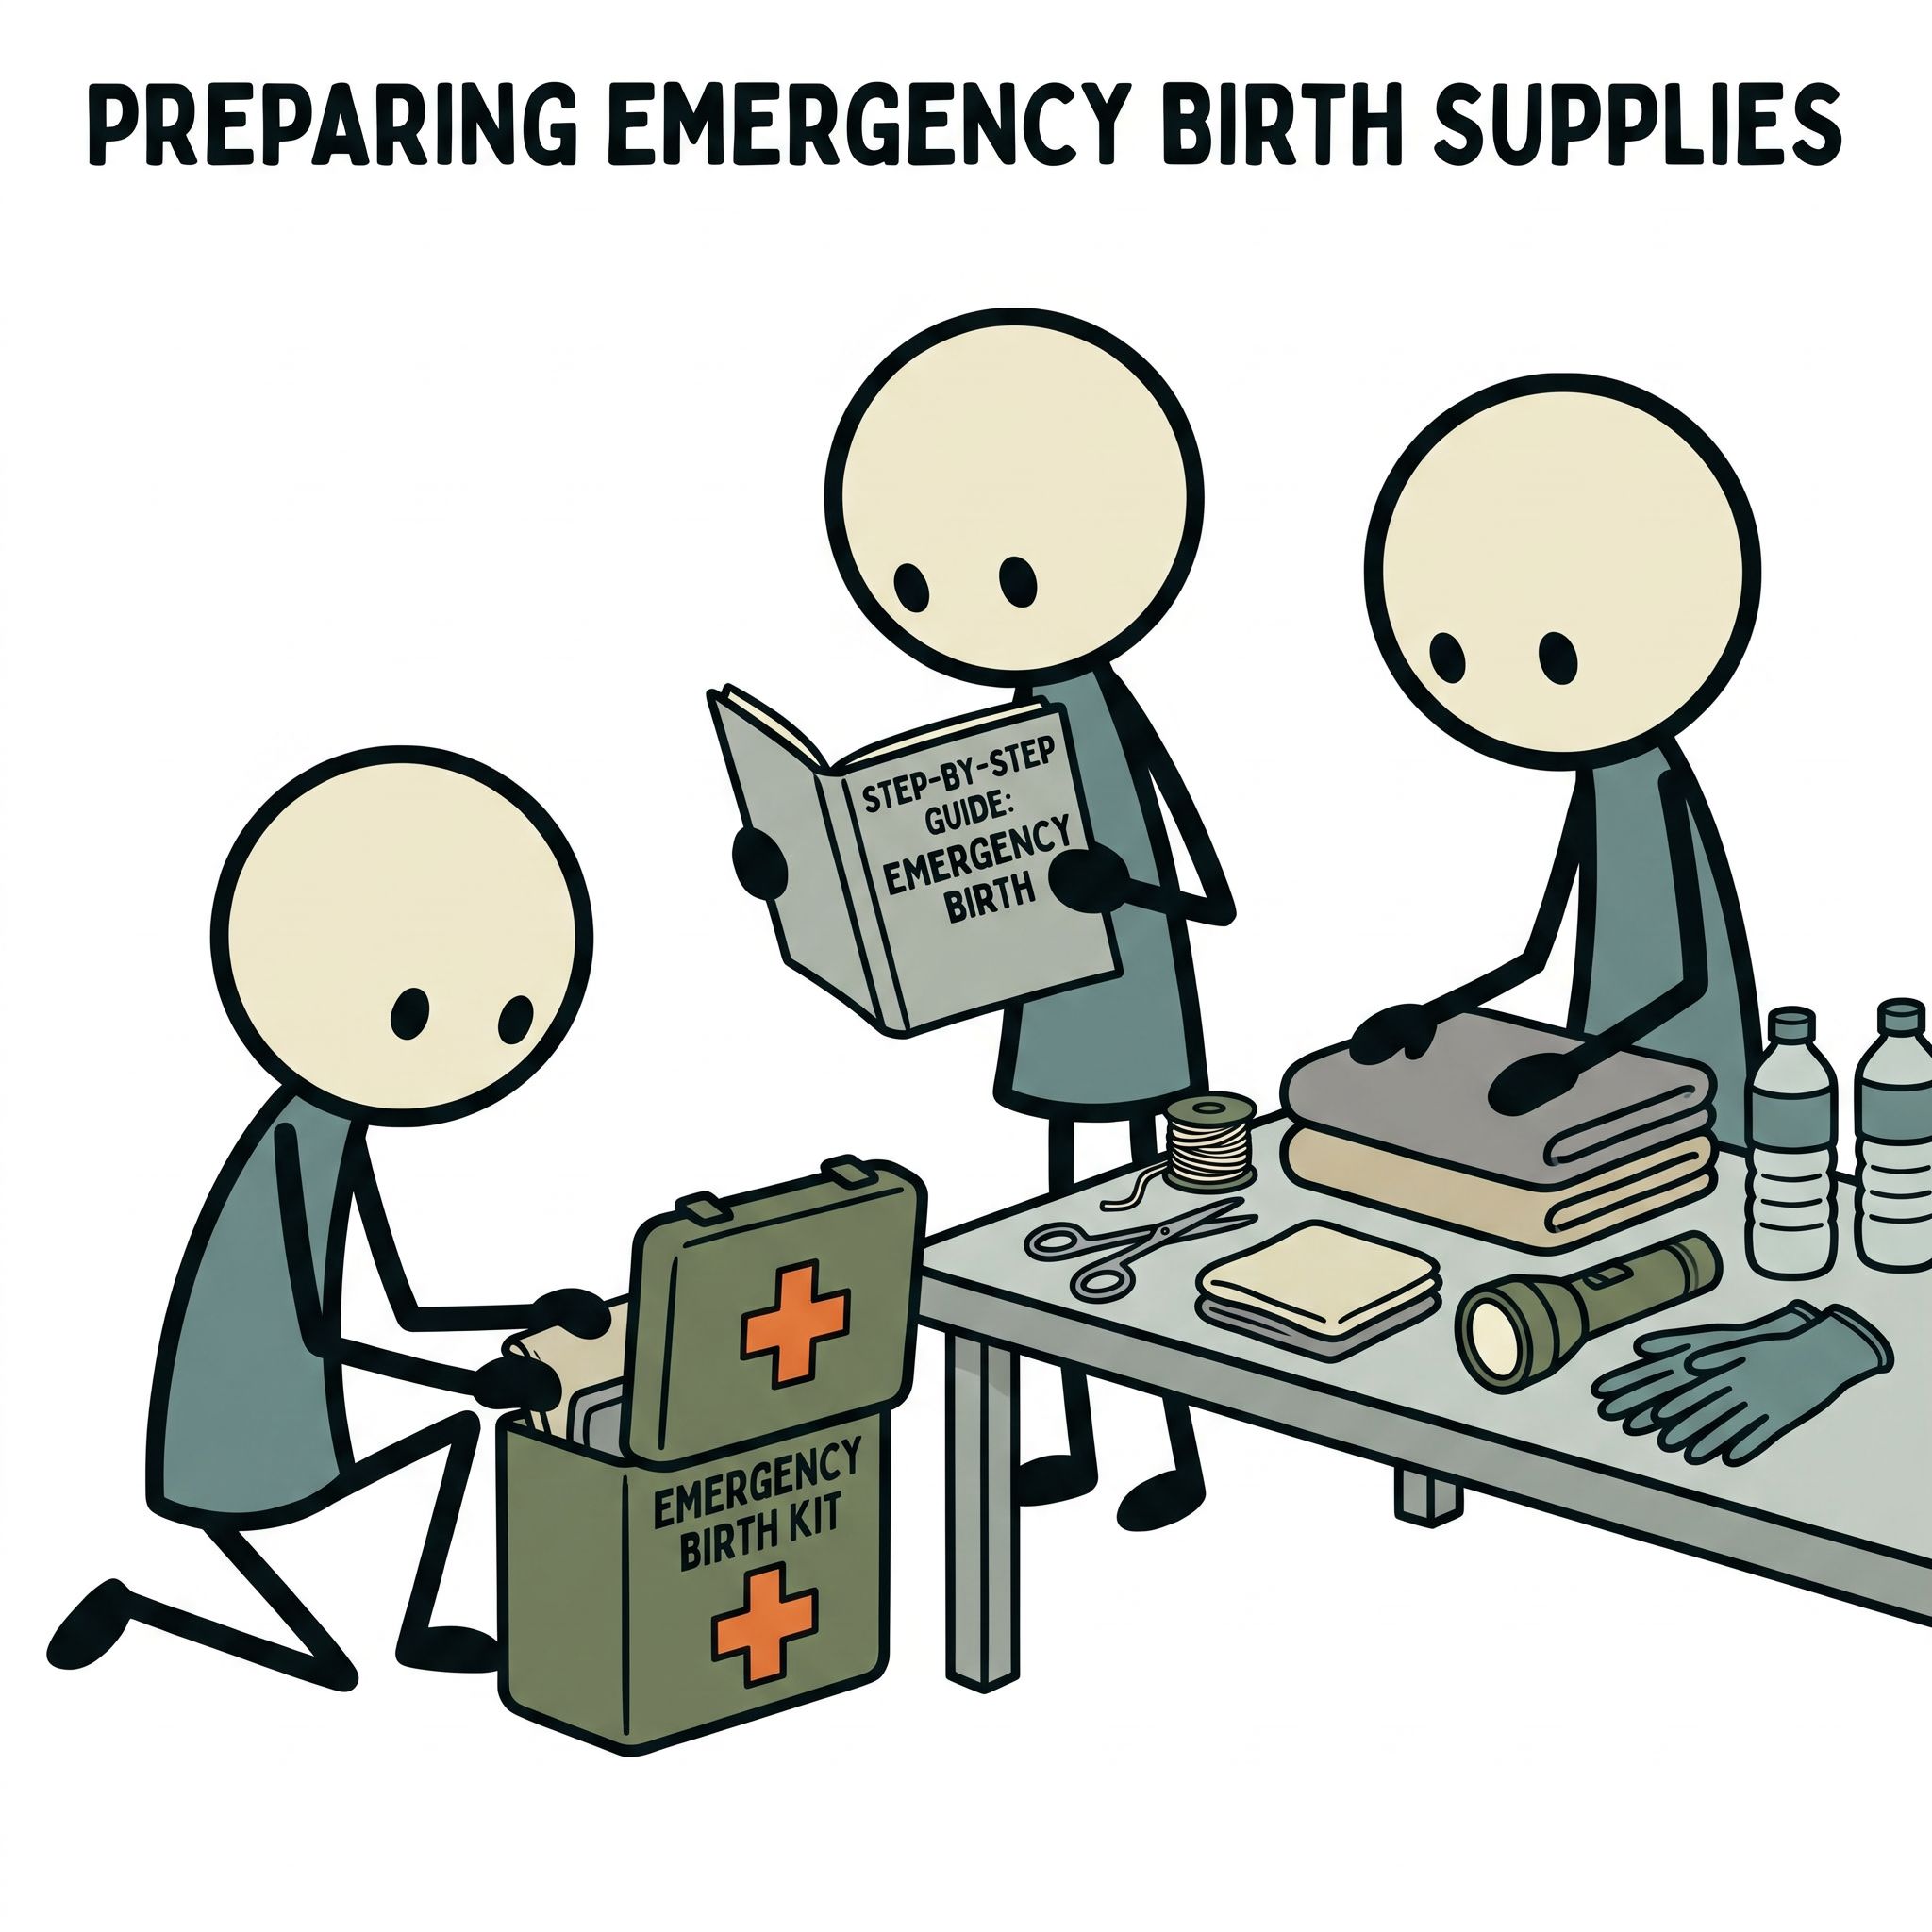
In a Survival Scenarios, infection is one of the greatest threats to both mother and child. Historical data from disaster zones, analyzed by the CDC and the Red Cross, consistently shows that maternal and neonatal mortality rates spike when basic sanitation is ignored. While you may not have a sterile hospital room, you can significantly mitigate risks by meticulously preparing your environment.
Sanitation and Hand Hygiene
Before you touch the mother or handle any supplies, you must sanitize your hands. Wash your hands and forearms vigorously with soap and clean, running water for at least 3 minutes. Clean under your fingernails. If clean running water is unavailable, use water that has been subjected to a rolling boil for at least one minute (or three minutes at elevations above 5,000 feet, per USGS and CDC guidelines) and allowed to cool. If water is entirely scarce, use a high-alcohol-content hand sanitizer (at least 60% alcohol) generously. Explore our go-bag builder for practical packing checklists.
Gathering Your Improvised Delivery Kit
A well-stocked FEMA-compliant emergency kit should ideally contain childbirth supplies, but if you are caught off guard, you will need to improvise. Scour the location for the following essential items, prioritizing cleanliness above all else:
- Clean Linens: Gather the cleanest sheets, towels, and blankets you can find. You will need several to place under the mother, and several more to dry and wrap the newborn.
- Cord Tying Material: You need strong, clean string to tie the umbilical cord. Shoelaces, heavy cotton thread, or unwaxed dental floss work well. Boil these items for 10 minutes to sterilize them.
- Cutting Tool: A new razor blade, a sharp pocket knife, or heavy-duty scissors. This tool must be sterilized by boiling for 10 minutes or soaking in rubbing alcohol.
- Bulb Syringe (if available): Essential for clearing the baby's mouth and nose. If you do not have one, you will use gravity and a clean cloth.
- Plastic Bags or a Clean Bowl: To catch and store the placenta after it is delivered.
- Warmth: A space heater, a roaring fire, or skin-to-skin contact. Newborns cannot regulate their body temperature, and hypothermia is a leading risk in out-of-hospital births.
Preparing the Delivery Space
Choose a room that is warm, draft-free, and well-lit. If the power is out, gather flashlights, headlamps, or battery-powered lanterns. Avoid using candles near the delivery area if possible, as they pose a fire hazard if knocked over during the commotion of birth. Protect the mattress or floor by laying down a clean plastic tarp or a shower curtain, then cover it with your cleanest sheets and towels.
Allow the mother to choose the position that feels most comfortable for her. Contrary to popular belief, lying flat on the back is often the least effective position for labor, as it works against gravity and compresses major blood vessels. Encourage positions such as side-lying, hands and knees, squatting, or semi-propped with pillows. The goal is to maximize the opening of the pelvis and allow gravity to assist the descent of the baby.
The Delivery Process: Supporting the Mother and Catching the Baby
As the mother enters the pushing phase, your role shifts from preparation to active support. It is vital to remain calm, encouraging, and highly observant. The mother's body will naturally dictate when and how hard to push. Do not force her to hold her breath and push for arbitrary counts; instead, encourage her to follow her body's natural urges, bearing down during contractions and resting completely between them.
Managing the Crowning Phase
As the baby descends, the perineum will begin to stretch, and the top of the baby's head will become visible. This is called crowning. To prevent severe vaginal tearing, you must help control the speed of the head's delivery. Instruct the mother to stop pushing forcefully and instead use short, panting breaths (like blowing out a candle) during the contraction.
Place a clean, warm, damp washcloth against the perineum to provide support. As the head emerges, place your hands lightly on the baby's head with gentle, even pressure. Do not pull the baby. Your goal is simply to keep the head from popping out too rapidly. Allow the mother's gentle pushes to slowly ease the widest part of the head through the vaginal opening.
Checking for the Umbilical Cord
Once the head is fully delivered, the mother should stop pushing for a moment. The baby's face will likely be pointing downward toward the mother's spine, but it will quickly turn to one side. This natural rotation, called restitution, aligns the baby's shoulders for delivery. At this exact moment, slide your clean finger gently around the baby's neck to check for the umbilical cord (a nuchal cord).
It is surprisingly common for the cord to be wrapped around the neck. If you feel it, do not panic. Simply hook your finger under the cord and gently slip it over the baby's head. If the cord is wrapped too tightly to slip over the head, leave it alone and proceed with the delivery; the baby can usually deliver right through it. In extremely rare cases where the cord is dangerously tight and holding the baby back, you may need to tie it in two places and cut it immediately, but this should only be done as a last resort.
Delivering the Shoulders and Body
With the next contraction, the mother will push to deliver the shoulders. The top shoulder will usually emerge first. You can assist by gently guiding the baby's head slightly downward (toward the floor) to help the top shoulder slip under the mother's pubic bone. Once the top shoulder is out, gently guide the head slightly upward to allow the bottom shoulder to emerge.
Once the shoulders are free, the rest of the baby's body will slide out very quickly and will be incredibly slippery. Be prepared! Grip the baby securely but gently, supporting the head and neck at all times. Note the exact time of birth. The moment the baby is fully born marks the beginning of the most critical phase of immediate newborn care.
Immediate Newborn Care: The First Golden Minutes
The first few minutes of a newborn's life are vital for establishing independent breathing and maintaining body temperature. When conducting childbirth without medical help, you must act swiftly and methodically during this "golden minute." Do not be alarmed if the baby's hands and feet appear slightly blue; this is normal. However, the baby's core (chest and lips) should quickly turn pink.
Clearing the Airway and Stimulating Breath
Most babies will begin to cry and breathe spontaneously within seconds of birth. As soon as you catch the baby, keep them at the same level as the mother's uterus to prevent a sudden shift in blood volume through the umbilical cord. If you have a clean bulb syringe, gently suction the baby's mouth first, then the nose. (Remember: M before N, Mouth before Nose, to prevent the baby from gasping and inhaling fluids).
If you do not have a bulb syringe, use a clean cloth to wipe the baby's face, mouth, and nose. To help clear fluids using gravity, hold the baby securely with their head slightly lower than their body. If the baby does not cry or breathe immediately, you must provide stimulation. Vigorously but safely rub the baby's back with a dry towel, or gently flick the soles of their feet. This tactile stimulation is usually enough to kickstart the respiratory drive.
Drying, Warming, and Skin-to-Skin Contact
Newborns enter a world that is significantly colder than the womb, and they lack the ability to shiver to generate heat. The evaporation of amniotic fluid from their skin will cause rapid heat loss, leading to life-threatening hypothermia if left unaddressed. Immediately place the baby on the mother's bare chest or abdomen (skin-to-skin contact).
Using your clean towels, vigorously dry the baby from head to toe. Once the baby is completely dry, discard the wet towels immediately. Leaving a wet towel on the baby will draw heat away from their body. Cover both the mother and the baby with fresh, dry, warm blankets, ensuring the baby's head is covered with a makeshift hat or towel, as a massive amount of body heat is lost through the scalp. Skin-to-skin contact is a medically proven method to regulate the baby's heart rate, breathing, and temperature, and it also promotes the release of oxytocin in the mother, which aids in delivering the placenta.
Umbilical Cord Management
One of the most anxiety-inducing aspects of an unplanned home birth emergency is managing the umbilical cord. Hollywood movies often depict the frantic, immediate cutting of the cord the second the baby is born. In reality, rushing this step is unnecessary and can actually be detrimental to the newborn. The umbilical cord continues to transfer oxygen-rich blood and stem cells from the placenta to the baby for several minutes after birth.
Delayed Cord Clamping
Modern obstetric guidelines, including those from the WHO, strongly advocate for delayed cord clamping. Leave the cord attached and untouched for at least 3 to 5 minutes, or until it completely stops pulsating and turns pale and limp. This delay allows up to a third of the baby's total blood volume to transfer from the placenta, significantly reducing the risk of infant anemia and providing a crucial oxygen reserve while the baby's lungs begin to function fully.
Tying and Cutting the Cord Safely
Once the cord has stopped pulsating, it is time to sever the connection. You must use the sterilized string and cutting tool you prepared earlier. Never use unsterilized scissors or dirty shoelaces, as this is a primary vector for tetanus infection.
- First Tie: Take your sterilized string and tie a tight, square knot around the umbilical cord approximately 3 to 4 inches away from the baby's belly button. Tie it securely enough to crush the jelly-like substance inside the cord and stop any blood flow.
- Second Tie: Tie a second tight knot about 2 inches further down the cord, toward the mother.
- The Cut: Using your sterilized scissors, razor, or knife, carefully cut the cord directly between the two knots. Hold the cord firmly so your tool does not slip and injure the baby.
After the cut is made, observe the stump on the baby's belly. If there is any active bleeding, tie another piece of string slightly closer to the baby's body to secure it. Do not apply any ointments, alcohol, or bandages to the stump. Keeping it clean and dry is the best way to prevent infection in a survival setting.
Note on Lotus Birth: If you are in a situation where you possess absolutely zero sterile tools or string, it is safer to leave the cord entirely intact. This is known as a Lotus Birth. You will deliver the placenta and keep it attached to the baby, wrapping the placenta in a clean cloth and keeping it near the infant until professional medical help arrives or the cord naturally dries and detaches days later. While cumbersome, it eliminates the risk of introducing a fatal infection through an unsterile cut.
Delivering the Placenta and Maternal Postpartum Care
The birth of the baby is only the first part of the delivery process. The third stage of labor involves the delivery of the placenta (the afterbirth). This usually occurs naturally within 10 to 30 minutes after the baby is born. Managing this stage correctly is crucial to prevent postpartum hemorrhage (PPH), which is the leading cause of maternal mortality in austere environments.
Waiting for the Placenta
Do not pull on the umbilical cord to force the placenta out. Pulling the cord can cause it to snap, or worse, cause uterine inversion (where the uterus pulls inside out), which is a fatal medical emergency. Watch for the natural signs of placental separation:
- A sudden gush of dark blood from the vagina.
- The umbilical cord lengthening outside the body.
- The mother's uterus rising upward in her abdomen, feeling firm and globular.
When the mother feels a mild cramping sensation, ask her to bear down and push gently. The placenta should slide out easily. Catch it in a clean bowl or plastic bag. Inspect it briefly to ensure it looks whole and intact, like a large piece of liver. If large pieces of the placenta remain inside the uterus, it can prevent the uterus from contracting, leading to severe bleeding. Keep the placenta in the bag so medical professionals can examine it once roads are cleared and help arrives.
Fundal Massage to Prevent Hemorrhage
Immediately after the placenta is delivered, you must check the mother's uterus to ensure it is contracting properly. A contracted uterus clamps down on the blood vessels where the placenta was attached, stopping the bleeding. Locate the mother's uterus by feeling her lower abdomen, just below the belly button. It should feel like a hard grapefruit.
If the uterus feels soft or "boggy," or if the mother is bleeding heavily (soaking through a thick towel in less than 15 minutes), you must perform a fundal massage. Place one hand just above her pubic bone to support the lower uterus, and use your other hand to firmly massage the top of the uterus (the fundus) in a circular motion. This will be uncomfortable for the mother, but it is a life-saving maneuver. The physical stimulation will cause the uterine muscle to contract and harden, slowing the bleeding. Continue to check the uterus every 15 minutes for the first two hours, massaging it whenever it feels soft.
Hydration and Monitoring
Childbirth is an athletic event that severely depletes the mother's energy and fluid reserves. Once she is stable, clean, and resting with the baby, offer her small sips of clean water or an electrolyte solution. Keep her warm and monitor her vital signs. Watch for signs of shock, such as pale, clammy skin, a rapid or weak pulse, confusion, or extreme lethargy.
Encourage the mother to put the baby to her breast as soon as possible. Even if her mature milk has not come in, the baby's suckling stimulates the mother's pituitary gland to release oxytocin, which naturally forces the uterus to contract and further reduces the risk of postpartum bleeding. Keep the mother's perineal area clean by gently pouring warm, sterilized water over the area when she urinates, and change her protective towels frequently.
Delivering a baby in an emergency without a doctor or midwife is undoubtedly a daunting prospect. However, by maintaining a calm mindset, prioritizing strict sanitation, and trusting the natural physiological process of birth, you can safely guide a mother and newborn through this miraculous event. Remember, the female body has evolved over millennia to accomplish this exact task. Your preparation, steady hands, and knowledge of basic interventions—like clearing the airway, delayed cord clamping, and fundal massage—are the ultimate tools for survival. Keep the mother hydrated, keep the baby warm, and initiate contact with emergency medical services the absolute second communication networks or roadways are restored.
Related preparedness term: bowline knot.
Frequently Asked Questions
What are the signs that delivery is truly imminent?
You're in active labor when contractions are 2-3 minutes apart and lasting 60+ seconds, you feel the urge to push, you can see the baby's head (crowning), or you feel an intense urge to bear down. Call 911 immediately and stay on the line.
What supplies do I need for an emergency delivery?
Clean towels or blankets to receive the baby, clean string or shoelaces to tie the umbilical cord, scissors sterilized with rubbing alcohol or flame, disposable gloves if available, a bulb syringe to clear airways, and something warm to wrap the newborn.
What are the warning signs of complications?
Excessive maternal bleeding, baby not breathing within 30 seconds of birth, umbilical cord emerging before the baby (critical emergency), and placenta not delivered within 30 minutes. For any complication, call 911 immediately.
Sources & Further Reading
- ACOG American College of Obstetricians Emergency Delivery
- AHA Neonatal Resuscitation
- Red Cross Emergency Childbirth First Aid
- WHO Emergency Childbirth Care