⚡ Key Facts
- Widespread Need: According to the Centers for Disease Control and Prevention (CDC), approximately 1 in 4 adults in the United States (about 61 million people) live with a disability that impacts major life activities.
- Disproportionate Impact: FEMA reports that individuals with access and functional needs are up to two to three times more likely to experience injury or death during natural disasters due to systemic gaps in family emergency planning.
- Power Dependency: The Department of Health and Human Services (HHS) emPOWER map tracks over 4 million Medicare beneficiaries who rely on electricity-dependent medical equipment to live independently at home.
- Shelter Rights: Under Title II of the Americans with Disabilities Act (ADA), emergency shelters run by state and local governments must provide equal access, physical accommodations, and reasonable modifications for individuals with disabilities.
When an emergency strikes—whether it is a fast-moving wildfire tracked by NOAA satellites, a sudden earthquake monitored by the USGS, or a prolonged power grid failure—standard survival advice often falls short. Traditional guides that instruct citizens to "grab a bag and run" assume a level of physical mobility, sensory processing, and systemic independence that does not represent everyone. For individuals with physical, cognitive, sensory, or medical needs, true safety requires a different approach. Rather than relying on generic disaster templates, effective planning must be built from the ground up using a capability-first model. This strategy assesses exactly what you can do, what specific assistance or equipment you require, and how to bridge the gap when critical infrastructure fails.
Understanding the Capability-First Planning Model
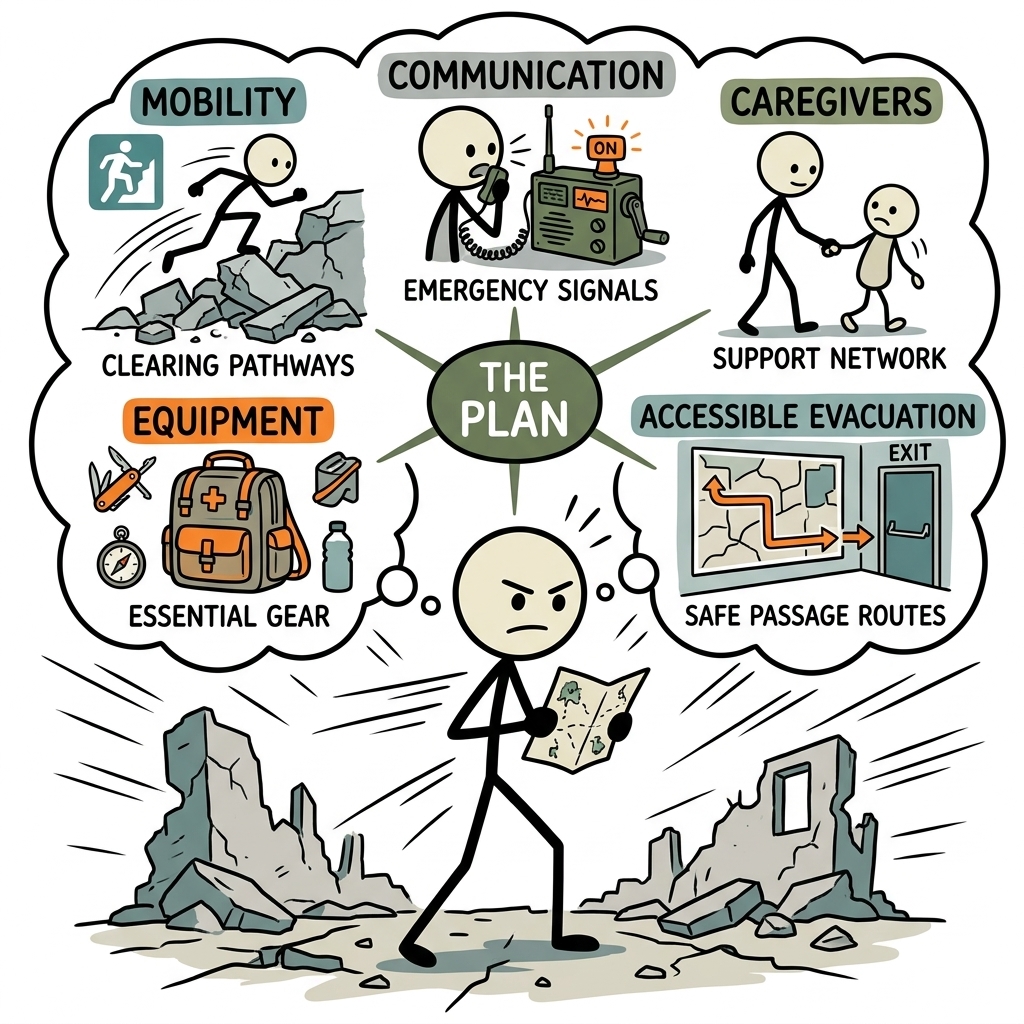
Traditional disaster planning is often diagnostic-focused. It asks, "What is your medical diagnosis?" and attempts to prescribe solutions based on broad categories. In contrast, capability-first planning is functional. It asks, "What are your specific capabilities, and what tools, environments, or assistance do you require to maintain those capabilities during a crisis?" This model shifts the focus from limitations to actionable strategies, ensuring that your plan is tailored to your real-world experience.
The foundation of capability-first planning lies in the C-MIST framework, a tool developed by emergency management professionals and championed by FEMA. C-MIST stands for:
- emergency communication plan: How do you receive, process, and send information? This includes addressing needs related to hearing loss, blindness, cognitive processing differences, or limited verbal communication.
- Maintaining Health: What medications, therapies, or clinical interventions do you require daily? This covers everything from dialysis and oxygen therapy to specialized dietary needs and wound care.
- Independence: What assistive technologies, mobility devices, or service animals allow you to function without assistance? Your plan must prioritize preserving these tools to maintain your autonomy.
- Services and Support: Do you rely on personal care assistants (PCAs), home health aides, or community-based services? Planning must account for the sudden absence of these support systems.
- Transportation: How will you physically move from point A to point B if public transit is down, roads are blocked, or your specialized vehicle is unavailable?
By analyzing your daily life through the lens of C-MIST, you can build a highly resilient framework. This approach ensures that your emergency preparedness for disabled individuals addresses the actual mechanics of survival rather than relying on generalized assumptions.
Conducting a Personal Capability Audit
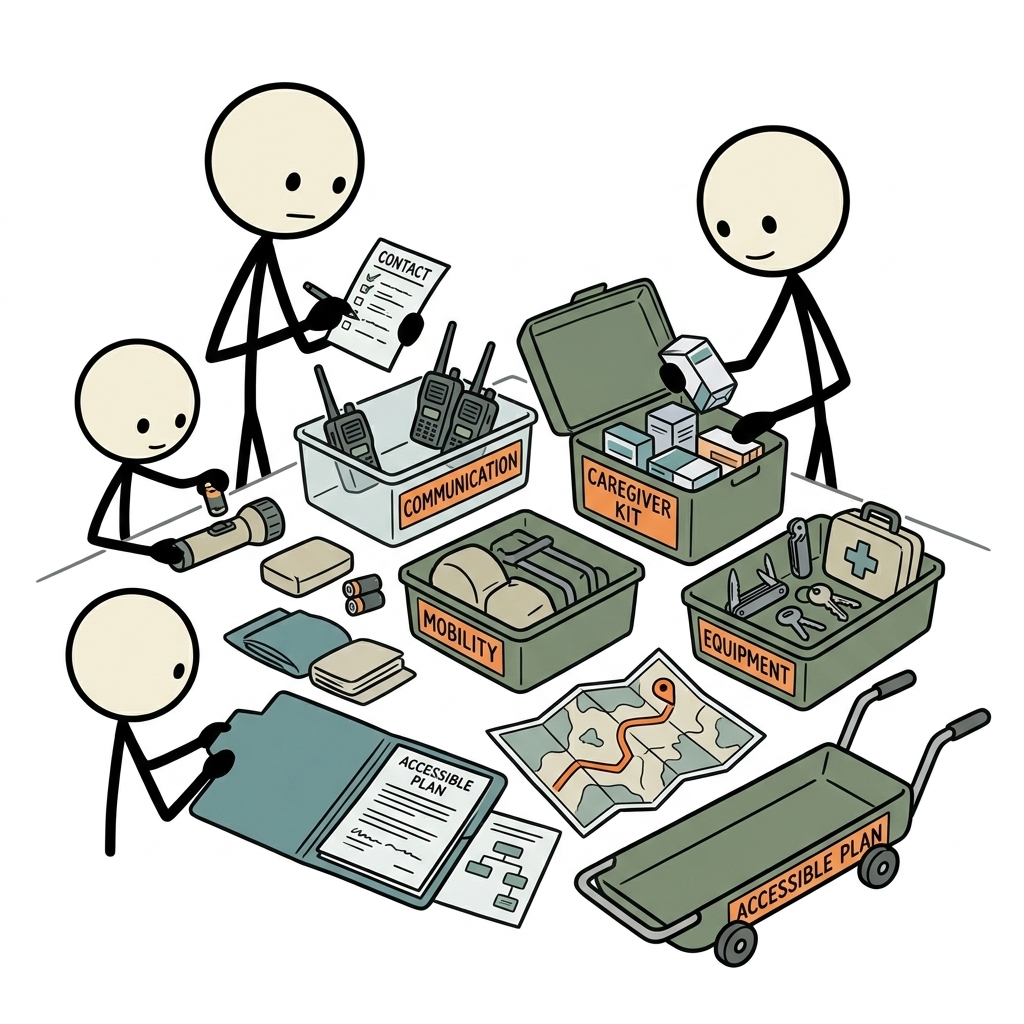
Before buying gear or packing bags, you must conduct a rigorous personal capability audit. This self-assessment forms the core of your emergency preparedness for disabled emergency preparedness strategy. It requires a realistic look at how you interact with your environment and how a disaster might disrupt those interactions.
Step 1: Environmental and Physical Navigation
Begin by evaluating your physical environment. Can you independently navigate your home if the power goes out and you are in complete darkness? Consider the pathways, doorways, and stairs. If you use a power wheelchair, do you have a manual backup chair, and can you physically operate it? Map out every physical transition you make in a day—from bed to chair, chair to vehicle, vehicle to office—and identify where those transitions would fail if your primary assistive devices or structural ramps were damaged.
Step 2: Sensory and Cognitive Processing
Assess how you process high-stress environments. Sudden alarms, flashing lights, and chaotic crowds can trigger sensory overload or disorientation. If you have a cognitive disability, sensory processing sensitivity, or autism, identify the tools that help you regain focus. This might include noise-canceling headphones, tactile grounding objects, or pre-written visual scripts. For individuals with visual or hearing impairments, audit how you receive emergency alerts. Do you rely on visual cues, vibrating alerts, or screen readers? Ensure you have redundant methods for each.
Step 3: Medical and Physiological Stability
Detail your physiological dependencies. Write down every medication, its exact dosage, and storage requirements (such as refrigeration). Determine how long you can safely go without a specific treatment, such as dialysis, IV therapy, or oxygen. If you rely on specialized medical supplies—like catheters, feeding tubes, or sterile dressings—calculate your burn rate. You should maintain a minimum of a two-week supply of these items at all times, independent of your standard insurance refill cycles.
Power, Equipment, and Assistive Technology Safeguards
For many individuals with disabilities, electricity is not a luxury—it is life support. A prolonged power outage caused by severe weather or grid strain can quickly become a life-threatening emergency. Safeguarding your equipment and securing backup power is a non-negotiable step in your preparedness planning.
Calculating Your Power Budget
To plan for backup power, you must understand your power consumption. Every electrical device has a label indicating its power requirements in watts (W), volts (V), or amps (A). If a device only lists amps and volts, calculate the wattage using the formula: Watts = Amps × Volts.
Create a detailed inventory of your essential medical devices, noting their running wattage and starting wattage (which can be significantly higher for devices with compressors or motors, like oxygen concentrators). Use this table to calculate your daily power needs:
| Device | Running Watts | Hours Needed/Day | Daily Watt-Hours (Wh) |
|---|---|---|---|
| CPAP Machine | 30 – 60W | 8 | 240 – 480Wh |
| Oxygen Concentrator | 300 – 600W | 24 | 7,200 – 14,400Wh |
| Power Wheelchair Charger | 100 – 150W | 4 | 400 – 600Wh |
| Medical Refrigerator | 50 – 100W | 24 (cycling) | 800 – 1,200Wh |
Selecting the Right Backup Power Source
Once you know your daily watt-hour requirement, you can select an appropriate backup power source. Options range from portable power stations (lithium battery banks) to fuel-powered generators.
- Portable Power Stations (LiFePO4): These are ideal for indoor use. They run silently, emit no fumes, and can be safely kept in a bedroom. Look for units with pass-through charging, allowing you to keep them plugged into the wall while your medical devices plug into them, acting as an Uninterruptible Power Supply (UPS).
- Dual-Fuel Generators: If you rely on high-wattage equipment like oxygen concentrators, a fuel-powered generator may be necessary. Dual-fuel models that run on both gasoline and propane offer the most flexibility. Propane can be stored indefinitely without degrading, unlike gasoline. Crucial Safety Rule: Never operate a combustion generator indoors, in a garage, or near windows. They must be placed at least 20 feet away from the home to prevent carbon monoxide poisoning.
- Solar Panels: For long-term grid collapse, portable solar blankets or folding panels can recharge your battery power stations. Ensure your solar array's output wattage matches or exceeds the input limits of your power station.
The HHS emPOWER Program and Utility Registries
Do not wait for a blackout to let your utility provider know you rely on life-support equipment. Most utility companies maintain a "critical care" or "life support" registry. Registering provides you with advance warning of planned outages and prioritizes your home for power restoration during widespread blackouts. Additionally, familiarize yourself with the HHS emPOWER Map, a public health tool that helps community planners and emergency responders identify areas with high concentrations of electricity-dependent residents.
Redundant Communication Systems
During a disaster, standard communication channels are often the first to fail. Cell towers become overloaded, internet access drops, and landlines can go dead. For those who communicate differently or rely on assistive communication tools, having a robust, multi-layered communication plan is critical.
Alternative and Augmentative Communication (AAC) Backups
If you use a high-tech AAC device, your communication is tied directly to battery life. If that device dies, you lose your voice. To mitigate this risk, create low-tech, waterproof backups. Print and laminate copies of your communication boards, core vocabulary sheets, or key phrases. Store these physical sheets in your emergency go-bag essentials guide, your vehicle, and a secure location near your bed.
Additionally, prepare pre-written emergency cards that clearly state your communication style and immediate needs. For example: "I am non-verbal and communicate using this picture board. I understand what you say, but I need time to point to my responses. Please do not take my board away."
Accessible Emergency Alerts
Relying on standard sirens or television broadcasts is insufficient. Build a redundant alert system using tools certified by agencies like NOAA and the FCC:
- Vibrating and Strobe Receivers: For those with hearing loss, connect your weather radio or smoke detectors to bed-shakers and high-intensity strobe lights. Brands like Midland offer NOAA weather radios with accessory jacks designed specifically for these assistive devices.
- Text-to-911 Services: Confirm whether your local emergency dispatch centers support Text-to-911. In many situations, a text message can get through a congested cellular network when a voice call cannot. It is also an essential tool for individuals who are deaf, hard of hearing, or have speech disabilities.
- Visual and Plain-Language Mapping: If you struggle with complex spatial directions or cognitive processing under stress, use visual maps with clear, color-coded routes rather than text-heavy evacuation notices. Keep physical copies of these maps, as digital maps may not load without internet access.
Building a Resilient Caregiver and Support Network
No one survives a disaster in isolation. For individuals who rely on caregivers, personal care assistants, or family support, creating a formal support network is a core pillar of emergency preparedness for disabled individuals.
The Rule of Three
Do not rely on a single caregiver. If a disaster occurs, your primary caregiver may be injured, blocked by road closures, or dealing with their own family emergencies. Build a support network of at least three trusted individuals who live near you. This group could include neighbors, co-workers, or friends who are willing and physically able to assist you during an evacuation.
Sharing Critical Access and Information
Your support network must be fully integrated into your emergency plan. This means giving them the tools and knowledge they need to assist you immediately, without waiting for your instruction:
- Physical Access: Provide members of your network with keys, lockbox codes, or smart-lock access to your home. If you are unable to answer the door, they must be able to enter quickly.
- Equipment Training: Conduct hands-on training sessions with your network. Show them how to operate your wheelchair’s manual freewheel mode, how to transfer you safely, how to administer emergency medications (like epinephrine or seizure rescue medications), and how to pack and secure your medical equipment.
- The Emergency File: Keep a physical folder in a prominent location (such as on your refrigerator or in your go-bag) containing your medical history, current prescriptions, insurance cards, and contact information for your primary physicians. Make sure your network knows exactly where this folder is located.
Mobility and Accessible Evacuation Logistics
Evacuation is one of the most physically demanding aspects of real-world Survival Scenarioss guide. If you have mobility limitations, a successful evacuation requires detailed planning and coordination with local resources.
Multi-Story Evacuation Strategies
If you live or work in a multi-story building, you must plan for situations where elevators are automatically recalled or lose power. Ramps and stairs become your only exits.
- Evacuation Chairs: These are specialized, wheeled chairs designed to safely transport individuals down stairwells. If your building does not have them, advocate with your building manager or employer to have them installed on designated escape floors. Ensure your support network is trained on how to transfer you into the chair and guide it down the stairs.
- Areas of Refuge: Many modern buildings feature designated "Areas of Refuge"—fire-resistant locations, often near stairwells, equipped with two-way communication systems. If you cannot evacuate down the stairs independently, navigate to this area and use the intercom to alert emergency responders of your exact location.
Accessible Transportation Coordination
Do not assume that standard emergency transport will accommodate your mobility devices. Many emergency evacuation buses are not wheelchair accessible.
Contact your local emergency management agency (EMA) or fire department today. Ask if they maintain a registry for residents who require accessible transportation during an evacuation. If they do, register immediately. If you rely on paratransit services, understand their emergency operating procedures. During a mandatory evacuation, paratransit may modify its routes or suspend standard service to focus entirely on evacuation logistics.
If you own an accessible vehicle, keep the fuel tank at least half full at all times. If you rely on others for transport, secure commitments from multiple members of your support network who own vehicles that can accommodate your wheelchair, ramp, or medical equipment.
The Comprehensive Emergency Preparedness for Disabled Checklist
To transition your plan from theory to practice, use this comprehensive emergency preparedness for disabled checklist. Audit your supplies, update your contacts, and assemble your gear using these specific categories.
1. Vital Documents and Medical Records (Waterproof Container)
- [ ] Copies of health insurance cards, Medicaid/Medicare cards, and photo identification.
- [ ] A complete list of all medications, including generic names, exact dosages, prescribing doctors, and pharmacy contact info.
- [ ] Written instructions for your specific medical regimens, therapies, or equipment operations.
- [ ] Copies of legal documents, including power of attorney, living wills, and healthcare proxies.
- [ ] A list of emergency contacts, including your support network, doctors, and equipment suppliers.
2. Medical Supplies and Equipment (Minimum 14-Day Supply)
- [ ] Prescriptions and daily medications (rotate stock regularly to prevent expiration).
- [ ] Consumable medical supplies: syringes, catheters, dressings, ostomy bags, feeding tubes, or sanitizing wipes.
- [ ] Batteries or charging cords for all medical devices, including hearing aids, communication tools, and power chairs.
- [ ] Manual backup tools: a manual blood pressure cuff, a manual pump for feeding tubes, or a manual wheelchair.
- [ ] Cold-chain storage supplies: insulated cooler bags and reusable ice packs for insulin or other temperature-sensitive medications.
3. Sensory and Cognitive Comfort Items
- [ ] Noise-canceling headphones or earplugs to manage high-decibel environments.
- [ ] Comfort items: weighted blankets, sensory fidget tools, or familiar calming objects.
- [ ] Laminated visual communication boards or picture cards.
- [ ] Written daily schedules or visual checklists to help re-establish routine and structure during displacement.
4. Service Animal Emergency Kit
- [ ] A minimum of a 14-day supply of pet food, treats, and clean water.
- [ ] Service animal documentation, vaccination records, and proof of registration (keep in your waterproof document pouch).
- [ ] Extra leash, collar, and harness (including any specialized working vests).
- [ ] Waste disposal bags and a portable, collapsible water bowl.
- [ ] Protective gear: booties to protect paws from hot asphalt, broken glass, or chemical spills.
5. Power and Communication Gear
- [ ] Portable power station (LiFePO4 battery bank) sized to match your daily medical device wattage.
- [ ] NOAA weather radio with strobe light or bed-shaker attachment.
- [ ] High-capacity USB power banks for cell phones and communication tablets.
- [ ] A physical list of emergency phone numbers written on waterproof paper.
Navigating Public Shelters and Legal Rights
If you must evacuate to a public shelter, knowing your rights under federal law is essential. During a disaster, the stress on local resources can lead to oversights, and being your own advocate (or having an advocate in your support network) is critical.
Your Rights Under the Americans with Disabilities Act (ADA)
Title II of the ADA prohibits state and local governments from discriminating against individuals with disabilities in their programs and services, which includes emergency sheltering. This means:
- Physical Accessibility: Shelters must provide accessible entrances, pathways, restrooms, bathing facilities, and eating areas.
- Reasonable Modifications: Shelter staff must modify standard rules to accommodate your needs. This can include providing a quiet space to prevent sensory overload, offering food options that accommodate severe allergies or swallowing difficulties, or modifying sleeping arrangements.
- No Separation: You cannot be forced into a separate "special needs" shelter or medical facility simply because you have a disability, unless you require acute clinical care that the general shelter cannot provide. You have the right to remain with your family and support network.
Service Animals vs. Emotional Support Animals
Under the ADA, service animals—defined as dogs or miniature horses individually trained to do work or perform tasks for an individual with a disability—must be allowed in all areas of an emergency shelter where the public is allowed. Shelter staff cannot turn you away because of a "no pets" policy, nor can they require proof of training or certification.
Be prepared to answer the two questions shelter staff are legally permitted to ask:
- Is the animal required because of a disability?
- What work or task has the animal been trained to perform?
Note that emotional support animals (ESAs), which provide comfort through their presence but are not trained to perform specific tasks, do not share the same federal protections under the ADA in public shelters. However, many local jurisdictions and Red Cross shelters have updated their policies to accommodate ESAs during disasters. It is wise to check your local guidelines in advance.
Building Resilience Through Self-Advocacy
True emergency preparedness is not about predicting the future; it is about knowing your capabilities and building the systems to support them. By shifting from a diagnostic model to a capability-first paradigm, you take control of your safety. You identify the points where your environment might fail you, and you build the redundant systems—whether through power backups, communication tools, or caregiver networks—to bridge those gaps. Start today by conducting your personal capability audit, filling out your emergency checklist, and connecting with your local emergency managers. Your resilience is built on self-knowledge, preparation, and community.
Frequently Asked Questions
What should a emergency preparedness for disabled plan include?
Start with the immediate safety steps, the supplies and records your household needs, a communication plan, and a regular review schedule. Follow local official guidance during an active emergency.
How often should I review emergency preparedness for disabled preparations?
Review them at least twice a year and whenever your household, medication, location, or local risks change. Replace expired supplies and practice key steps.
Where can I find reliable emergency guidance?
Use local emergency management alerts and established public-health or emergency-management agencies. A blog guide should support, not replace, official real-time instructions.