⚡ Key Facts
- Maintenance Deficit: According to FEMA, while roughly 54% of Americans claim to have some form of an emergency kit, less than half of those individuals regularly update, test, or maintain their supplies; compare your inventory against a current emergency preparedness gear guide before each seasonal audit.
- Water Viability: The Centers for Disease Control and Prevention (CDC) strictly recommends replacing self-stored tap water every six months and inspecting commercially bottled water for plastic degradation annually.
- Medical Efficacy: The FDA notes that life-saving emergency medications, such as epinephrine auto-injectors and liquid antibiotics, can rapidly lose critical efficacy past their expiration dates, requiring strict rotation.
- Fuel Degradation: Untreated gasoline begins to oxidize and break down in as little as three to six months. The Department of Energy highlights fuel degradation as a leading cause of backup generator failure during severe weather events.
- Continuous Readiness: The American Red Cross advises that emergency preparedness is not a one-time event but a continuous cycle; testing critical electronics like NOAA weather radios and flashlights should occur monthly.
Check Your Cutting Tool Before You Need It
Add your knife to the same rotation as batteries and water filters: inspect the edge, sheath, corrosion protection, and the job it serves. Our best survival knife guide explains which fixed-blade and compact options make sense for real emergency kits.
Imagine this scenario: A severe storm has just knocked out the local power grid. The wind is howling, temperatures are dropping, and your family is looking to you for guidance. You confidently walk to the closet where you stashed your survival gear three years ago. You pull out your heavy-duty flashlight, click the button, and nothing happens. You open the battery compartment only to find a crusty, white mess of leaked battery acid that has destroyed the internal contacts. You turn to your first aid kit, only to realize the adhesive on your bandages has dried into useless paper, and your backup generator won't start because the fuel in the carburetor has turned to sludge. See Medical Emergencies and Field First Aid (Spanish) for additional options. See Medical Emergencies and Field First Aid (Spanish) for additional options. See Supply Calculator for additional options. See Supply Calculator for additional options.
Buying emergency supplies provides a vital sense of security, but true resilience comes from maintenance. A stockpile is not a static museum exhibit; it is a living, breathing inventory that requires your active participation. The false confidence of a forgotten stash is one of the most dangerous vulnerabilities a prepper can face. Equipment degrades, food expires, and environmental factors silently compromise your gear.
To ensure that your equipment serves you when you need it most, you must master the art of prepping inventory management. This comprehensive guide will walk you through the exact protocols required to systematically inspect, test, and rotate your emergency supplies. By implementing these authoritative, actionable strategies, you will transform your stockpile from a collection of potential liabilities into a guaranteed lifeline, empowering you to face any crisis with absolute confidence.
The Psychology and Strategy of Prepping Inventory Management
The most common pitfall in the preparedness community is the "set-and-forget" mentality. It is psychologically satisfying to purchase a comprehensive survival kit, place it on a shelf, and check "preparedness" off your to-do list. However, readiness is an ongoing operational state, not a final destination.
Effective prepping inventory management requires shifting your mindset from a consumer to an auditor. You must view your supplies through the lens of continuous logistics. Every item in your inventory has a lifecycle. Textiles dry rot, metals oxidize, chemical compounds break down, and nutritional values deplete. Recognizing this reality is the first step in building a resilient household.

To manage your supplies effectively, you need a centralized system. Whether you prefer a dedicated physical ledger, a detailed spreadsheet, or a specialized inventory app, documenting your gear is non-negotiable. Your inventory log should track the item name, purchase date, expiration date, storage location, and the date of its last inspection. This documentation removes the guesswork from your emergency gear rotation and ensures that no critical item is left to quietly expire in the back of a dark closet.
Structuring Your Survival Gear Audit
You cannot inspect your entire stockpile in a single afternoon without experiencing severe decision fatigue. To maintain a high level of operational readiness without becoming overwhelmed, you must break your survival gear audit into manageable, scheduled phases.
The Monthly Check-In
The monthly audit is a brief, targeted inspection focusing on high-risk, high-use items. This should take no more than thirty minutes. During this check, you should test your smoke detectors and carbon monoxide alarms, as recommended by the United States Fire Administration. You should also power on your NOAA weather radios to ensure they are receiving signals. Finally, visually inspect your primary flashlights and top off any rechargeable battery banks to counteract parasitic drain.
The Quarterly Deep Dive
Every three months, your survival gear audit should expand to include your food and water supplies. This is the time to check the environmental conditions of your storage areas. Are there signs of rodents or pests? Has a leak introduced moisture into your pantry? The quarterly audit is also the perfect time to rotate seasonal clothing in your go-bag essentials guides and check the pressure gauges on your fire extinguishers to ensure the needle remains in the green zone.
The Annual Stress Test
Once a year, you must conduct a comprehensive, top-to-bottom review of your entire preparedness infrastructure. This involves pulling everything off the shelves. During the annual stress test, you will pitch tents to check for mold or seam degradation, fire up generators under a physical load, and meticulously update your digital inventory logs. This annual event is your ultimate safeguard against equipment failure.
Food and Water: Rotating Emergency Supplies Safely
Your biological needs are the most pressing concern in any disaster. Without safe drinking water and adequate nutrition, all the tactical gear in the world becomes irrelevant. Rotating emergency supplies is most critical when it comes to your consumable goods.
Water Storage and Purification Testing
Water does not expire, but the containers holding it certainly do. The CDC advises that tap water stored in food-grade plastic containers should be replaced every six months. Over time, plastic can leach chemicals into the water, especially if exposed to temperature fluctuations or sunlight.
When rotating your stored water, do not simply dump it down the drain. Use it to water your garden, wash your car, or clean your home. Before refilling your containers, sanitize them using a solution of one teaspoon of unscented liquid household chlorine bleach per quart of water, swishing it around to touch all surfaces before rinsing thoroughly.
Beyond stored water, you must test your water purification systems. Inspect your ceramic water filters for micro-cracks. If a ceramic filter has been frozen while wet, it is compromised and must be replaced. Check the expiration dates on your chemical water purification tablets (like iodine or chlorine dioxide), as they lose their potency over time.
The FIFO Method for Pantry Management
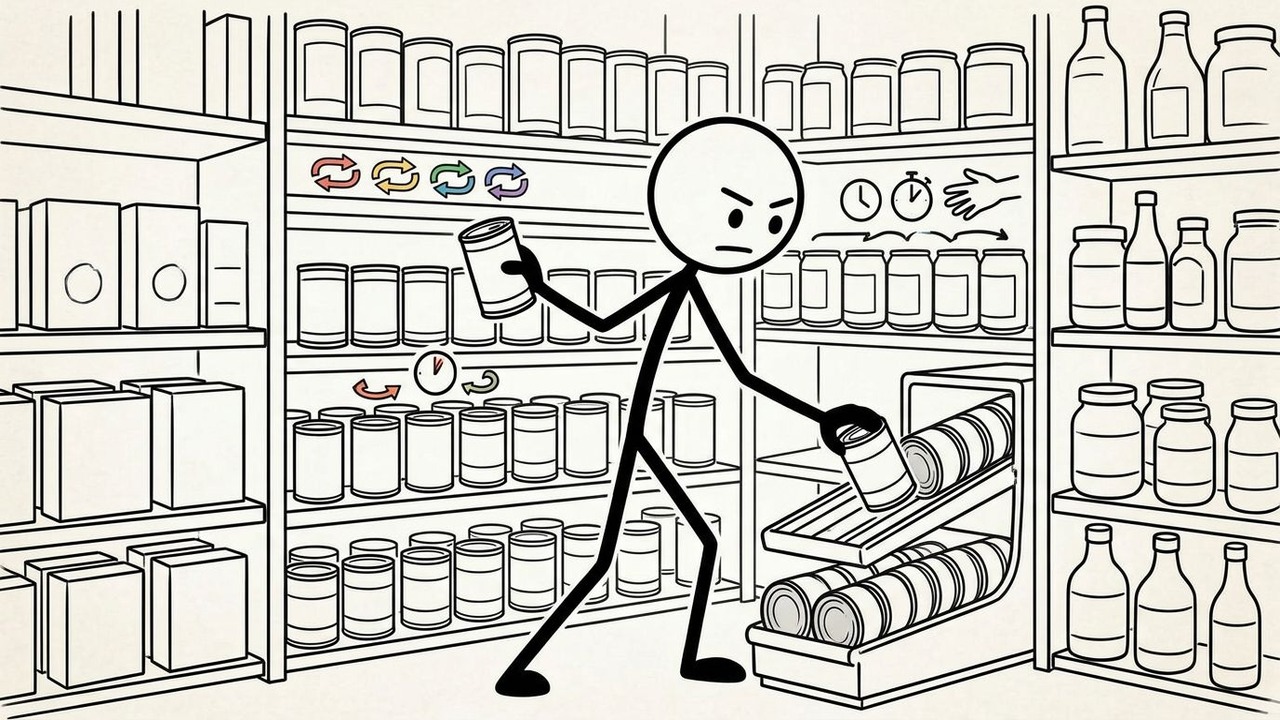
When it comes to your emergency pantry, the golden rule of rotating emergency supplies is FIFO: First In, First Out. Whenever you purchase new canned goods or dry staples, place them at the back of the shelf, pushing the older items to the front. This ensures you are naturally consuming your oldest food before it spoils.
During your quarterly audit, inspect your canned goods for signs of botulism or compromised seals. According to the USDA, you should immediately discard any cans that are deeply dented, bulging, rusting, or leaking. For long-term emergency food storage guide items like Mylar bags filled with rice and beans, check for punctures or signs that the oxygen absorbers have failed (the bags should remain tightly vacuum-sealed around the food).
Power, Light, and Electronics Readiness
In a grid-down scenario, light provides psychological comfort and physical safety, while power keeps your communication lines open. However, electronics and batteries are highly susceptible to environmental degradation.
Battery Degradation and Mitigation
Alkaline batteries are notorious for leaking potassium hydroxide, a caustic agent that destroys electronic circuitry. Never store your emergency electronics with alkaline batteries installed. Keep the batteries in their original packaging right next to the device.
For rechargeable lithium-ion batteries—found in power banks, solar generators, and modern flashlights—parasitic drain is the enemy. If left untouched, a lithium-ion battery will slowly discharge. If it drops below a certain voltage, the internal protection circuitry may permanently brick the battery. To prevent this, your emergency gear rotation schedule must include discharging these batteries to about 50% and then recharging them to 80-100% every three to six months. Storing lithium-ion batteries at extreme temperatures also drastically reduces their lifespan; keep them in a climate-controlled environment.
Solar Panels, Generators, and Fuel
Portable solar panels, especially foldable ones, can develop micro-fractures in the photovoltaic cells if packed too tightly or stored improperly. Unfold them annually, set them in direct sunlight, and use a multimeter to ensure they are outputting their rated voltage.
If you rely on a gas-powered generator, fuel management is paramount. Gasoline is a volatile mixture of hydrocarbons that begins to oxidize quickly. If left untreated, it will form a gummy varnish that clogs carburetors and fuel lines. Always treat your stored gasoline with a high-quality fuel stabilizer, which can extend its life up to 12 months. However, even treated fuel must be rotated. Pour your stored, stabilized gas into your daily commuter vehicle once a year and refill your jerry cans with fresh fuel. Furthermore, start your generator every month and let it run for twenty minutes under a load (like a space heater) to keep the engine components lubricated and clear out old fuel from the carburetor.
Medical and First Aid Kit Overhauls
A medical emergency during a disaster is a Survival Scenarios scenario. When hospitals are overwhelmed or unreachable, your first aid kit becomes a trauma center. Unfortunately, medical supplies are among the fastest-degrading items in any prepper's inventory.
Expiration Dates on Medications
The FDA mandates expiration dates on medications to guarantee full potency and safety. While some solid pill forms (like ibuprofen) may retain partial potency past their expiration date, liquid medications, suspensions, and biologicals degrade rapidly. Antibiotic ointments can separate, rendering them ineffective. Epinephrine auto-injectors can lose their life-saving efficacy and must be replaced strictly according to their dates. Establish a dedicated emergency gear rotation for your medicine cabinet, safely disposing of expired medications at a local pharmacy take-back program and restocking with fresh supplies.
Degradation of Bandages and Trauma Gear
It is a dangerous misconception that bandages and trauma gear last forever. The adhesive on standard fabric bandages will eventually dry out, leaving them unable to stick to the skin. Check the wrappers; if the paper packaging is yellowing or brittle, the adhesive is likely compromised.
More critically, examine your trauma gear. Chest seals rely on a thick hydrogel to adhere to a bleeding torso and prevent tension pneumothorax. If exposed to high heat (such as being stored in the trunk of a car), this hydrogel can melt or dry out. Inspect the packaging of your chest seals for any signs of air leaks or fluid pooling.
Tourniquets, the ultimate life-saving tool for arterial bleeding, are also subject to wear. If you keep a tourniquet staged on the outside of your bag, UV rays from the sun will break down the nylon webbing and the plastic windlass over time. A brittle windlass will snap under the immense pressure required to stop blood flow. Keep your primary tourniquets protected from direct sunlight and inspect the stitching and plastic hardware during your quarterly survival gear audit.
The Bug Out Bag Inspection
Your Go-Bag Builder (BOB) or Go-Bag is your immediate lifeline if you are forced to evacuate your home. Because this bag is often stuffed into a closet or the trunk of a vehicle, it is highly susceptible to neglect and environmental damage. A thorough bug out bag inspection should be conducted at least twice a year, ideally aligning with the changing of the seasons.
Seasonal Adjustments
A survival bag packed for a sweltering July afternoon will be dangerously inadequate for a freezing January night. During your bug out bag inspection, you must rotate your clothing and shelter modules. Swap out lightweight moisture-wicking shirts for thermal base layers. Replace your summer tarp with an emergency bivvy or a cold-weather sleeping bag.
If you have children, seasonal rotation is even more critical. Children grow rapidly; the spare shoes and pants you packed for your six-year-old last year will not fit them today. Ensure that all clothing in your family's evacuation bags currently fits and provides adequate environmental protection.
Wear and Tear on Textiles and Hydration
Leaving a backpack fully loaded for years places immense stress on the seams and shoulder straps. Inspect the load-bearing points of your bag. Look for fraying threads, stressed zippers, and degraded buckles.
If you utilize a hydration bladder in your bag, do not store it with water inside. Stagnant water in a dark, enclosed plastic bladder is a breeding ground for black mold and bacteria. Store your hydration bladders empty, completely dry, and with the bite valve propped open to allow for airflow. During your bug out bag inspection, fill the bladder, check for leaks, and test the flow of the bite valve before drying it out and repacking.
Shelter, Tools, and Hardware Maintenance
Survival tools and shelter systems are robust, but they are not invincible. Environmental factors like humidity, extreme temperature shifts, and prolonged compression will slowly destroy your expensive gear if left unchecked.
Tent Seams, Tarps, and Dry Rot
Tents and waterproof tarps are treated with polyurethane coatings and seam tape to keep rain out. If a tent is packed away while even slightly damp, mildew will form, eating away at the waterproof coating and causing a phenomenon known as "dry rot." The fabric will become brittle, smell like vomit, and tear easily.
During your annual audit, pitch your emergency tent in the backyard. Inspect the rainfly for flaking polyurethane. Check the seam tape to ensure it is not peeling away. Leave the tent pitched in the sun for a few hours to allow it to completely air out before meticulously rolling it back up. Never stuff a tent tightly into a compression sack for long-term storage; fold it loosely to prevent permanent creasing and stress on the fabric.
Rust Prevention and Tool Lubrication
High-carbon steel survival knives, axes, and multi-tools are incredibly durable, but they are highly susceptible to rust. Humidity in a basement or garage can cause oxidation to bloom on your blades in a matter of weeks.
Take out your cutting tools and inspect the edges. Use a fine sharpening stone or a leather strop to maintain a razor-sharp edge—a dull knife is a dangerous knife. Once sharpened, clean the metal with rubbing alcohol to remove dirt and acidic oils from your fingerprints. Finally, apply a light coat of mineral oil or a specialized rust-inhibiting protectant to the blade.
For multi-tools and folding knives, check the pivot points. If the action is stiff or gritty, flush the pivot with a dedicated solvent, dry it, and apply a drop of high-quality lubricating oil. Check the O-rings on your tactical flashlights and waterproof match tubes; if the rubber is cracking, replace the O-ring and apply a thin layer of silicone grease to maintain the waterproof seal.
Documentation, Maps, and Digital Backups
Physical gear is only one half of the preparedness equation; information is the other. Your family emergency plans, topographical maps, and critical documents must also undergo a strict rotation and audit process.
Topographical maps and road atlases become outdated as new developments are built and old roads are closed. Ensure your physical maps are current and stored in waterproof map cases. Review your emergency communication plan with your family. Are the phone numbers for your out-of-state contacts still accurate? Are your designated rally points still accessible?
Furthermore, FEMA strongly advises keeping digital backups of your critical documents—such as identification, property deeds, medical records, and insurance policies. Store these encrypted files on a durable, waterproof USB drive inside your bug out bag. During your audit, plug the USB drive into your computer to ensure the data is not corrupted and update the files with any new medical records or renewed insurance policies. Consider placing this USB drive inside a small faraday bag to protect the solid-state memory from electromagnetic interference.
The Empowering Reality of Readiness
Systematically inspecting, testing, and rotating emergency supplies is not a chore; it is an empowering ritual. Every time you check a battery, rotate a can of food, or sharpen a survival knife, you are actively taking control of your family's safety. You are transforming uncertainty into tactical readiness.
Disasters are chaotic, unpredictable, and unforgiving. They will test you, your plans, and your equipment. By committing to a disciplined prepping inventory management system, you eliminate the variable of equipment failure. You ensure that when the grid goes down, the storm hits, or the evacuation order is given, your gear will perform exactly as intended. Embrace the audit process, maintain your stockpile with diligence, and step into the future with the unshakeable confidence that you are truly, comprehensively prepared for whatever comes your way.
Maintain your emergency gear through systematic rotation practices. Review comprehensive preparedness from our emergency preparedness guide. Learn gear storage from our bug-out bag maintenance. Update inventory with our supply calculator. Organize gear rotation with our go-bag builder. Master maintenance through our preparedness courses.
Frequently Asked Questions
How often should I rotate my emergency gear?
You should conduct a basic audit of your emergency gear every six months, ideally aligning with daylight saving time, and perform a comprehensive inspection annually.
What survival items expire the fastest?
Batteries, water purification tablets, first aid ointments, medications, and certain emergency rations typically have the shortest shelf lives and require frequent rotation.
How do I keep track of my prepping inventory?
Use a digital spreadsheet, a dedicated inventory app, or a physical logbook to record purchase dates, expiration dates, and testing schedules for all your supplies.
Sources & Further Reading
Related resource: Supply Calculator.
Related resource: Survival Psychology Course.
Related resource: Medical Preparedness Guide.