⚡ Key Facts
- Rapid Heat Loss: According to the Federal Emergency Management Agency (FEMA), a well-insulated home can drop to freezing temperatures in just 24 to 48 hours during a severe winter power outage.
- The CO Threat: The Centers for Disease Control and Prevention (CDC) reports that carbon monoxide poisoning peaks during the winter months, with over 400 Americans dying annually from unintentional CO exposure, often linked to improper use of alternative heating.
- Micro-Climate Efficiency: Isolating a single room and utilizing passive heat retention strategies can maintain indoor temperatures up to 20 degrees warmer than the rest of a powerless house.
- Propane Viability: A standard 1-pound propane cylinder can safely power a 4,000 BTU indoor-safe catalytic heater for up to five hours, making it a highly reliable short-term solution.
- Fire Risks: The National Fire Protection Association (NFPA) notes that heating equipment is the second leading cause of home fires, underscoring the critical need for strict safety protocols during grid failures.
When the grid fails in the dead of winter, the rapidly dropping temperature inside your home is more than just an inconvenience—it is a ticking clock. In February 2021, Winter Storm Uri left millions of Texans without power for days, proving that catastrophic winter grid failures are not isolated to traditionally snowy northern climates. Whether caused by an ice storm snapping utility lines, a rolling blackout to prevent grid collapse, or a localized transformer blowout, losing your primary heat source requires immediate, decisive action. Surviving a winter blackout is not about fighting the cold across your entire house; it is about strategic heat management, resource conservation, and uncompromising safety. See preparedness guides for related planning. See Spanish courses for additional options. See French courses for additional options. See free Spanish course for additional options. See free French course for additional options. See Spanish pricing page for additional options. See French pricing page for additional options.
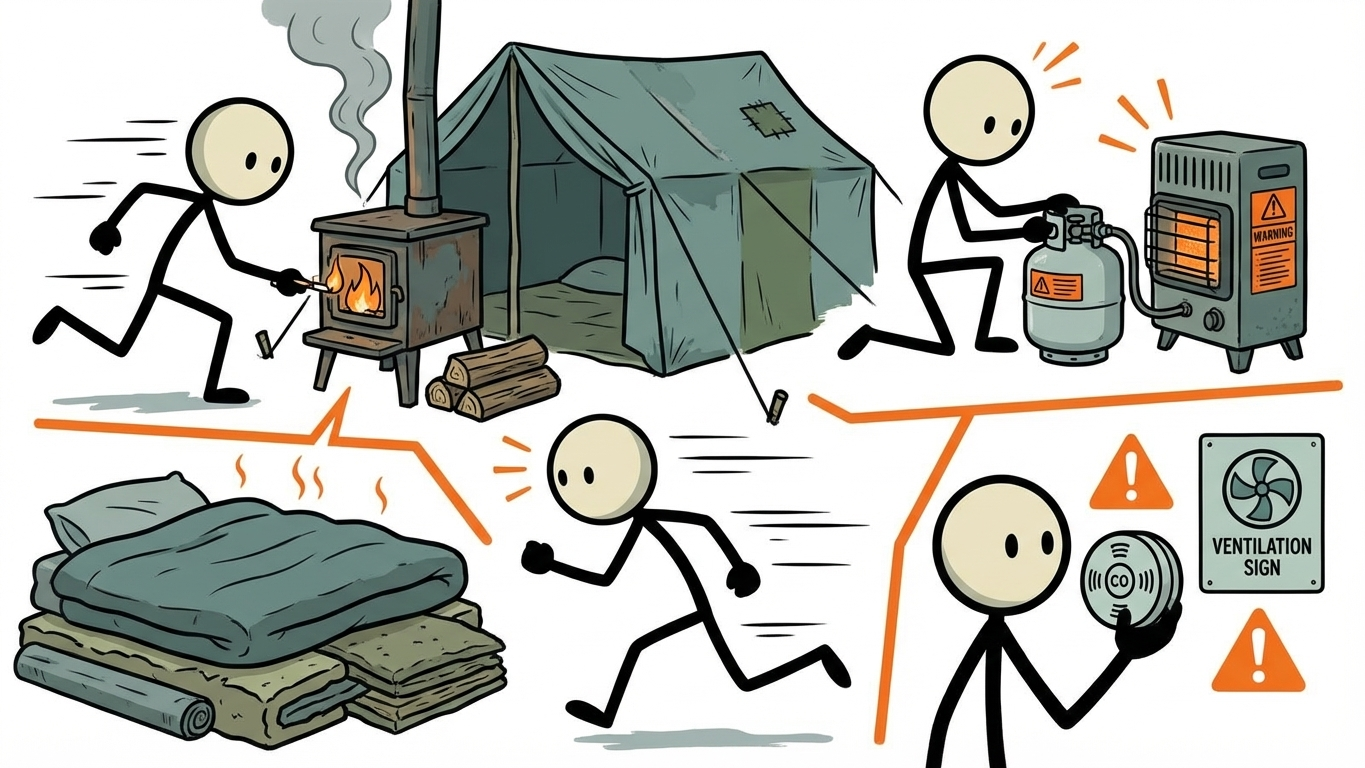
Mastering the art of heating without electricity is a fundamental pillar of household emergency preparedness. Relying solely on the utility company to keep your family warm leaves you vulnerable to unpredictable weather patterns and aging infrastructure. By combining passive heat retention tactics with active, non-electric heat sources like propane and wood, you can create a sustainable, warm environment indefinitely. However, introducing combustion into a sealed home brings severe risks. This guide will walk you through the most effective methods for winter blackout heating, empowering you to keep your family warm while strictly adhering to carbon monoxide and fire safety protocols. See survival scenarios for related planning.
Phase 1: Passive Heat Retention and Micro-Climates
Before you spark a single flame or ignite a heater, your first line of defense is passive heat retention. Your home is essentially a giant thermal envelope. When the furnace stops blowing, that envelope begins to leak heat through windows, doors, roof vents, and uninsulated walls. Attempting to heat an entire powerless house is a massive waste of limited emergency fuel. Instead, your goal is to shrink your living space and trap the heat you already have. See training options for related planning.
Choosing Your Survival Room
The moment the power goes out, you must designate a single "survival room" where your household will eat, sleep, and wait out the emergency. Choosing the right room is critical for maximizing your emergency heat sources. Ideally, select a room on the south side of your home to take advantage of passive solar heating during daylight hours. The sun's radiant energy can significantly bump up the ambient temperature if allowed through the glass. See Catastrophe Survival 101 course for related planning.
Your survival room should have a low ceiling, as heat naturally rises, and minimal exterior walls. Interior rooms or rooms situated over a heated basement tend to retain warmth longer. Avoid rooms with vaulted ceilings, large drafty bay windows, or open floor plans that cannot be sealed off. If your home has a natural wood-burning fireplace or stove, the room housing that appliance automatically becomes your designated survival space. See winter storm preparedness for related planning.
Sealing the Thermal Envelope
Once you have chosen your room, you must aggressively seal it off from the rest of the freezing house. Close the doors and place rolled-up towels or draft dodgers at the base to stop cold air from creeping in. If the room lacks a door, use heavy blankets, sleeping bags, or thermal curtains tacked to the doorframe to create a makeshift barrier. Tape heavy-duty plastic sheeting over the windows; this creates a dead-air space that acts as an excellent insulator against the freezing glass.
According to the Department of Energy, up to 30% of a home's heating energy is lost through windows. By covering them with blankets or insulated curtains at night, you drastically slow this heat transfer. During the day, open the curtains on south-facing windows to let the solar radiation in, but seal them tight the moment the sun begins to set. Remember to close the dampers on any unused fireplaces in other rooms, as an open chimney acts like a massive vacuum, sucking the remaining warm air right out of your house.
The Indoor Tent Strategy
Human bodies are essentially 98.6-degree biological heaters, radiating roughly 350 BTUs of heat per hour. You can harness this natural thermal output by utilizing the "indoor tent" strategy. Pitching a standard camping tent inside your survival room creates a micro-climate that traps the collective body heat of your family. Because the tent's volume is incredibly small compared to the room, the temperature inside the tent can easily sit 10 to 15 degrees warmer than the surrounding ambient air.
To maximize this effect, insulate the floor of the tent. Cold floors will rapidly sap your body heat through conduction. Layer the bottom of the tent with yoga mats, thick wool blankets, or sleeping pads to create a thermal break between you and the floorboards. Drape a lightweight blanket over the top of the tent for added insulation, but ensure you leave a small vent open at the top to allow moisture from your breath to escape, preventing condensation from soaking your gear.
Phase 2: Active Emergency Heat Sources - Propane
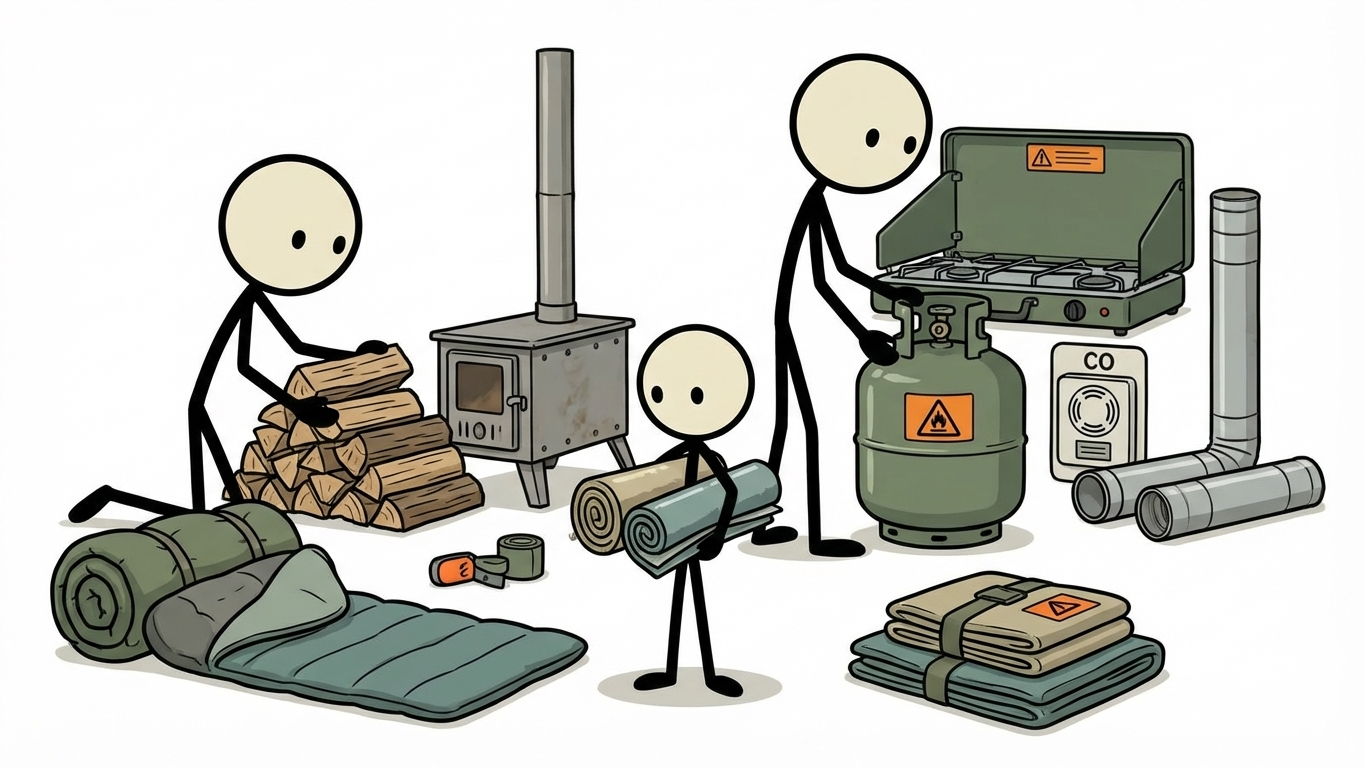
When passive retention is no longer enough to keep the biting cold at bay, you must introduce active heating. Propane is arguably the most versatile, accessible, and shelf-stable fuel for emergency preparedness. Unlike gasoline, which degrades over a few months, propane can sit in a cylinder indefinitely without losing its combustibility. This makes it an ideal cornerstone for your safe indoor heating outage plan.
Indoor-Safe Catalytic Heaters
Not all propane heaters are created equal, and bringing the wrong type indoors is a fatal mistake. Standard propane torpedo heaters or outdoor patio heaters produce massive amounts of carbon monoxide and should never be used inside. For indoor use, you must invest in an indoor-safe radiant or catalytic heater, such as the widely trusted Mr. Heater Buddy series. These units are specifically engineered for enclosed spaces.
Catalytic heaters work by utilizing a chemical reaction to produce heat without an open, roaring flame, resulting in highly efficient combustion with incredibly low carbon monoxide output. Furthermore, high-quality indoor heaters are equipped with two non-negotiable safety features: a tip-over switch that instantly shuts off the gas if the unit is knocked over, and an Oxygen Depletion Sensor (ODS). The ODS monitors the oxygen levels in the room and will automatically extinguish the heater if oxygen drops below safe levels, long before carbon monoxide becomes a threat.
Proper Ventilation and Usage
Despite being labeled "indoor-safe," these heaters still consume oxygen and produce trace amounts of combustion byproducts. Therefore, you must never run a propane heater in a completely airtight room. The manufacturer guidelines—backed by FEMA safety recommendations—dictate that you must crack a window at least one to two inches to provide makeup air. This slight draft will not negate the heat output of the unit, but it will ensure the ODS does not constantly trigger and keep the air safe to breathe.
Use propane heaters strategically. Instead of running them 24/7, use them to take the edge off the cold. Run the heater for an hour before bed to warm up the room, shut it off completely while you sleep, and turn it back on for an hour in the morning. This "burst heating" method aggressively conserves your fuel supply while minimizing any prolonged exposure to indoor combustion.
Safe Propane Storage
Fuel storage is just as critical as the heater itself. The small 1-pound green propane cylinders are generally safe to store indoors in a cool, dry place away from direct sunlight or ignition sources. However, the larger 20-pound barbecue tanks must absolutely never be stored inside your home, basement, or attached garage. Propane is heavier than air; if a 20-pound tank leaks indoors, the invisible gas will pool along the floor, seeking out pilot lights or electrical sparks, leading to a catastrophic explosion.
If you plan to run your indoor heater off a 20-pound tank to save money and extend runtimes, you must use a specialized hose equipped with a regulator. The tank itself must remain outside in the freezing cold, with the hose routed through a cracked window to the heater inside. Ensure you wrap a towel around the gap in the window to block the draft.
Phase 3: Traditional Wood Heating
For centuries, wood has been the ultimate off-grid heating solution. If you live in a heavily wooded area, your fuel supply is virtually unlimited, provided you have the physical capability to harvest it. In a prolonged grid-down scenario where propane supplies eventually run dry, wood heating transitions from a supplemental luxury to a primary survival mechanism.
Wood Stoves vs. Open Fireplaces
It is vital to understand the vast difference in efficiency between a modern wood stove and a traditional masonry open fireplace. Open fireplaces are notoriously inefficient. While they provide excellent radiant heat immediately in front of the hearth, they operate by pulling massive amounts of oxygen from the room to feed the fire. This creates a vacuum effect, sucking the warm air out of your house and sending it straight up the chimney. In many cases, an open fireplace can actually make the rest of your home colder.
In contrast, a modern EPA-certified wood stove or a fireplace insert operates as a closed system. They control the airflow precisely, burning the wood slowly and transferring the heat into the heavy cast iron or steel body of the stove, which then radiates that warmth outward into the room. If you are serious about preparing for long-term winter blackout heating, upgrading your open fireplace to an insert or installing a freestanding wood stove is one of the best investments you can make.
Fuel Preparation and Maintenance
A wood stove is only as good as the fuel you feed it. Burning green, unseasoned wood is incredibly frustrating and dangerous. Wet wood burns at a much lower temperature, producing dense smoke and rapidly accelerating the buildup of creosote inside your chimney. Creosote is a highly flammable, tar-like substance; if it accumulates and ignites, it causes a chimney fire that can easily spread to the framing of your house.
You must stockpile well-seasoned hardwood—such as oak, maple, or hickory—which has been split and left to dry for at least six to twelve months. Hardwoods burn hotter and longer than softwoods like pine. Additionally, emergency preparedness requires routine maintenance. Have your chimney professionally swept and inspected annually. During a blizzard is not the time to discover that a bird's nest is blocking your flue, forcing deadly smoke back into your living room.
Phase 4: Kerosene and Alternative Combustibles
Beyond propane and wood, there are other combustible fuels that can provide emergency heat, though they require a higher degree of caution and situational awareness.
Kerosene Heaters
Kerosene heaters have been a staple of emergency heat sources for decades. They are capable of producing massive amounts of heat—often ranging from 10,000 to 23,000 BTUs—which is enough to warm a large basement or an entire floor of a house. Kerosene is also relatively inexpensive and stores well if treated with fuel stabilizers.
However, kerosene heaters come with significant drawbacks. They produce a distinct, strong odor, especially during ignition and shutdown. More importantly, they consume vast amounts of oxygen and emit higher levels of carbon monoxide and soot than catalytic propane heaters. If you use a kerosene heater, strict ventilation is mandatory. You must keep a window cracked, and you must only burn 1-K grade clear kerosene. Burning yellow or contaminated kerosene will foul the wick, produce toxic fumes, and create a severe fire hazard. Like propane, never sleep with a kerosene heater running.
Candle and Clay Pot Heaters: Fact vs. Fiction
If you spend time in online survival communities, you will inevitably see the "terracotta pot heater" hack. This involves placing an overturned clay flower pot over a few lit tea light candles. The theory is that the clay absorbs the heat from the candles and radiates it outward, acting as a miniature space heater.
While the physics of thermal mass are real, the practical application in a freezing house is largely a myth. A single tea light candle produces roughly 100 BTUs of heat. Even with four candles, 400 BTUs is wildly insufficient to heat a room; you would need dozens of them to make a noticeable difference. Furthermore, setting up an array of open-flame candles on a floor or table creates an extreme fire hazard, especially in a dark house with pets or children. While a candle can warm your hands, rely on proper, purpose-built heaters to warm your environment.
Phase 5: Personal Heating Tactics
When fuel runs low or you are forced to sleep without active heating, your focus must shift entirely from heating the room to heating your body. Human thermal regulation is your final fallback.
Layering Clothing Correctly
Throwing on a massive, bulky winter coat indoors is inefficient. Survival in the cold requires a strategic layering system. The base layer, sitting directly against your skin, must be moisture-wicking. Use merino wool or synthetic thermals; avoid cotton at all costs, as cotton traps sweat, which will rapidly chill your core. The mid-layer is your insulating layer—think thick fleece, wool sweaters, or down vests that trap dead air. Finally, a lightweight outer shell can be worn to block drafts.
Do not neglect your extremities. The body prioritizes keeping the core warm, restricting blood flow to your hands and feet. Wear heavy wool socks, insulated slippers, and a warm beanie. A significant amount of heat is lost through the head and neck, so wearing a scarf or balaclava indoors is highly recommended.
Sleeping Warm
Sleeping during a winter blackout is often the most dangerous time, as temperatures drop to their lowest point and your body's metabolic rate slows down. Invest in high-quality, cold-weather sleeping bags rated for zero degrees or lower. Mummy-style bags are superior because they contour to your body and feature a hood to trap heat around your head.
If you have a way to boil water—such as an outdoor camp stove or a fireplace—you can utilize the hot water bottle trick. Fill a thick rubber hot water bottle or a heavy-duty Nalgene canteen with hot (not boiling) water. Wrap it in a t-shirt to prevent burns, and place it at the foot of your sleeping bag or between your thighs near your femoral artery. This will act as a radiant heat source, keeping you incredibly warm for six to eight hours throughout the night.
The Non-Negotiable: Carbon Monoxide Blackout Safety
The greatest threat during a winter power outage is often not the freezing temperatures, but the invisible, odorless gas produced by the very tools used to fight the cold. Carbon monoxide blackout safety is the single most critical aspect of your family emergency plan. According to the CDC, CO poisoning cases spike dramatically during winter storms, almost entirely due to the improper use of generators, grills, and unvented space heaters indoors.
Understanding the Threat
Carbon monoxide is a byproduct of incomplete combustion. When you inhale CO, it binds to the hemoglobin in your blood with an affinity 200 times greater than oxygen. It effectively suffocates you from the inside out, even if you are breathing normally. Because it has no smell, taste, or color, it is known as the "silent killer."
The early symptoms of CO poisoning are dangerously subtle and often mimic the flu. They include dull headaches, dizziness, nausea, weakness, and confusion. Because these symptoms make you sleepy, victims who are exposed while sleeping often never wake up. If anyone in your household begins exhibiting these symptoms while an emergency heat source is running, you must assume CO poisoning. Shut off the heater, evacuate the house immediately, get into fresh outdoor air, and call 911.
Defensive Measures and Detectors
You cannot rely on your senses to detect carbon monoxide. The only way to ensure safe indoor heating outage practices is through technological monitoring. Every home must have multiple, battery-operated carbon monoxide detectors. Hardwired detectors are useless during a blackout unless they have a dedicated battery backup.
Place a battery-powered CO detector directly inside your designated survival room, roughly knee-high or at sleeping level, as CO mixes evenly with the air. Test the batteries every fall before winter storm season begins. Never, under any circumstances, bring a charcoal grill, a gas generator, or an outdoor camp stove inside your home or garage for heat. These devices produce lethal amounts of carbon monoxide in minutes and cannot be safely ventilated indoors.
Fire Prevention and Safety Protocols
When the grid fails, emergency services are often stretched to their absolute limits. Roads may be impassable due to ice and snow, meaning the fire department could be hours away. Introducing alternative heat sources into your home drastically elevates the risk of a house fire, making strict prevention protocols essential.
The Red Cross and the NFPA mandate a "three-foot rule" for all space heaters. You must maintain a minimum of three feet of completely clear, empty space in all directions around any propane, kerosene, or wood heating unit. Keep blankets, clothing, sleeping bags, and highly flammable materials well away from the heat source. Ensure that heaters are placed on hard, level, non-combustible surfaces. If you have carpet, place a fireproof hearth pad or a large piece of tile beneath the heater to prevent accidental ignition.
Finally, your emergency blackout kit must include large, easily accessible fire extinguishers. An ABC-rated dry chemical extinguisher should be kept in the survival room at all times. Ensure every adult in the household knows how to use the PASS method (Pull the pin, Aim at the base, Squeeze the trigger, Sweep side to side). A small fire can double in size every 30 seconds; having an extinguisher within arm's reach is the difference between a quick scare and losing your home to the elements.
Facing a severe winter blackout without electricity is a daunting scenario, but it is entirely survivable with the right mindset and equipment. By understanding the science of passive heat retention, responsibly utilizing indoor-safe propane or wood heat, and maintaining a rigid adherence to carbon monoxide and fire safety protocols, you take control of the situation. Emergency preparedness is not about fearing the storm; it is about building the resilience and knowledge to keep your family warm, safe, and secure until the lights finally come back on.
Learn heating alternatives through our emergency preparedness guide. Understand winter survival from our winter storm preparedness guide. Build heating kits with our go-bag builder. Calculate heating supplies with our supply calculator. Get heating survival training through our preparedness courses.
Frequently Asked Questions
How long should a household plan for a blackout?
Plan for at least 72 hours as a minimum, then build to 7 to 14 days if your area faces severe weather or grid instability.
What should I do in the first hour of a power outage?
Check safety first, confirm outage scope, protect refrigerated food, set light discipline, and start your communication plan.
Can I run a generator in my garage with the door open?
No. Never run fuel generators in garages or near doors or windows. Carbon monoxide can build up quickly and become fatal.
How do I keep my phone charged during long outages?
Use layered charging: power banks first, then vehicle charging, then generator or solar recharge windows.
What foods are safest during blackouts?
Prioritize ready-to-eat shelf-stable foods, then fridge items early, then freezer items while still frozen.