⚡ Key Facts
- Significant Reserve Volume: The average residential storage tank contains between 30 and 80 gallons of water, representing one of the largest pre-staged emergency water sources at home.
- Federal Endorsement: Both FEMA and the American Red Cross officially recognize water heater tanks as viable emergency drinking water reserves during catastrophic infrastructure disruptions.
- Two-Step Processing Required: Water extracted from a water heater must undergo mechanical filtration (for mineral sediment and heavy metals) followed by disinfection (boiling or chemical purification for biological pathogens).
- Critical Hazard Alert: Heating elements must be completely powered down prior to draining; firing an empty tank destroys electric elements within minutes and creates dangerous thermal stresses in gas models.
- Tankless Limitation: Tankless (on-demand) water heaters maintain zero usable reserve capacity, rendering them useless for emergency bulk water harvesting.
When municipal infrastructure collapses during seismic events, severe winter storms, or widespread grid failures, the immediate threat to human life is rarely starvation—it is hydration. According to the United States Geological Survey (USGS), an adult requires roughly one gallon of water per day for basic survival and sanitation. Yet, the Federal Emergency Management Agency (FEMA) notes that over 50% of American households lack even a three-day supply of commercially packaged water. While panic buying clears supermarket shelves within hours of a National Oceanic and Atmospheric Administration (NOAA) severe weather warning, an overlooked, pressurized reservoir sits quietly in the utility closets of millions of homes: the residential storage water heater. For the practical checklist side, use the community emergency preparedness guide.
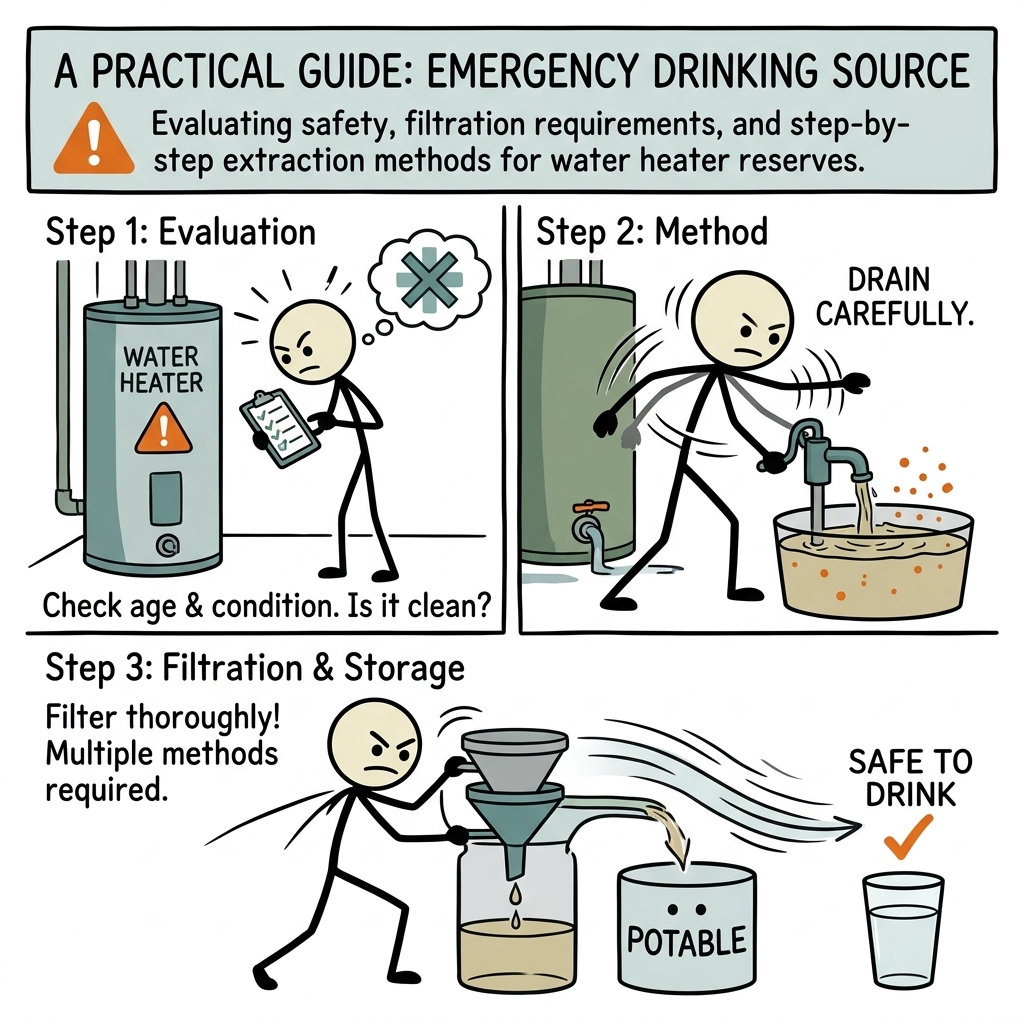
Tapping into this domestic reservoir is not as simple as twisting a spigot and filling a glass. Between you and a safe drink lies decades of mineral accumulation, degraded galvanic anode material, potential bacterial colonies like Legionella pneumophila, and the mechanical risk of imploding your plumbing lines via vacuum lock. Navigating these hazards requires an exact protocol. This operational guide provides the technical evaluations, microbiological safety parameters, and step-by-step extraction blueprints necessary to convert your water heater into an emergency drinking water lifeline. For the practical checklist side, use the neighborhood preparedness network.
Is Water Heater Water Safe to Drink? A Technical Safety Assessment
The short answer is yes, but with critical caveats. Under standard operating conditions, the water inside your hot water tank is sourced directly from your municipal supply or private well. It was potable when it entered the vessel. However, time, temperature fluctuations, and internal appliance chemistry fundamentally alter that water while it sits inside the tank.
To safely consume water heater emergency drinking water, you must understand the three distinct contamination categories that develop inside a closed water heating system: biological pathogens, chemical/metallic runoff, and physical particulates.
1. Biological Hazards and Bacterial Colonization
The primary biological concern in standing warm water is Legionella pneumophila, the bacterium responsible for Legionnaires' disease and Pontiac fever. The Centers for Disease Control and Prevention (CDC) notes that Legionella proliferates rapidly in warm water between 68°F and 122°F (20°C to 50°C). Many homeowners lower their thermostat to 120°F (49°C) to prevent scalding and conserve energy, inadvertently creating an optimal incubator for bacterial biofilms.
While Legionella is predominantly dangerous when aerosolized and inhaled into the lungs—such as during a shower—drinking water contaminated with high bacterial loads poses severe risks to immunocompromised individuals or those with micro-aspirations. Maintaining an operating temperature of 140°F (60°C) neutralizes this pathogen, but during a prolonged power outage, the water temperature will drop through the danger zone within 24 to 48 hours. Consequently, you must treat all extracted water as biologically compromised once the heating source goes offline.
2. Mineral Degradation and Anode Rod Particulates
Every standard tank utilizes a sacrificial anode rod made of magnesium, aluminum, or an aluminum-zinc alloy. This component diverts corrosive galvanic currents away from the steel tank lining, corroding itself to preserve the structural integrity of the outer vessel. As the rod breaks down, microscopic and macroscopic metal compounds precipitate to the tank floor.
Consuming high concentrations of degraded aluminum or magnesium precipitate can cause acute gastrointestinal distress, including severe cramping, nausea, and diarrhea. In an austere emergency setting, dehydration caused by water-induced diarrhea is fatal. Extracting water without proper sediment filtration exposes you directly to this metallic sludge.
3. Heavy Metals and Solder Leaching
In homes constructed prior to the 1986 Safe Drinking Water Act amendments, copper pipes were frequently joined using lead-based solder containing up to 50% lead. Elevated water temperatures accelerate the leaching of copper, lead, and zinc from internal plumbing and brass fittings directly into the tank. According to the Environmental Protection Agency (EPA), there is no safe level of lead exposure in drinking water, meaning mechanical and carbon filtration is mandatory for older residential structures.
Water Heater Architecture: Which Systems Yield Potable Water?
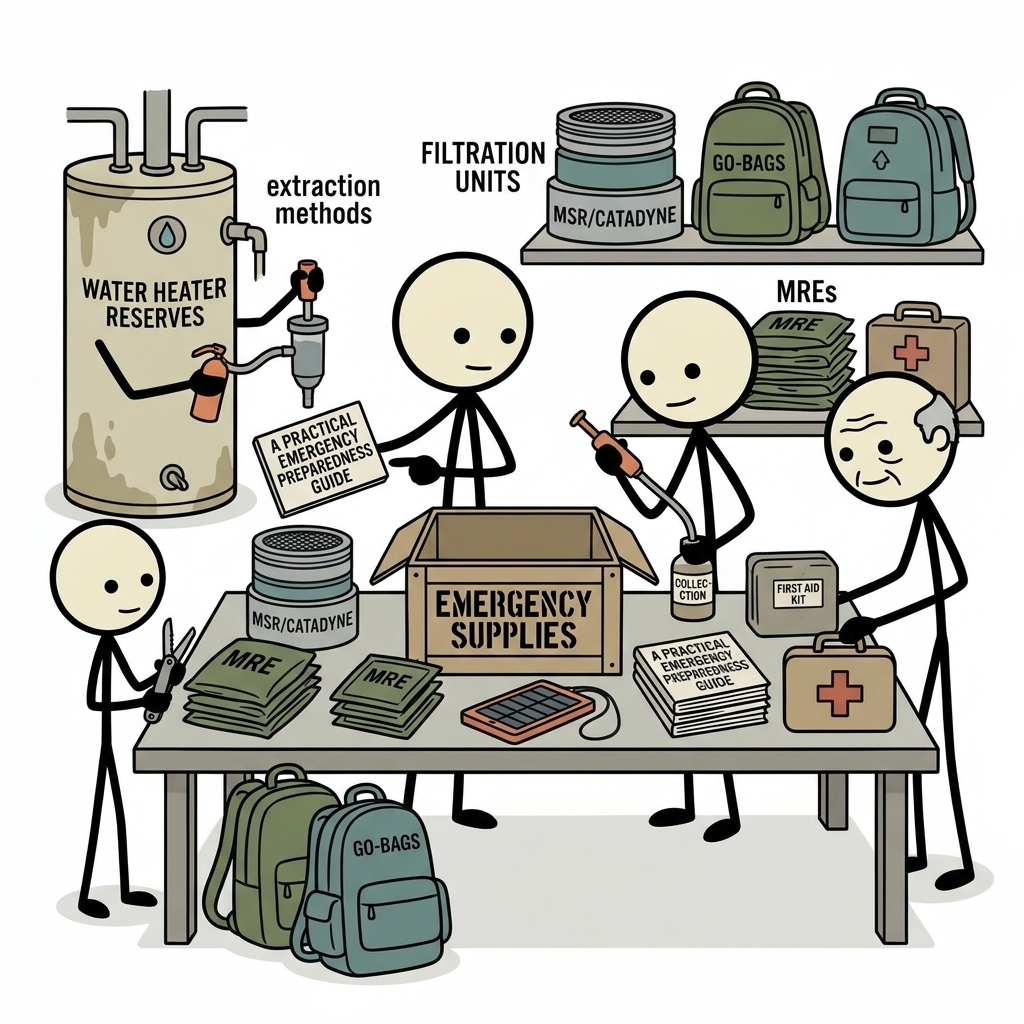
Before deploying tools to drain your system, you must identify your specific appliance configuration. Attempting to harvest water from the wrong mechanical design can yield zero fluid or expose your family to toxic industrial chemicals.
- Standard Tank Storage (Gas or Electric): The gold standard for emergency harvesting. These vessels hold 30 to 80 gallons of water under continuous pressure, featuring a dedicated cold-water inlet, hot-water outlet, temperature and pressure (T&P) relief valve, and a bottom drain spigot.
- Hybrid / Heat Pump Water Heaters: Highly viable. These modern units utilize an overhead heat pump compressor mounted to a conventional storage tank. The internal water storage operates identically to a standard electric tank.
- Tankless / On-Demand Systems: Non-viable. These units flash-heat water through a small copper heat exchanger without storing reserve volume. You cannot extract usable emergency bulk drinking water from a tankless system.
- Boiler Indirect Storage Tanks: Conditional. If the tank is a domestic hot water storage unit heated indirectly by an external boiler loop, the domestic water inside is safe. However, the closed heating loop itself contains non-potable boiler water often treated with toxic chemical inhibitors. Never tap the closed hydronic heating loop.
- Solar Thermal Water Systems: High danger. Many solar domestic hot water setups cycle a toxic heat-transfer fluid—typically propylene glycol or ethylene glycol—through a closed loop inside the tank heat exchanger. If internal heat exchangers rupture, toxic contamination occurs. Do not use solar storage tanks for drinking water unless you have advanced mechanical knowledge of that specific system's isolation valves.
Essential Tools for Emergency Extraction
Draining water heater for drinking during a crisis requires specific gear. Attempting extraction without proper fittings can strip plastic valves, flood your living space, or cross-contaminate your Water Calculator. Keep the following equipment staged near your utility closet:
- Standard 3/4-inch Garden Hose: Ideally a dedicated, drinking-water-safe hose certified to NSF/ANSI Standard 61 (often sold as RV/marine drinking hoses). Standard garden hoses leach plasticizers, phthalates, and lead into the water. If a standard hose is all you have, use it—acute hydration trumps trace plasticizer ingestion—but purge it first.
- Short Transfer Hose (3 to 6 feet): Long 50-foot hoses waste substantial water volume just coating the internal lumen of the pipe. A short lead hose delivers water directly into your collection vessel with minimal loss.
- Flathead Screwdriver and Adjustable Wrench: Many factory-installed drain valves feature recessed plastic stems rather than traditional hand-crank wheel handles.
- Food-Grade Buckets (5-Gallon): Certified HDPE buckets marked with the recycling triangle #2. Thoroughly sanitize these with a dilute bleach solution prior to collection.
- Inline Water Transfer Hand Pump: Essential if your water heater sits in a basement below the grade of your drainage exit or bucket lip.
- Heavy Leather Gloves: Tank plumbing and brass fittings conduct extreme heat if the system was operational immediately before the power outage.
Step-by-Step: How to Drain Water Heater During an Emergency
Executing an emergency extraction requires methodical adherence to a phased protocol. Rushing this process risks element destruction, structural damage to your plumbing, or biological contamination of the reserve.
Phase 1: Absolute Isolation (Power and Input)
The moment municipal pressure fails or contamination occurs, you must sever the water heater from incoming lines and power sources. Failing to disconnect the incoming water line leaves your clean reserve vulnerable to back-siphonage contamination if municipal pipes lose pressure and draw suction.
- Cut the Energy Source:
- Electric Units: Switch off the dedicated double-pole circuit breaker (typically 30-amp, 240-volt) in your main electrical panel. If floodwaters are present, do not approach the panel.
- Gas Units: Rotate the gas control valve knob on the front of the tank to the "OFF" position. Alternatively, rotate it to "PILOT" if you anticipate quick restoration of service and have verified zero gas leaks in the area. Shut the yellow handle on the rigid gas supply pipe to a 90-degree perpendicular angle.
- Isolate Incoming Municipal Water: Locate the cold-water shut-off valve at the top of the water heater tank. This is typically a brass gate valve (turn clockwise until seated) or a quarter-turn ball valve (rotate perpendicular to the pipe). Closing this valve seals your tank, trapping the existing clean water and preventing cross-contamination from back-siphonage or compromised city mains.
Phase 2: Vacuum Release and Hydraulic Setup
A closed water heater is a sealed hydraulic system. If you attempt to open the drain spigot without introducing air into the top of the tank, a partial vacuum forms. Water will trickle out briefly and then stop completely, much like holding your thumb over the end of a drinking straw.
- Thread the Hose: Connect your NSF-certified drinking hose securely to the drain valve located at the base of the tank. Ensure the internal rubber washer is present and seated flat to prevent leaks. Position the other end directly over your sanitized food-grade bucket.
- Break the Vacuum Lock: You must allow atmospheric air to displace the draining water. You have two options:
- Method A (Preferred): Open the hot-water side of a sink faucet on the highest floor of the home. This introduces air down through the plumbing system and into the top of the tank without disturbing mechanical safety components.
- Method B (Direct): Locate the Temperature and Pressure (T&P) Relief Valve near the top or upper side of the tank. Gently lift the spring-loaded brass lever until it locks open. You will hear an audible hiss of air entering the tank. Caution: If the water is scalding, hot steam or water may discharge; wear protective gloves and keep your face clear of the discharge pipe.
Phase 3: Extraction and Initial Purge
The drain valve at the bottom of the tank sits level with or slightly above the floor of the vessel. The first few gallons of water to exit will inevitably carry concentrated sediment, rust, and calcium deposits.
- Crack the Drain Valve: Using your screwdriver or wrench, slowly turn the drain stem counter-clockwise. Plastic valves can be brittle; apply smooth, even torque to avoid snapping the stem off inside the valve body.
- Isolate the Purge Volume: Direct the first 2 to 4 gallons of water into a separate "utility bucket." This initial discharge will often appear cloudy, brown, or contain white, crystalline calcium flakes. Do not discard this purge water—set it aside for secondary emergency utilities like flushing toilets or basic equipment wash-downs.
- Harvest Potable Core Reserves: Once the water runs visually clear, direct the hose into your sanitized food-grade containers. Fill them to roughly 90% capacity to avoid sloshing during transport.
- Manage Slow Drains: If water flow stops or slows to an inconsistent trickle despite releasing the vacuum, hardened sediment flakes have likely clogged the drain valve orifice. Close the valve, disconnect the hose, and insert a short, stiff length of sanitized wire or a straightened coat hanger into the valve opening to push past the sediment crust. Reattach the hose and resume flow.
Post-Extraction Purification: Transforming Tank Water to Potable Standards
You cannot safely consume water straight from the drain spigot under emergency conditions. Even visually clear tank water frequently carries elevated micro-particulates, trace metals, and biological agents. Implementing a strict two-stage purification protocol—mechanical filtration followed by absolute disinfection—is mandatory.
Stage 1: Mechanical Filtration (Physical Contaminants)
Mechanical filtration strips suspended particulate matter that shields bacteria from chemical disinfectants. It also removes foul tastes and heavy metal compounds associated with sacrificial anode decay.
- Pre-Filtration: Pour the collected water through a clean, tight-weave cotton cloth, folded bandana, or standard paper coffee filters suspended inside a funnel. This catches heavy calcium flakes and rust particles.
- Micro-Filtration: Pass the pre-filtered water through a portable 0.1-micron hollow-fiber membrane filter (such as a Sawyer Squeeze, LifeStraw Mission, or gravity-fed ceramic filter like a Katadyn or Berkey). A 0.1-micron pore size effectively excludes 99.99999% of bacteria (including Legionella, E. coli, and Salmonella) and 99.99% of protozoan cysts (such as Giardia and Cryptosporidium).
- Activated Carbon Stage: If the water retains a metallic or sulfurous odor, run it through an activated carbon block filter. Carbon adsorbs dissolved heavy metals, volatile organic compounds, and residual anode byproducts.
Stage 2: Disinfection (Biological Eradication)
While micro-filtration removes bacteria and protozoa, it does not reliably eliminate smaller viral pathogens. To achieve definitive biological safety, apply one of the following methods recommended by the CDC and the EPA.
| Purification Method | Operational Parameters | Pathogen Target Efficacy |
|---|---|---|
| Rolling Boil (Thermal) | Bring water to a vigorous, rolling boil for 1 full minute (3 full minutes at elevations above 5,000 feet). | 100% effective against bacteria, viruses, and protozoan cysts. The single most reliable domestic method. |
| Liquid Chlorine Bleach | Use strictly plain, unscented 6% to 8.25% household sodium hypochlorite. Add 6 to 8 drops (approx. 1/8 teaspoon) per gallon of clear water. Mix and rest for 30 minutes. | Highly effective against bacteria and viruses. Low efficacy against thick-walled Cryptosporidium oocysts. |
| Chlorine Dioxide Tablets | Follow manufacturer instructions (typically 1 tablet per quart/liter). Requires up to 4 hours of dwell time for full biocidal action. | Effective against all classes of waterborne pathogens, including viruses and Cryptosporidium. |
If treating with bleach, the water should emit a faint chlorine odor after the 30-minute rest period. If it does not, repeat the dosage with 6 additional drops, stir, and let stand for an additional 15 minutes. If the water smells excessively of bleach, aerate it by pouring it repeatedly back and forth between two clean containers.
Alternative Emergency Water Sources at Home
Relying solely on your water heater is a tactical error. A balanced family emergency plan accounts for secondary indoor reserves that can be tapped concurrently. If your water heater holds only 40 gallons, the average family of four will exhaust it in ten days under strict rationing.
- Interior Plumbing Pipes (Gravity Drain): When municipal pressure halts, several gallons remain trapped in domestic plumbing. Open the faucet on the highest floor to break the vacuum, then place collection vessels under the lowest tap in the home (usually a basement utility sink or outdoor spigot) to drain the entire piping network.
- Toilet Flush Tanks (Not Bowls): The clean water held inside the porcelain gravity tank (cistern) above your toilet bowl is identical to the municipal water that entered it. As long as you have not added chemical blueing agents, drop-in disinfectant tablets, or mechanical deodorizers, this water is entirely potable after standard Stage 2 disinfection.
- Ice Maker Storage Bins: The frozen ice lingering in your freezer represents clean, pre-filtered municipal water. Melt down ice bins in sanitized pots. Do not let melted ice sit unboiled at room temperature, as domestic freezers harbor high concentrations of surface mold and fungal spores.
- Canned Goods and Produce Liquid: Fluids packaged inside canned vegetables, fruits, and beans represent sterile, hydration-rich reserves that require zero purification. Retain all canning liquid during food preparation during off-grid operations.
Post-Emergency Recovery: Restoring Your Water Heater
Once municipal authorities clear the water system and lift all boil-water advisories, you must return your water heater to service correctly. Failing to observe proper re-commissioning sequencing can cause catastrophic dry-fire conditions, permanently destroying your heating infrastructure.
The "Dry Fire" Catastrophe
Electric water heaters use immersion heating elements made of copper, nickel, or stainless steel alloys. These elements operate at intense electrical surface wattages. When submerged, the surrounding water instantly carries heat away into the bulk fluid.
If you restore electrical power to a water heater while the tank is empty or partially filled, an exposed upper element will reach critical temperatures within 30 to 60 seconds. The element sheath will melt, split, and incinerate the internal resistance wire, destroying the heating assembly and potentially triggering an electrical short. With gas systems, firing an empty steel vessel cooks the glass-porcelain lining, causing internal micro-cracks that lead to catastrophic structural failure and massive tank leaks once pressure returns.
Operational Restoration Sequence
- Close the Tank Drain: Firmly tighten the bottom drain spigot. Ensure it is completely seated and not dripping. If using a garden hose, disconnect it entirely.
- Close Vacuum Breakers: If you wedged open the T&P relief valve lever, gently release it back down into its sealed, spring-loaded position. Close all open domestic faucets throughout the house except one single hot-water faucet at the highest point in your home.
- Refill the Vessel: Slowly open the cold-water inlet valve at the top of the water heater. You will hear incoming water pressurizing the tank. Keep the highest domestic hot-water faucet wide open. As the tank fills, it will forcefully push all trapped air out through this open fixture.
- Confirm Hydrostatic Saturation: Wait until the sputtering mix of air and water from the high faucet transitions into a solid, unbroken stream of cold water. Let it run continuously for two full minutes to guarantee that zero air pockets remain at the top of the tank. Close the high faucet.
- Inspect for Leaks: Check the bottom drain valve, cold inlet, and T&P valve fittings for any signs of seepage or dripping under full municipal line pressure.
- Re-energize Safely: Only after the tank is completely full and verified leak-free should you restore the power source. Switch the circuit breaker back to the "ON" position or re-ignite the gas pilot following the manufacturer’s instructional plate on the lower tank panel.
Pre-Disaster Maintenance: Hardening Your Reserve
You should never wait for an active catastrophic crisis to discover whether your water heater drain valve functions. Standard maintenance performed annually will ensure that your reserve water remains clean and instantly accessible when disaster strikes.
First, execute an annual sediment flush. Attach a hose to the drain spigot, open the valve fully under line pressure, and allow the system to blast sediment off the floor of the tank for 5 minutes until discharge runs crystal clear. This routine scouring minimizes the metallic sludge you will have to filter during an emergency.
Second, upgrade cheap, factory-installed plastic drain valves. Many entry-level storage heaters use fragile composite plastic drain stems that quickly degrade under heat and snap off flush with the tank during emergency manipulation. Have a licensed plumber replace your plastic drain with a full-port, heavy-duty brass ball valve equipped with a garden hose thread adapter. A full-port brass valve eliminates narrow bottlenecks, resists brittle fractures, and guarantees immediate, unrestricted water extraction under any circumstances.
Third, verify your sacrificial anode rod condition every three years. A depleted anode accelerates galvanic tank rust, turning your emergency reserves into an undrinkable suspension of iron oxide and degraded heavy metals. Replacing a depleted anode preserves both your expensive utility equipment and your survival life support system.
Securing reliable hydration during an extreme Survival Scenarios does not hinge on luck or government intervention—it depends entirely on your operational knowledge and mechanical readiness. Your utility closet holds an essential lifeline capable of keeping your family alive through the acute phase of any civil breakdown. Treat your water heater not merely as a domestic convenience, but as a primary municipal fallback. Maintain its infrastructure, stage your extraction equipment in advance, and execute the harvesting protocol with disciplined precision.
Frequently Asked Questions
Is it safe to drink water directly from a water heater in an emergency?
Yes, water stored in a standard tank-style water heater is generally safe to drink during an emergency, but it should be strained through a cloth or coffee filter and boiled or chemically disinfected to eliminate sediment and potential bacterial growth.
How do you drain water from a water heater during a crisis?
First, shut off the electricity or gas supply to the unit. Next, close the cold-water inlet valve to prevent contaminated municipal water from entering. Open a hot-water faucet upstairs to release vacuum pressure, then connect a hose or place a container beneath the drain valve at the base to collect the water.
Can you access emergency water from a tankless water heater?
No. Tankless water heaters heat water on demand as it flows through the pipes and do not maintain a storage reservoir, meaning there is no reserve volume available to tap during an emergency shutoff.
How much drinking water can you realistically recover from a water heater?
Most standard residential storage water heaters hold between 30 and 50 gallons of water. Factoring in sediment at the bottom of the tank, you can safely recover 80% to 90% of that volume, providing roughly 25 to 45 gallons of usable water.
Why does water drained from a water heater look cloudy or discolored?
Cloudy or discolored water is caused by harmless mineral scale (calcium and magnesium), sediment, or rust that naturally settles at the bottom of the tank over time. Let the sediment settle, pour the water through a fine filter, and disinfect it before consumption.
Sources & Further Reading
- Ready.gov - Managing Water in an Emergency
- Centers for Disease Control and Prevention - Creating & Storing an Emergency Water Supply
- Federal Emergency Management Agency - Food and Water in an Emergency
- American Red Cross - Emergency Water Supplies
- U.S. Department of Energy - Water Heating Safety and Maintenance