⚡ Key Facts
- The Baseline Standard: The Federal Emergency Management Agency (FEMA) and the Centers for Disease Control and Prevention (CDC) recommend a bare minimum of 1 gallon of water per person, per day, for at least three days, though a two-week supply is highly recommended for true resilience. For the practical checklist side, use the community emergency preparedness guide.
- The Weight Factor: Water is incredibly dense and heavy, weighing exactly 8.34 pounds (3.78 kilograms) per gallon. Storing 30 gallons adds over 250 pounds of static weight to your floor. For the practical checklist side, use the neighborhood preparedness network.
- Infrastructure Vulnerability: According to the Environmental Protection Agency (EPA), there are approximately 240,000 water main breaks per year in the United States, proving that localized municipal water outages are the most common urban infrastructure failure. For the practical checklist side, use the emergency communication plan.
- Plastic Lifespan: Not all plastics are created equal. Food-grade High-Density Polyethylene (HDPE #2) is the industry standard for long-term storage, as it does not leach harmful chemicals or bisphenol-A (BPA) into your drinking supply.
- The Sunlight Threat: Direct exposure to ultraviolet (UV) light degrades plastic containers over time and accelerates the growth of algae and harmful pathogens, making dark indoor storage spaces mandatory.
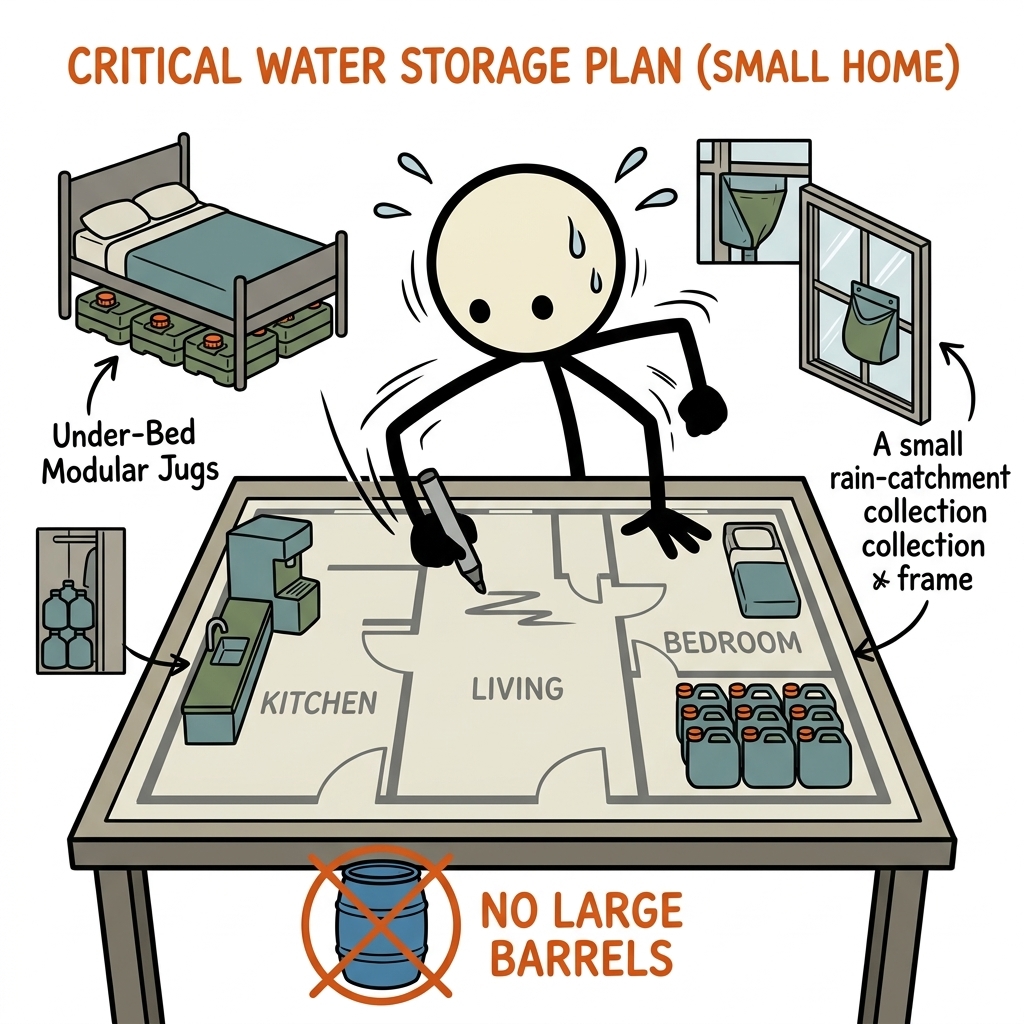
When municipal water systems fail, urban and suburban apartments are often the hardest hit. Unlike rural homeowners who can rely on private wells, rainwater harvesting systems, or massive 55-gallon drums kept in a spacious garage, apartment dwellers face a unique, highly constrained reality. If you live in a third-floor walk-up, a studio loft, or a modern high-rise without a basement, garage, or dedicated utility room, the standard emergency preparedness advice simply does not apply. You cannot drop a 250-gallon bladder in your living room without risking structural floor damage, nor can you roll a massive blue barrel into your kitchen. However, a lack of square footage does not excuse you from the fundamental biological reality: you can survive weeks without food, but only three days without clean, potable water. Establishing a practical, safe, and space-efficient water storage system in a small home is not only possible, but it is also a cornerstone of urban self-reliance.
The Math of Urban Survival: How Much Water Do You Actually Need?
To build an effective plan for emergency water storage apartment emergency preparedness, you must first calculate your household’s exact physiological and sanitary needs. FEMA, the American Red Cross, and the CDC all align on the baseline recommendation of one gallon of water per person, per day. However, this is a generalized baseline designed for basic survival under average conditions. To build a truly resilient strategy, you must break down how that gallon is allocated and adjust for your specific household dynamics.
In a standard Survival Scenarios, a single gallon of water is roughly split into two halves: one-half gallon for direct hydration (drinking) and one-half gallon for basic hygiene, food preparation, and sanitation. If you live in a hot climate, have a poorly insulated apartment that traps heat during a power outage, or have household members who are pregnant, nursing, or ill, your daily hydration requirement will increase. The World Health Organization (WHO) notes that under extreme heat or physical exertion, a person's water requirement can easily double to two gallons per day.
Furthermore, you must account for pets. Your dogs and cats cannot drink municipal tap water during a system-wide contamination event. A general rule of thumb for pet water storage is to allocate 1 ounce of water per pound of body weight per day for dogs, and roughly 5 to 7 ounces of water daily for a standard cat. For example, if you have a 60-pound golden retriever, you must store an additional half-gallon of water per day just for your canine companion.
Calculating Your 3-Day vs. 2-Week Supply
For a small household consisting of two adults and one medium-sized pet, the math for a baseline 3-day emergency water storage apartment plan is as follows:
- Adult 1: 1 gallon x 3 days = 3 gallons
- Adult 2: 1 gallon x 3 days = 3 gallons
- Pet (approx. 50 lbs): 0.5 gallons x 3 days = 1.5 gallons
- Total 3-Day Minimum: 7.5 gallons (roughly 62.5 pounds of water)
While a 3-day supply protects you against short-term municipal water main breaks, major natural disasters—such as earthquakes, hurricanes, or severe winter storms—can cripple regional water treatment facilities for weeks. The Red Cross recommends preparing for a two-week disruption. For our two-adult, one-pet household, a comprehensive 14-day supply requires 35 gallons of water, weighing a substantial 292 pounds. Storing this volume of water in a small apartment requires careful consideration of structural limits and spatial efficiency.
Structural Engineering in Small Spaces: The Weight and Floor Load Reality
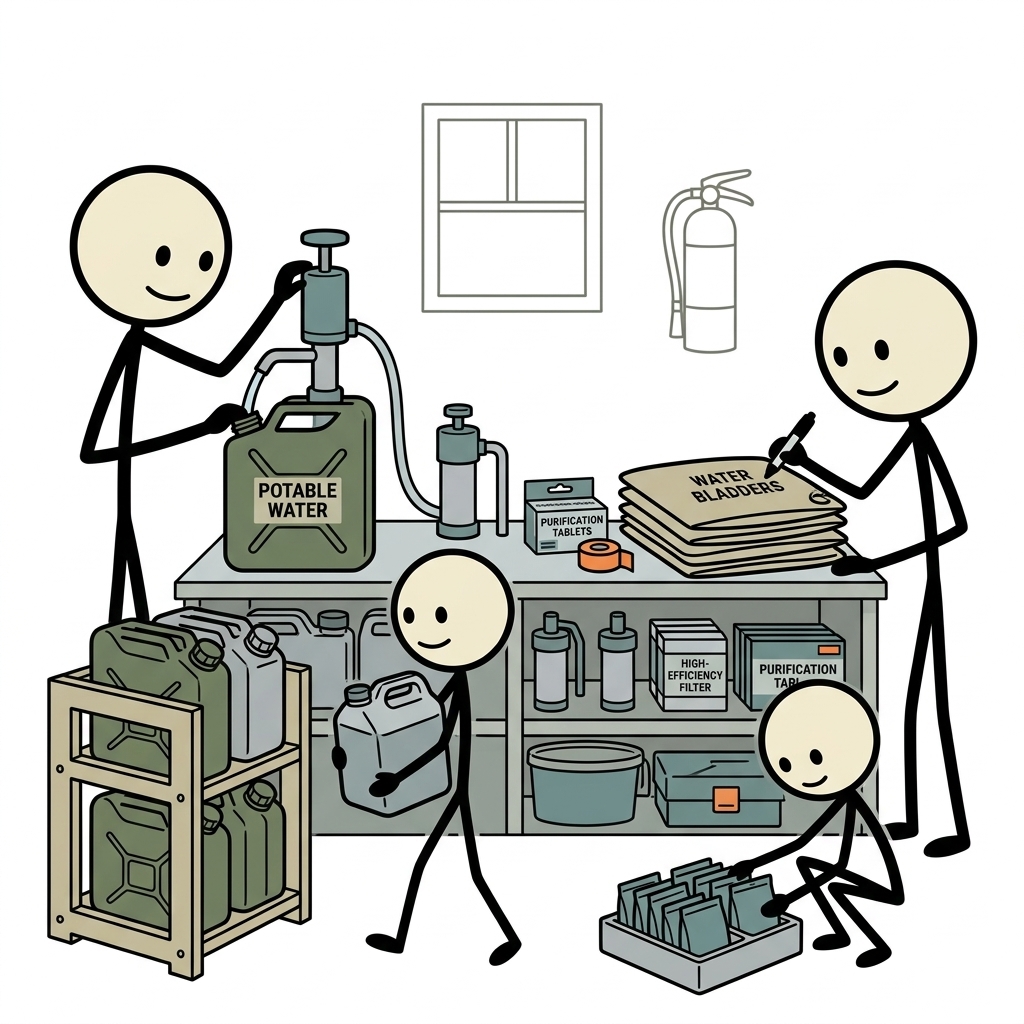
Before you begin purchasing containers, you must understand the structural engineering constraints of your apartment. Many renters and condo owners overlook the sheer weight of water. Because water weighs 8.34 pounds per gallon, storing a robust emergency supply creates a highly concentrated static load on your flooring system.
In the United States, modern residential building codes (such as the International Building Code) typically design apartment floors to support a uniform live load of 30 to 40 pounds per square foot (psf). A uniform load assumes weight is distributed evenly across the entire floor surface. However, a highly concentrated stack of water containers can easily exceed this limit if placed incorrectly. For example, if you stack four 5-gallon water jugs on top of each other in a 1-square-foot footprint, you are placing roughly 167 pounds of static weight on that single square foot. While modern joists can easily handle this due to safety margins, concentrating hundreds of gallons in the center of a room is a structural hazard.
How to Safely Distribute Water Weight
To mitigate structural risks and ensure your emergency water storage apartment setup is safe, follow these structural distribution principles:
- Load-Bearing Walls: Position your heaviest water storage containers directly against load-bearing exterior walls or structural columns. These areas of the floor frame are structurally reinforced and transfer weight directly to the building's foundation or vertical support pillars.
- Avoid Center-of-Room Stacking: Never stack heavy water containers in the middle of a room, especially on wide joist spans. Keep the center of your rooms clear of heavy static loads.
- Horizontal Distribution: Instead of stacking water vertically in a single towering column, distribute your containers horizontally along the base of your walls. This spreads the static load across multiple joists and floor supports.
The Best Small-Space Water Storage Containers (No 55-Gallon Drums)
When space is at a premium, the container you choose dictates your storage efficiency. Traditional 55-gallon blue polyethylene drums are completely impractical for apartments; they cannot fit through standard doorways easily, they cannot be hidden, and when full, they weigh over 450 pounds, making them impossible to move in an emergency. Instead, you must focus on modular, stackable, and low-profile containers designed for tight spaces.
1. Stackable Rigid Water Bricks
WaterBricks are perhaps the most innovative solution for apartment emergency water storage. These are heavy-duty, BPA-free, food-grade HDPE (#2) containers that typically hold 3.5 gallons of water each. They are designed with a unique interlocking pattern, similar to giant plastic building blocks. This allows you to stack them vertically or horizontally with extreme stability.
A single 3.5-gallon WaterBrick weighs approximately 30 pounds when full, making it highly portable for almost any adult. Because of their rectangular, low-profile design (typically 9 inches wide by 18 inches long by 6 inches high), they can easily slide under standard bed frames, stack neatly in the back of a closet, or be used to build a makeshift platform for a television or coffee table.
2. 5-Gallon Heavy-Duty Samson Stackers
If you prefer a slightly larger capacity, 5-gallon stackable jugs (often called Samson Stackers or Hedpak containers) are an excellent choice. Made of thick, food-grade plastic, these containers feature a built-in handle and a recessed bottom that nests perfectly onto the top of another jug. This prevents them from sliding or tipping over when stacked three-high. Storing three of these jugs gives you 15 gallons of water in a footprint of just 1.5 square feet.
3. Collapsible Water Bladders (For Pre-Event Storing)
If you have absolutely zero daily storage space, collapsible water bladders are your best option. These heavy-duty plastic bladders lay completely flat when empty, taking up virtually no space in a drawer or closet. When a major storm or emergency is forecasted, you place the bladder inside your bathtub and fill it directly from the faucet.
Products like the "WaterBOB" can hold up to 100 gallons of water within a standard bathtub. This temporary system keeps the water sealed and protected from airborne contaminants, dust, and soap residue for up to 16 weeks. Note: This is a reactive storage method and will not protect you during sudden, unannounced water outages like earthquake-induced pipe ruptures.
4. Commercial Bottled Water Cases
While not the most environmentally friendly or cost-effective option over time, commercial cases of bottled water are highly accessible and easy to store. Standard cases of 16.9-ounce bottles are highly stackable and can be slid under furniture. However, be aware that the plastic used for commercial water bottles (PET or PETE #1) is very thin. Over time, this plastic degrades, is susceptible to micro-punctures, and can slowly leach chemicals or allow outside odors to permeate the water. If you use commercial bottled water, you must rotate it every 12 months.
| Container Type | Capacity | Material | Pros | Cons |
|---|---|---|---|---|
| WaterBrick | 3.5 Gallons | HDPE #2 (BPA-Free) | Extremely stackable, fits under beds, highly portable, durable. | Higher cost per gallon than standard jugs. |
| Samson Stackers | 5.0 Gallons | HDPE #2 (BPA-Free) | Excellent volume-to-space ratio, heavy-duty, secure nesting. | Weighs 41.7 lbs when full; harder to lift for some individuals. |
| Bathtub Bladder (WaterBOB) | 65–100 Gallons | Food-Grade Plastic | Massive storage volume, zero footprint when empty. | Reactive only; renders your bathtub unusable for bathing. |
| Commercial Cases | Approx. 3–4 Gallons | PET #1 Plastic | Cheap, highly accessible, pre-packaged, easy to distribute. | Thin plastic degrades quickly, high environmental waste. |
Strategic Storage Locations: Hiding Water in Plain Sight
In a small apartment, finding space for 20 to 30 gallons of water requires creative spatial planning. You must think of your apartment not in terms of square footage, but in terms of cubic volume. Every unused nook, cranny, and void space is a potential water storage depot.
1. Under-Bed Optimization
The space beneath a standard queen-size bed is roughly 30 square feet of completely unused real estate. A standard bed frame sits about 7 to 12 inches off the ground. By utilizing 3.5-gallon WaterBricks or low-profile, flat-lying storage containers, you can easily store up to 28 gallons of water under a single bed. This distributes the weight perfectly across a large surface area, directly beneath the bed's support legs, and keeps the water in total darkness, preventing algae growth.
2. The "False Wall" Couch Strategy
If your couch is pushed up against a wall, pull it forward approximately 10 inches. This creates a hidden corridor behind your sofa. You can stack 5-gallon Samson Stackers or WaterBricks along the length of the couch, creating a "false wall." Drape a decorative throw blanket or a narrow console table over the top of the containers to make them completely invisible to guests while keeping them easily accessible.
3. Closet Floor Foundations
Most people hang clothes in their closets but leave the floor cluttered with shoes, bags, or random boxes. Clear out the floor of your coat closet or bedroom closet. Line the bottom of the closet with heavy-duty water containers. Closet floors are typically positioned near internal structural partition walls, making them excellent for supporting static weight. You can place your shoe racks or storage bins directly on top of the flat-topped water containers, reclaiming your storage space.
4. Kitchen Cabinet Plinths and Pantries
Look at the bottom of your kitchen cabinets. Many modern apartments have a hollow "toe kick" or plinth space beneath the bottom cabinets. While too narrow for large jugs, this space can sometimes accommodate small, flat-lying water pouches or emergency water cans. Alternatively, dedicate the absolute bottom shelf of your kitchen pantry to water storage. Storing water at floor level keeps the center of gravity low and prevents heavy liquids from falling and rupturing during seismic events.
Where NOT to Store Your Water
While maximizing space is critical, placing your water in the wrong environment can ruin your supply and endanger your health. Avoid these areas at all costs:
- The Balcony or Patio: Never store water on an outdoor balcony. Fluctuations in temperature accelerate plastic degradation, and freezing temperatures will cause the water to expand and rupture the containers. Furthermore, direct sunlight exposure allows UV rays to penetrate the plastic, leading to chemical leaching and rapid algae growth.
- The Utility Closet (Near Water Heaters or Furnaces): High ambient heat from water heaters or HVAC units can cause plastic containers to soften and release chemical odors into the water. Additionally, gas-fired appliances can emit small amounts of combustion byproducts that can permeate thin plastics over time.
- Near Harsh Chemicals: Do not store your drinking water next to household cleaning supplies, pesticides, or paints. Many plastics are semi-permeable to volatile organic compounds (VOCs), meaning chemical fumes in the air can slowly contaminate your drinking water.
Water Treatment, Preservation, and Sanitation
Storing water is only half the battle; ensuring that water remains safe to drink over months or years of storage is equally critical. Municipal tap water is pre-treated with chlorine or chloramines to kill pathogens, but this residual sanitizer slowly dissipates over time. To maintain an aseptic environment within your containers, you must follow strict sanitation and preservation protocols based on CDC and EPA guidelines.
Step-by-Step Container Sanitation
Before filling any reusable container with tap water, you must sanitize it thoroughly. Even brand-new, food-grade containers can harbor manufacturing residues, dust, or bacterial spores.
- Wash the inside of the container with warm water and mild dish soap, then rinse it thoroughly to remove all soap residue.
- Create a sanitizing solution by mixing 1 teaspoon of unscented liquid household chlorine bleach (containing 5% to 9% sodium hypochlorite) with 1 quart of clean water.
- Pour the sanitizing solution into the container, seal the cap, and shake it vigorously for at least 30 seconds, ensuring the liquid contacts all interior surfaces, including the neck and cap.
- Empty the solution and rinse the container thoroughly with clean, food-grade water. Let it air-dry completely before filling it for long-term storage.
Preserving Stored Water
If you are filling your containers with municipal tap water, it is already treated and generally safe to store for up to six months without additional additives, provided the container is sterile and kept in a cool, dark place. However, if you want to extend the shelf life of your stored water to 5 years and avoid the hassle of rotating it every six months, you should use a specialized water preservative.
Commercial water preservatives, such as those utilizing bio-dissolvable oxygen or copper-silver ion formulations (e.g., Aquamira or PreserverTech), are highly effective. These additives inhibit the growth of bacteria, viruses, algae, and fungi for up to five years. Alternatively, you can add unscented household liquid bleach to your stored water. According to the EPA, you should add 8 drops (about 1/8 teaspoon) of bleach per gallon of water. For a 5-gallon container, add 1/2 teaspoon of bleach. Stir or shake the container, then let it sit for 30 minutes. It should have a very slight chlorine odor; if it does not, repeat the dose and let it sit for another 15 minutes.
Your Emergency Water Storage Apartment Checklist
To streamline your preparation, use this comprehensive step-by-step checklist to design, execute, and maintain your small-space water security plan.
📋 Emergency Water Storage Apartment Checklist
- Calculate Your Target Volume: Multiply your household members (including pets) by 1 gallon per day. Multiply that by your target duration (3-day minimum, 14-day ideal).
- Assess Spatial Weight Limits: Identify load-bearing walls and structural columns in your apartment floor plan for heavy storage.
- Select the Right Containers: Purchase food-grade, BPA-free HDPE #2 stackable containers (like WaterBricks or 5-gallon stackers) that fit your identified storage locations.
- Sanitize Every Container: Perform the bleach-water sanitization rinse on all new or reusable containers before filling.
- Fill and Treat: Fill containers with clean tap water. Add a 5-year water preservative or the EPA-recommended dose of unscented household bleach.
- Label and Date: Use a permanent marker to clearly label each container with the date of filling and the scheduled rotation date (6 months for plain tap water, 5 years for treated water).
- Distribute Strategically: Place containers under beds, behind sofas, or at the bottom of closets, ensuring weight is distributed horizontally along load-bearing walls.
- Secure Against Movement: If stacking containers more than two high, use straps or wedge them securely to prevent tipping during seismic events.
- Prepare a Post-Event Filtration Plan: Store a high-quality gravity filter (like a Sawyer or Berkey) or a portable purification system to treat secondary water sources if your primary supply runs low.
Harvesting "Hidden" Water Inside Your Apartment During a Crisis
If an unexpected disaster strikes and you run through your stored emergency Water Calculator, you are not entirely out of options. Modern apartments contain several gallons of "hidden" water trapped within the building's plumbing and appliances. Knowing how to safely harvest this water can provide a vital lifeline when municipal systems run dry.
1. The Water Heater Tank
If your apartment has an individual, dedicated water heater tank (typically located in a utility closet), you have an immediate reservoir of 30 to 50 gallons of clean, pressurized water. Warning: Do not attempt this with tankless water heaters, and always turn off the electricity or gas supply to the water heater before draining to prevent element burn-out or explosion.
To harvest this water: 1. Turn off the cold water inlet valve at the top of the tank to isolate your heater from the contaminated municipal grid. 2. Open a hot water faucet upstairs or in your kitchen sink to vent the system and allow air to enter the tank. 3. Attach a clean hose (such as a food-grade RV drinking water hose) to the drain valve at the bottom of the tank. 4. Open the drain valve and collect the water into clean containers. Note: The first few gallons may contain sediment or mineral scale. Filter this water through a clean cloth or coffee filter before drinking or purifying.
2. Draining the Plumbing Lines
When the municipal water supply is cut off, gravity traps a significant amount of water inside your apartment's internal pipes. You can harvest this through a simple gravity-drain process. Go to the highest faucet in your apartment (usually a showerhead or top-floor sink) and open it completely to allow air into the system. Next, go to the lowest faucet in your apartment (typically a bathtub faucet or kitchen sink on the ground level) and open it. Place a clean pitcher or pot underneath the faucet to collect the water as gravity pulls it down through the building's pipes.
3. The Toilet Tank Myth vs. Reality
A common survival tip is to drink the water from your toilet tank. While this water is technically clean tap water before it enters the bowl, you must exercise extreme caution. If you have ever used chemical toilet bowl cleaners, drop-in blue chlorine tablets, or if your toilet tank is old and has degrading rubber seals, this water is toxic and unsafe to drink. However, if your tank is clean, free of chemical additives, and you boil or filter the water first, it can be used for basic hygiene, hand washing, or emergency sanitation.
Securing Your Water Future in the Modern Jungle
Emergency preparedness is not about anticipating the end of the world; it is about managing the practical disruptions of the world we live in today. For the apartment dweller, water security is not a luxury reserved for those with sprawling country estates—it is a vital, achievable component of urban citizenship. By shifting your perspective from massive, unmanageable barrels to modular, stackable, and hidden storage solutions, you can easily secure a two-week supply of life-saving water without sacrificing your living space, your aesthetic, or your safety. Take action today: measure the space under your bed, calculate your household's daily needs, and invest in high-quality, food-grade containers. When the taps unexpectedly run dry, your foresight will transform a potential survival crisis into a manageable, stress-free inconvenience.
Frequently Asked Questions
What should a emergency water storage apartment plan include?
Start with the immediate safety steps, the supplies and records your household needs, a communication plan, and a regular review schedule. Follow local official guidance during an active emergency.
How often should I review emergency water storage apartment preparations?
Review them at least twice a year and whenever your household, medication, location, or local risks change. Replace expired supplies and practice key steps.
Where can I find reliable emergency guidance?
Use local emergency management alerts and established public-health or emergency-management agencies. A blog guide should support, not replace, official real-time instructions.