⚡ Key Facts
- Indefinite Shelf Life vs. Peak Quality: According to the USDA Food Safety and Inspection Service (FSIS), commercially canned foods are safe indefinitely if the cans remain structurally sound, rust-free, and vacuum-sealed, though peak nutritional value and texture degrade over time.
- The Temperature Multiplier: Food scientists have demonstrated that for every 18°F (10°C) increase above room temperature (70°F / 21°C), the rate of chemical degradation within canned goods doubles, effectively cutting product quality life in half.
- Acid Profiles Determine Longevity: High-acid foods (tomatoes, citrus fruits, vinegar-pickled items) maintain peak quality for only 12 to 18 months, whereas low-acid foods (beans, meats, poultry, stews) retain quality for 2 to 5 years or longer.
- Deadly Pathogen Thresholds: The CDC warns that Clostridium botulinum spores thrive in the anaerobic (oxygen-free), low-acid, and moist environment of damaged canned goods, producing tasteless, odorless neurotoxins that can prove fatal in microscopic quantities.
- Floodwater Total Loss Protocols: FEMA and the Red Cross mandate the immediate disposal of all canned goods with pull-tab lids, crimped bottle caps, or home-canned jars if exposed to floodwaters, as decontamination beneath the lid edges is chemically impossible.
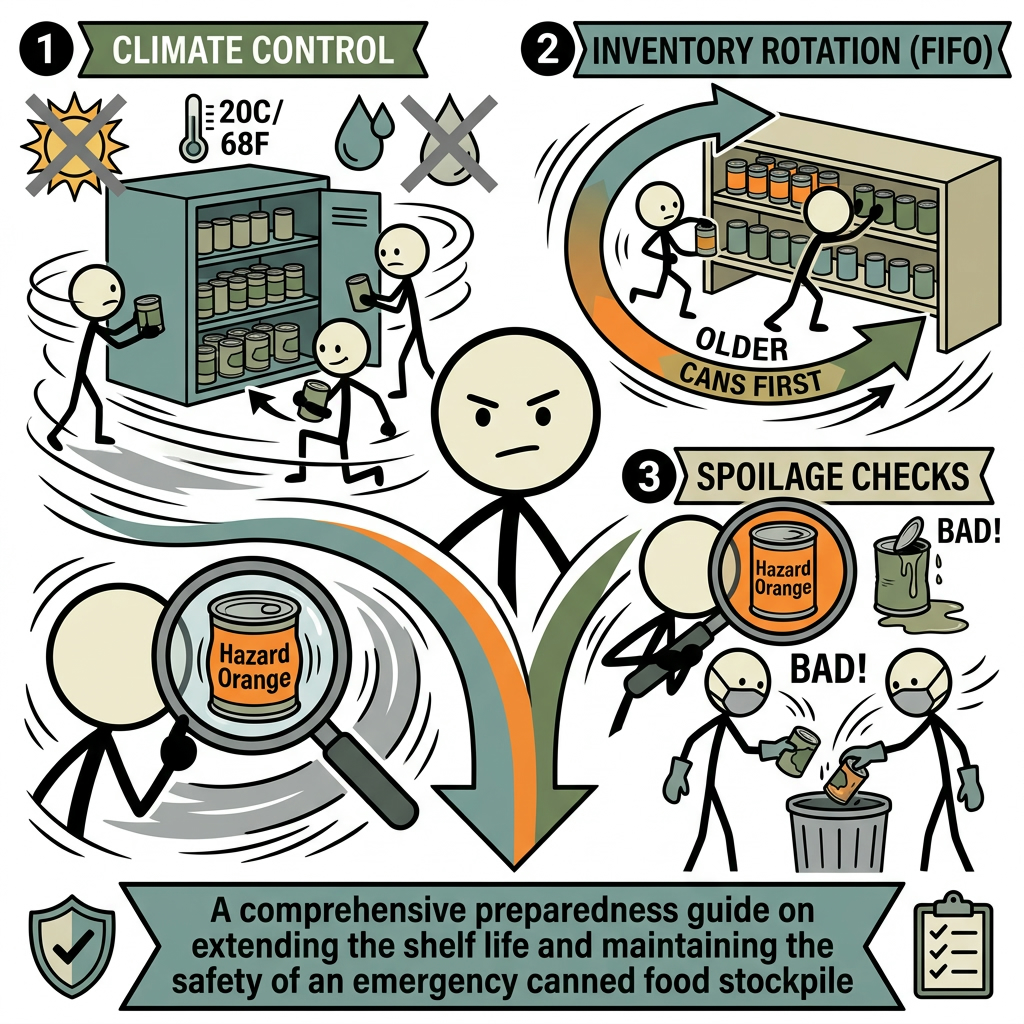
When Hurricane Katrina severed regional supply chains across the Gulf Coast in 2005, thousands of households discovered that having supplies meant nothing if those supplies were ruined. Canned goods left in sweltering 90-degree attics and humid garages turned into sour, rusted liabilities. Metal cans provide an exceptional barrier against light, oxygen, and vermin, making them a primary staple of disaster preparedness. However, a canned stockpile is an active chemical environment, not a passive storage unit. Ambient thermal shifts, mechanical damage, oxidation, and micro-fissures constantly threaten the integrity of food seals. Transforming an ordinary shelf of canned goods into a multi-year survival pantry storage system demands an operational framework grounded in climate control, inventory science, and rigorous safety checks. For the practical checklist side, use the community emergency preparedness guide.
The Science of Canned Food Preservation and True Shelf Life
To preserve emergency rations successfully, you must first understand the industrial packaging process. Commercial canning relies on a dual-phase preservation method: thermal processing and hermetic sealing. Food is sealed inside a multi-layered steel or aluminum cylinder and heated under steam pressure to temperatures typically between 240°F and 250°F (115°C to 121°C). This process eliminates viable vegetative pathogenic microorganisms and neutralizes bacterial spores, primarily target-destroying Clostridium botulinum. For the practical checklist side, use the neighborhood preparedness network.
Once cooled, a partial vacuum forms inside the container. This structural vacuum pulls the can's lid inward, creating an oxygen-depleted environment that halts aerobic bacterial proliferation and oxidative rancidity. Consequently, modern survival pantry storage protects your emergency food storage guide from microbial breakdown until physical force, thermal stress, or internal chemical interactions breach that seal.
Decoding Dates: Quality Expiration vs. Safety Expiration
The dates stamped on the tops or bottoms of commercial cans rarely indicate microbial safety limits. The USDA explicitly clarifies that federal regulations do not require product dating on canned goods, with the singular exception of infant formula. Instead, manufacturers print voluntary "Best If Used By," "Best By," or "Use By" stamps to indicate when sensory attributes—such as mouthfeel, pigment, aromatic compounds, and water-soluble vitamins—will peak. For the practical checklist side, use the emergency communication plan.
Consuming food past these advisory milestones is not inherently dangerous. If the container exhibits structural integrity, low-acid staples like black beans, corned beef, and vegetable broth can remain microbiologically safe and calorie-dense for decades. However, chemical decay continues at a molecular level, gradually reducing nutrients like Vitamin C, Thiamine (B1), and Folate (B9). For the practical checklist side, use the family emergency planning guide.
High-Acid vs. Low-Acid Dynamics
The primary factor dictating real-world canned goods shelf life is internal pH. Understanding the chemical divergence between high-acid and low-acid foods determines where and how you should organize your stockpile caches.
- High-Acid Foods (pH 4.6 and below): This category encompasses canned whole peeled tomatoes, tomato pastes, pineapple rings, peaches, applesauce, sauerkraut, and foods packed in heavy vinegar sauces. The ambient acid continually attacks the tin or polymer interior lining of the can. Over 12 to 24 months, this reaction can cause pinhole degradation, metallic off-flavors, and food discoloration.
- Low-Acid Foods (pH above 4.6): This group includes canned tuna, salmon, chicken breast, beef stew, pinto beans, green beans, corn, potatoes, and condensed soups. Lacking aggressive acid profiles, low-acid foods remain chemically stable within polymer-lined containers for 3 to 7 years without catastrophic nutritional decay, provided external environmental vectors remain controlled.
Environmental Warfare: Climate Control for Survival Pantries
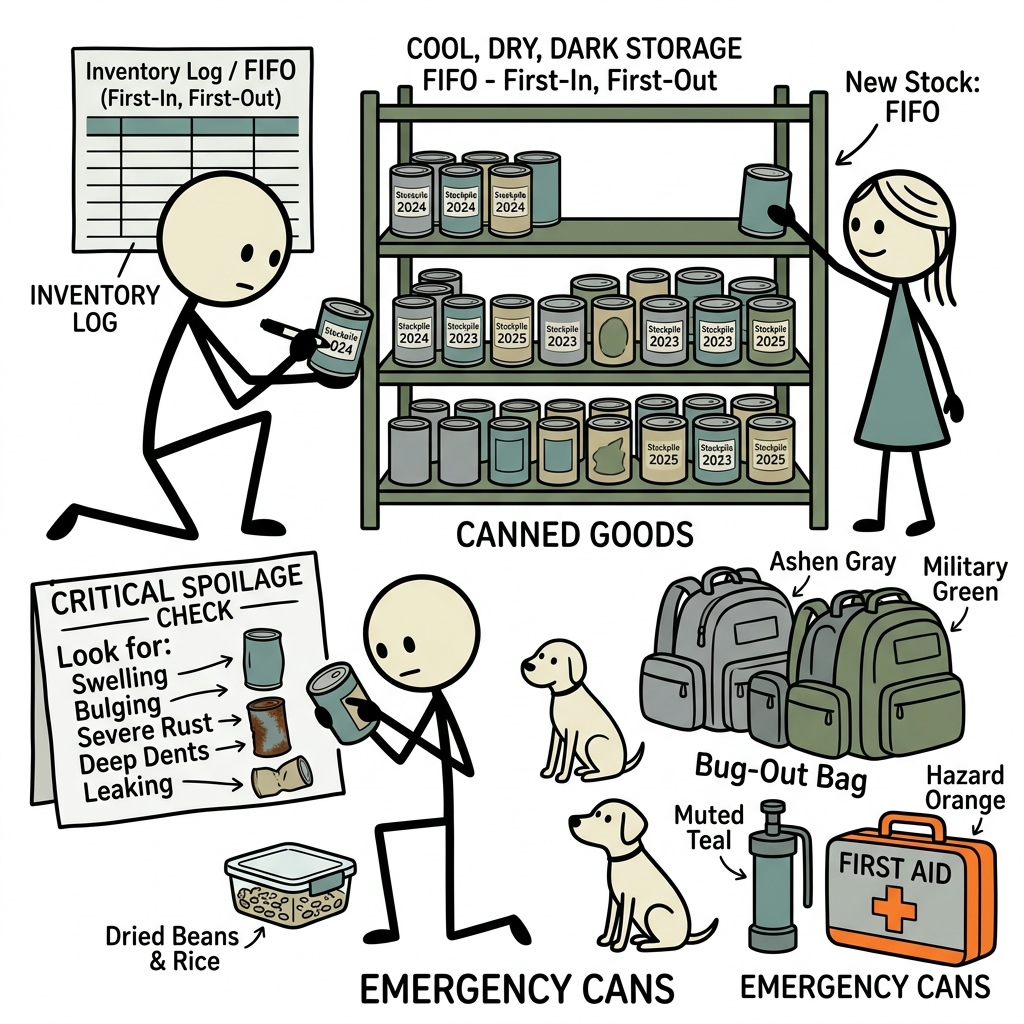
A survival stockpile will only last as long as the climate in which it is stored. Metal cans act as thermal and vapor conductors. Storing your rations in unconditioned spaces like outdoor sheds, attics, or non-insulated garages exposes your investment to rapid degradation.
Thermal Regulation and the Arrhenius Principle
Chemical reactions accelerate as temperatures climb. Under the Arrhenius equation—a fundamental principle of physical chemistry—chemical reaction rates roughly double for every 10°C (18°F) rise in temperature. When canned food storage reaches an ambient temperature of 88°F (31°C), the internal breakdown of flavor compounds, lipid matrices, and micronutrients occurs twice as fast as in a basement kept at a stable 70°F (21°C).
FEMA and the Red Cross recommend storing emergency provisions in cool, dry areas between 50°F and 70°F (10°C to 21°C). If you manage to sustain consistent subterranean temperatures near 55°F (13°C), you dramatically slow this chemical decay, keeping stored provisions viable for years beyond standard commercial projections.
Freezing temperatures also present serious structural risks. When aqueous foods freeze, the water within them expands by roughly 9% in volume. This hydraulic expansion can pop the lid seams, deform the cylindrical body, or cause micro-fractures along the rim. Even if the can thaws without bursting open, the disrupted hermetic seal will draw in ambient air and contaminants during the thaw cycle.
Relative Humidity and Atmospheric Corrosion
High ambient moisture is an immediate threat to metal containers. When relative humidity (RH) consistently exceeds 60%, galvanic corrosion and atmospheric rust attack the thin protective layer of tin or chromium on steel cans. Pinpoint rust can form along the rim seams where stamping machinery crimps the metal together.
To mitigate moisture issues, keep your storage room's relative humidity at or below 50%. You can maintain this target by applying simple, layered protective measures:
- Active Dehumidification: Run a continuous-drain, compressor-based dehumidifier in basement caches to hold moisture levels steady through the summer months.
- Passive Desiccant Systems: Keep high-grade calcium chloride or silica gel buckets inside enclosed supply cabinets to prevent ambient condensation.
- Protective Barrier Coatings: For long-term emergency caches in naturally humid zones, apply a light coat of food-grade mineral oil or paste wax to can exteriors, seams, and rims using a microfiber cloth. This creates a hydrophobic shield against moisture.
Air Circulation, Light, and Subterranean Ground Moisture
Do not store canned goods in direct contact with unfinished concrete floors or exterior walls. Concrete is a porous material that draws groundwater upward through capillary action, transferring moisture directly onto resting steel cans. Place your goods on coated wire shelving or non-porous composites set at least four to six inches above the ground and two inches away from exterior structural walls to support steady airflow.
Exposure to direct sunlight also creates local heat zones. Sunlight passing through a basement window can warm the surface of a steel can to over 100°F (38°C), even if the surrounding room feels cool. Keep storage areas completely dark or shield individual shelves to prevent thermal hotspots.
Systematic Inventory Rotation: Mastering FIFO and Storage Audits
An emergency stockpile must function like an active inventory system rather than a static cache. Without structured emergency food rotation, your oldest cans will get pushed to the back, slowly degrading into useless waste while you continually consume newer items. You can avoid this by standardizing your inventory around the FIFO system.
Implementing the FIFO Protocol
The First-In, First-Out (FIFO) methodology is the commercial gold standard for managing perishable inventory. Applying it to your survival pantry ensures that the oldest supplies are eaten long before their nutritional or chemical quality drops off.
- Front-Facing Accessioning: Whenever you bring fresh cans into the home, write the purchase month and year on the top lid with an industrial-grade black permanent marker (e.g., "04/26" for April 2026). Do not rely solely on tiny, stamped manufacturer batch codes.
- Rear-Loading Protocols: Always place your newly dated cans at the rear of your pantry shelves or load them into the top of gravity-fed can organizers.
- Front-Extracting Habits: Pull items exclusively from the front of the line or the bottom run of gravity dispensers for your daily cooking. This simple step keeps your entire inventory moving in a steady, systematic cycle.
Gravity-Fed Can Dispensers vs. Fixed Shelving
The physical structure of your storage affects how reliably you rotate supplies. Standard flat pantry shelves make FIFO maintenance tedious, often requiring you to unload dozens of cans just to place three new units at the back. Gravity-fed rotation systems solve this problem by design.
When you place a new can into the upper track of a gravity rack, it rolls into place behind the others, while the oldest unit moves directly to the dispensing point below. If you build or buy fixed shelving instead, keep each shelf shallow—ideally no more than two cans deep—or leave a rear alleyway to make manual restacking quick and painless.
Analog and Digital Inventory Architecture
Relying on memory alone to track months of family provisions is a recipe for overlooked, spoiled stock. Build a reliable tracking system using either digital software or an analog binder:
- The Pantry Field Binder: Keep a physical three-ring binder near your storage space with pages organized by category (e.g., "Proteins," "Vegetables," "High-Acid Fruits," "Soups"). Use a simple tally system: date, brand, product, quantity added, quantity removed, and calculated expiration quarter.
- Spreadsheet Architectures: Create a digital inventory spreadsheet using platforms like Google Sheets or Microsoft Excel. Add conditional formatting that automatically highlights rows in amber when an item hits twelve months before its estimated quality horizon, and red when it enters its terminal storage phase.
- Quarterly Audits: Schedule an inventory review on the first Saturday of every quarter (January, April, July, and October). Use this time to pull any supplies nearing their recommended usage window and integrate them into your regular family meal plan.
| Food Category | Optimal Ambient Temp | Recommended Window | Primary Risk Vector |
|---|---|---|---|
| Canned Citrus & Berries | 50°F–65°F (10°C–18°C) | 12–18 Months | Lining corrosion, acid delamination |
| Tomato Pastes & Sauces | 50°F–65°F (10°C–18°C) | 18–24 Months | Internal acid venting, off-flavoring |
| Poultry, Beef, Pork, Fish | 55°F–70°F (13°C–21°C) | 3–5 Years | Lipid breakdown, texture softening |
| Legumes & Root Vegetables | 55°F–70°F (13°C–21°C) | 3–6 Years | External corrosion, vitamin degradation |
The Triage Checklist: Identifying Damaged and Compromised Cans
During an emergency, a single toxic can of food can trigger a life-threatening medical crisis when advanced medical support is completely unavailable. Learning to identify damaged canned goods is a mandatory survival skill. Develop a systematic, physical inspection process to evaluate every can before you open it.
The Triple-Seam Inspection: Dents and Integrity
Modern three-piece steel sanitary cans rely on an engineered structure: a cylindrical body formed with a longitudinal side seam, closed off at both ends by flat disks crimped into "double seams." Dents are not just cosmetic flaws. A dent represents displaced metal that puts extreme tension on both the interior lining and exterior seams.
Use these criteria from the USDA Food Safety and Inspection Service to evaluate dent damage safely:
- Critical Flaws (Immediate Disposal): Any sharp dent along the top or side seam. A dent crossing a seam weakens the mechanical crimp, instantly compromising the hermetic seal and letting micro-contaminants enter. Discard any can with sharp, pointed indentations that fold the metal onto itself.
- Severe Body Dents: Dents on the can's main wall that feature sharp, knife-like angles or prevent you from stacking the can flat are unsafe. They often fracture the internal plastic or enamel lining, exposing bare steel to rapid oxidation and food contamination.
- Minor Body Dents (Acceptable): Smooth, shallow, rounded indentations on the cylindrical body that do not involve the seams or puncture the metal surface are generally safe for consumption, provided the can is used promptly.
Swelling, Buckling, and the Botulism Profile
Any can with bulging ends or outward expansion must be treated as hazardous bio-waste. Swelling occurs when internal pressure climbs above outside atmospheric levels, almost always driven by gas-producing bacterial proliferation.
The primary concern is Clostridium botulinum. When active, these spores produce lethal botulinum neurotoxins alongside gases like hydrogen sulfide, carbon dioxide, and nitrogen. Swelling can show up in several distinct stages:
- Flipper: A can that looks normal, but one lid pops outward when you press the opposite end, revealing an initial loss of internal vacuum pressure.
- Springer: One end of the can bulges outward permanently. Applying firm thumb pressure may pop it inward, but doing so causes the opposite lid to bulge out immediately.
- Soft Swell: Both ends bulge outward, but you can still compress the metal slightly with your fingers.
- Hard Swell: Both ends bulge out rigidly under severe internal pressure. The metal will feel rock-hard and resistant to hand pressure. This can is a hazardous pressurized vessel; handle it carefully to avoid a sudden burst.
Safety Warning: Never taste, heat, or sniff food from a swollen can. The CDC emphasizes that trace amounts of botulinum toxin—even from licking a contaminated finger—can cause paralysis and death. Discard these cans immediately without puncturing the metal.
Rust Patterns: Surface Oxidation vs. Perforating Pits
Rust on a steel can requires careful examination. Light surface rust that leaves a faint orange dust on your wiping cloth without pitting the metal does not threaten the interior contents. Buff this minor rust away with fine-grit steel wool or a dry rag, apply a light coat of food-grade oil, and move the item up for immediate consumption.
Conversely, dark, crusty rust deposits signify advanced corrosion. If rubbing away the rust reveals distinct pitting, visible dark indents, or pinhole leaks, discard the can. Once rust pits the steel, the vacuum seal is gone, and atmospheric air has reached the food.
Building a Resilient Physical Infrastructure
A well-curated supply of food will fail if your physical storage setup collapses during a natural disaster. Canned provisions are heavy: a standard case of 24 15-ounce cans weighs nearly 26 pounds. Multi-tiered pantries holding hundreds of cans can easily place thousands of pounds of static load onto your shelving units.
Selecting and Engineering Storage Racks
Skip inexpensive plastic shelving or lightweight fiberboard bookcases. Heavy canned goods will bow thin plastic shelves over time, causing structural failures that can ruin your entire stockpile. Instead, invest in welded steel wire shelving or commercial-grade industrial boltless steel racks rated for at least 600 to 1,000 pounds per shelf.
Industrial steel wire units offer two key benefits: their open-mesh design promotes continuous 360-degree air circulation around the cans, minimizing localized moisture traps, and they allow water from fire sprinkler systems to flow through freely during a structural emergency.
Earthquake Bracing and Seismic Retainers
According to safety directives from the USGS and FEMA, seismic ground acceleration during earthquakes easily tips freestanding storage shelves, dumping your supplies onto the floor where seams split and jars shatter. Build seismic resilience into your survival pantry using these field-tested safeguards:
- Anchoring to Wall Studs: Anchor all shelving units directly to structural wall studs using steel L-brackets, heavy lag screws, and high-tensile safety straps. Never rely on plastic drywall anchors to support heavy shelving loads.
- Shelf Retaining Wires: Install safety retention lips along open shelves. Fasten marine-grade 1/8-inch vinyl-coated stainless steel aircraft cables or wooden retaining bars along the front of each shelf, suspended 2 to 3 inches above the shelf surface. This simple barrier keeps cans from walking off the edges during low-frequency seismic vibrations or shockwaves.
- Weight Distribution Strategies: Always store your heaviest items—such as gallon-sized steel cans, case boxes, and dense meat rations—on the bottom tiers of your shelving. Keep lighter goods like dried goods, spices, and small fruit tins on top to maintain a low, stable center of gravity.
Post-Disaster Food Assessment Protocol
When natural disasters like flash floods, severe hurricanes, or infrastructure failures hit your home, you must complete a formal safety inspection before preparing or eating any stored rations.
Floodwater Contamination Protocols
Floodwaters are treated as category-three blackwater. According to guidelines from the CDC and FEMA, floodwater carries raw municipal sewage, agricultural chemicals, petroleum distillates, heavy metals, and virulent pathogens like Escherichia coli and Salmonella enterica. The porous nature of external can labels easily absorbs these toxic compounds, holding them directly against the steel casing.
Mandatory Discard Criteria: You must immediately discard all canned items that feature commercial pull-tab tops ("pop-tops"), screw caps, or crimped lids if they come into contact with floodwaters. The structural recess beneath pull-tabs is impossible to sterilize reliably. Even after washing, contaminants trapped beneath the tab edge will transfer onto your can opener blade and into your food during opening.
Decontamination Protocol for Sealed Sanitary Cans
Standard, flat-top, crimped all-metal cans that have been touched by floodwaters can be salvaged if you execute an exact, four-stage decontamination protocol:
- Strip Paper Contaminants: Completely remove paper labels from the metal containers. Paper holds silt, sewage, and chemical residues directly against the metal and prevents surface disinfection. Use permanent marker to re-label the bare steel lid with the food type and accession date.
- Mechanical Scrubbing: Scrub the bare exterior of every can with an abrasive nylon brush using hot potable water and heavy-duty dish soap. Remove all visible silt, dried mud, and surface grease, taking care to scrub the recessed seams around both ends. Rinse thoroughly with clean, potable water.
- Chemical Sanitization: Submerge the cleaned cans for 15 straight minutes in a freshly prepared chlorine sanitizing solution: one tablespoon of standard 5% to 8.25% unscented household liquid bleach per gallon of clean water. Alternatively, submerge the cans in clean, rapidly boiling water for 10 minutes.
- Air-Drying and Corrosion Defense: Pull the cans from your sanitizing bath and let them air-dry thoroughly on clean drying racks. Do not towel-dry, as towels can transfer lingering bacteria between cans. Once they are dry, apply a light wipe of food-grade oil to protect the bare, unlabelled steel surfaces against oxidation.
Building Long-Term Food Independence
Real emergency readiness is built on clear-headed, consistent practices, not reactive panic. A high-density survival pantry storage system is one of the most reliable investments you can make for self-reliance, provided you treat it as an active system that needs steady oversight. Shield your supplies from high heat and humidity, set up a simple First-In, First-Out rotation system, and inspect your seals regularly to keep your canned stockpile safe, nutritious, and ready when you need it most.
Frequently Asked Questions
What is the ideal temperature range for storing canned emergency food?
The ideal storage temperature is between 50°F and 70°F (10°C to 21°C) in a dry, dark location. Temperatures exceeding 70°F accelerate food degradation and nutrient loss, while temperatures below freezing can break container seals.
How do you implement the FIFO method for rotating canned goods?
First In, First Out (FIFO) requires stocking newer canned purchases at the back of the shelf and pulling older cans to the front. Always label purchase dates or expiration dates visibly on the lid with a marker to track inventory.
Are dented cans safe to eat during an emergency?
Minor surface dents on the can body are generally safe, but cans with deep dents that you can lay a finger into, dents on the top or side seams, or sharp creases should be discarded due to microscopic seal failures.
What damage checks indicate a canned item must be thrown out?
Immediately discard cans that are bulging, leaking, heavily rusted, spurting liquid when opened, or emitting an unnatural odor. Bulging and gas pressure often indicate lethal Clostridium botulinum contamination.
How long do canned goods actually last past their 'best by' date?
Undamaged low-acid canned goods (beans, meats, poultry, vegetables) remain safe to eat for 2 to 5 years past the date if stored properly. High-acid foods (tomatoes, citrus fruits, pineapple) retain peak quality for 12 to 18 months.