⚡ Key Facts
- High Prevalence: According to the Centers for Disease Control and Prevention (CDC), dental emergencies account for over 2 million emergency department visits in the United States annually, many of which could be stabilized temporarily with basic supplies. For the practical checklist side, use the community emergency preparedness guide.
- Critical Window: The American Dental Association (ADA) states that a knocked-out (avulsed) permanent tooth has the highest rate of successful replantation if it is kept moist and replaced or professionally treated within 15 to 30 minutes. For the practical checklist side, use the neighborhood preparedness network.
- Infrastructure Gaps: Federal Emergency Management Agency (FEMA) planning guides emphasize that during major disasters, standard emergency medical services (EMS) do not carry dental-specific tools, materials, or medications. For the practical checklist side, use the emergency communication plan.
- Systemic Risks: Clinical data published in the Journal of Emergency Medicine warns that untreated dental abscesses can rapidly escalate into systemic infections, such as Ludwig's angina or sepsis, within 24 to 48 hours.
Imagine the aftermath of a severe seismic event or a Category 4 hurricane. The power grid is offline, local roads are choked with debris, and emergency services are stretched to their absolute limits. You have secured your family, checked your water reserves, and verified your primary medical supplies. Then, a sharp, debilitating pain shoots through your jaw—you have cracked a molar on a hard piece of survival ration, exposing the highly sensitive dental pulp. In a Survival Scenarios, a dental emergency is not merely an inconvenience; it is a critical vulnerability that can compromise your decision-making, disrupt your sleep, and expose you to systemic, life-threatening infections. Standard first-aid kits are remarkably ill-equipped for oral trauma, which is why understanding how to construct and utilize a safe, legal, and compact emergency dental kit is a cornerstone of true disaster resilience.
Why Dental Preparedness is the Missing Link in Disaster Planning
In the field of emergency preparedness, dental health is routinely overlooked. Most pre-packaged medical kits are designed for trauma—hemorrhage control, airway management, and bone immobilization. While these are undoubtedly vital, they offer virtually nothing to address a lost filling, a dislodged crown, a fractured tooth, or a localized oral abscess. The American Red Cross and FEMA both emphasize the importance of self-reliance during the first 72 hours of a disaster, yet a severe toothache can incapacitate an otherwise healthy adult far faster than many minor soft-tissue injuries.
The mouth is a highly vascularized, microbe-rich environment. When the protective layers of enamel and dentin are compromised, bacteria have direct access to the dental pulp and, consequently, the bloodstream. Without intervention, a simple cavity or fracture can quickly evolve into an acute abscess. In a compromised environment where professional dental care is unavailable, this infection can spread to the deep facial spaces, leading to airway compromise or systemic bacteremia. Integrating dedicated dental supplies into your emergency dental kit emergency preparedness strategy ensures you can stabilize these injuries before they escalate into systemic crises.
The Anatomy of a Safe, Legal, and Compact Emergency Dental Kit
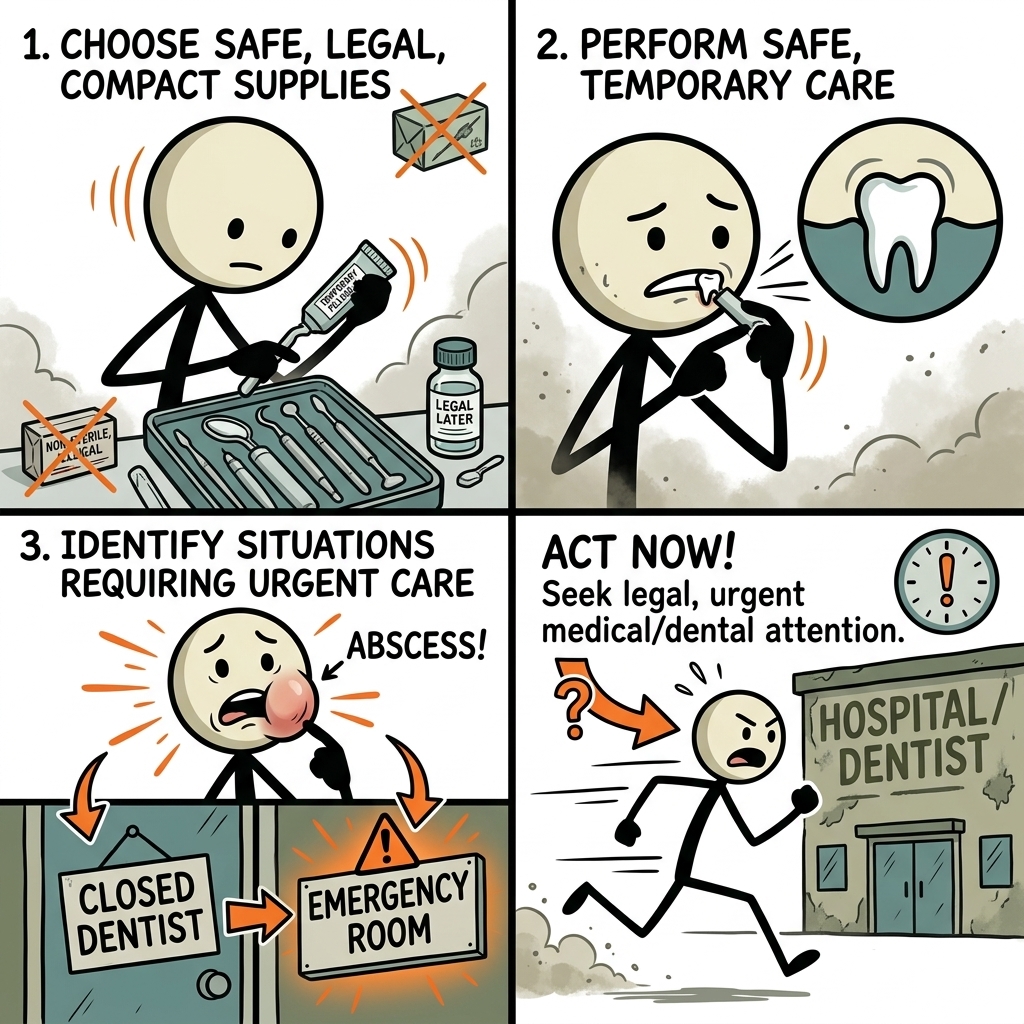
When assembling supplies for oral care in the field, you must navigate the critical boundary between safe stabilization and illegal or dangerous practice. A legal and safe emergency dental kit must focus strictly on temporary stabilization, pain mitigation, and infection prevention. It should not contain professional-grade surgical instruments, prescription-strength local anesthetics (such as lidocaine cartridges for injection), or dental drills, as attempting invasive procedures without professional training is both illegal and highly dangerous.
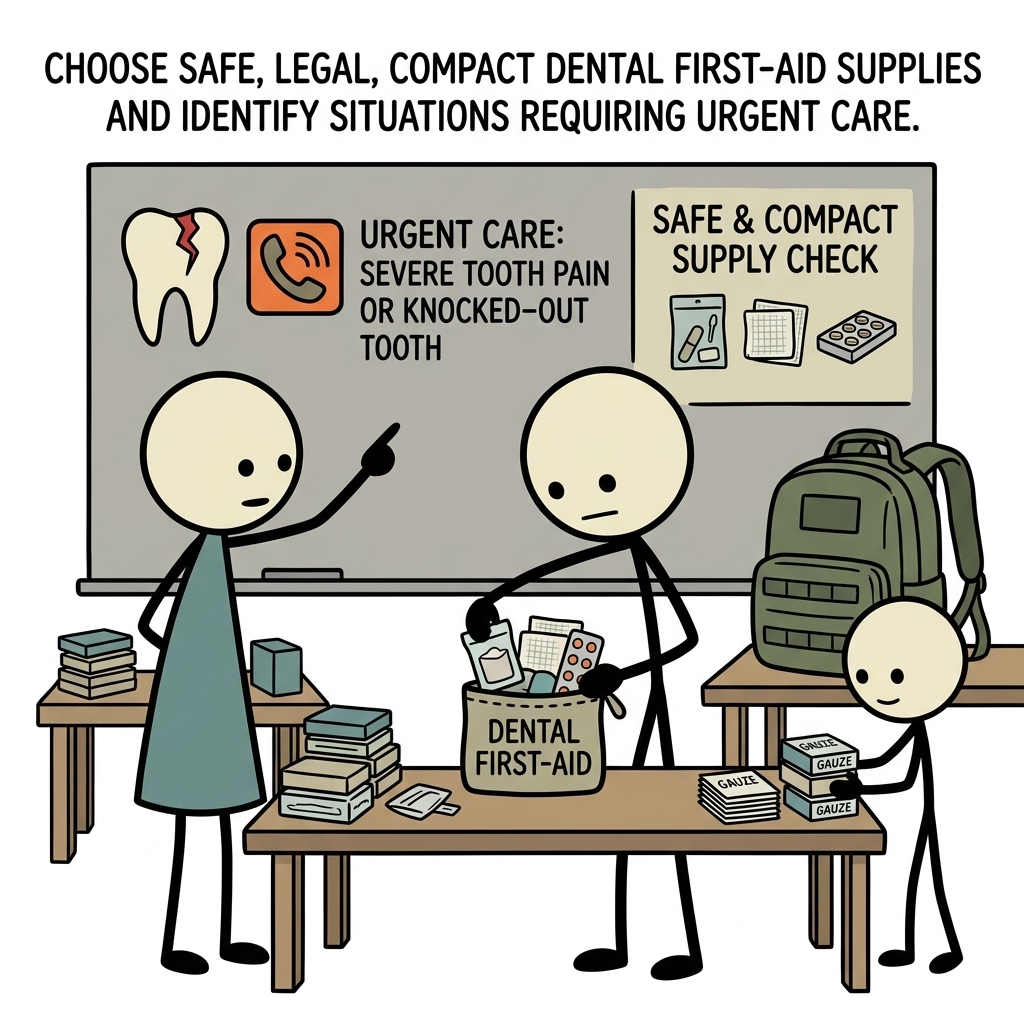
The ideal kit must also be compact. Space and weight are premium commodities in any Go-Bag Builder, vehicle emergency kit, or home disaster locker. Your supplies should fit within a small, waterproof, rigid container—roughly the size of a standard utility pouch. Every item included must serve a multi-functional purpose, have a stable shelf-life, and be simple enough to use under high-stress conditions without specialized training.
The Danger of DIY and Unregulated Supplies
It is tempting to look for cheap, improvised solutions for dental pain, but doing so can cause permanent damage. Using household glues, industrial epoxies, or non-medical resins to secure loose crowns or fill cavities can introduce toxic chemicals into the oral cavity, destroy the remaining tooth structure, and cause chemical burns to the surrounding gingival tissue. Similarly, importing prescription-strength anesthetics or dental extraction tools from unregulated overseas suppliers poses severe legal and health risks. Stick exclusively to FDA-approved, over-the-counter (OTC) dental materials designed specifically for temporary emergency use.
The Ultimate Emergency Dental Kit Checklist
To ensure you are fully prepared for any oral emergency, use this comprehensive emergency dental kit checklist to source, organize, and maintain your supplies. These items are selected for their safety, legal compliance, compactness, and ease of use in high-stress field conditions.
1. Diagnostics and Personal Protection
- Nitrile Medical Gloves (3-4 pairs): Essential for maintaining a sterile field and protecting both the caregiver and the patient from cross-contamination.
- Anti-Fog Dental Mirror: Allows you to visualize the posterior teeth, upper palate, and sublingual areas clearly without obstructing your light source.
- Compact LED Penlight: Provides targeted, high-intensity illumination inside the dark oral cavity.
- Stainless Steel Dental Probe/Explorer: A double-ended, non-sharp probe used gently to clear food debris from a cavity or check for loose tooth fragments.
2. Temporary Restorations and Sealants
- Zinc Oxide-Eugenol (ZOE) Temporary Cement (e.g., Cavit, Dentemp, or Temparin): This moisture-activated paste is the gold standard for filling empty cavities and securing loose crowns. It sets in the presence of saliva and provides a mild anesthetic effect.
- Orthodontic Silicone Wax: Used to cover sharp, fractured tooth edges or broken orthodontic brackets, preventing painful lacerations to the tongue and cheeks.
- Cotton Rolls and Pellets (Sterile): Crucial for isolating the affected tooth and drying the area before applying temporary filling materials (cement will not adhere to a wet surface).
3. Pain Management and Antiseptics
- Eugenol (Clove Oil): A highly effective, natural local anesthetic and antiseptic. Applying a drop to an exposed nerve provides rapid, temporary relief from throbbing pulpitis.
- Benzocaine Gel (20% concentration): A safe, topical anesthetic used to numb irritated gums, canker sores, or localized soft-tissue trauma.
- OTC Analgesics: A combination of Ibuprofen (NSAID for inflammation) and Acetaminophen (for pain pathways), packaged in waterproof unit-dose blisters.
- Antiseptic Oral Rinse (Chlorhexidine Gluconate or hydrogen peroxide-based): Helps suppress bacterial growth when brushing is difficult or when treating localized gingival infections.
4. Emergency Tooth Preservation
- Hank's Balanced Salt Solution (HBSS) or a dedicated tooth preservation system (e.g., Save-A-Tooth): This specialized fluid keeps the periodontal ligament cells of an avulsed tooth alive for up to 24 hours, dramatically increasing the chances of successful replantation.
- Sterile Saline Wipes/Ampoules: Used to gently rinse dirt and debris from a knocked-out tooth or soft-tissue wound without damaging delicate cellular structures.
Triage: Identifying True Dental Emergencies vs. Manageable Discomfort
In a disaster scenario, medical resources must be rationed. Understanding how to triage oral conditions is vital. You must be able to differentiate between a situation that requires immediate, life-saving medical intervention and one that can be safely managed in the field using your emergency dental kit until professional care becomes available.
| Severity Level | Clinical Presentation | Immediate Field Protocol | Urgency Status |
|---|---|---|---|
| Category 1: Life-Threatening | Swelling extending to the eye or neck, difficulty swallowing or breathing, high fever, uncontrolled hemorrhaging. | Maintain open airway, apply cold compress, seek immediate emergency medical services (EMS). Do not attempt to treat the tooth. | CRITICAL: Immediate evacuation required. |
| Category 2: Urgent Dental | Avulsed (knocked-out) permanent tooth, severe throbbing pain with localized swelling, fracture exposing the pink/red pulp. | Preserve or replant tooth within 30 minutes; apply eugenol to exposed pulp; administer systemic analgesics; monitor for fever. | HIGH: Seek professional care within 24–48 hours. |
| Category 3: Manageable | Lost filling or crown, chipped tooth without pulp exposure, mild gum irritation, loose orthodontic wire. | Clean and dry the area; apply temporary filling cement or orthodontic wax; rinse with antiseptic solution. | LOW: Manage in field; schedule routine care when stable. |
Recognizing the Signs of Systemic Infection
A localized dental infection can quickly turn systemic if left unchecked. You must closely monitor anyone presenting with dental pain for the "Red Flag" symptoms of a spreading infection. If the patient develops a fever over 101°F (38.3°C), visible swelling in the cheek, jawline, or neck, or difficulty fully opening their mouth (trismus), the infection has breached the localized tooth structure. In these scenarios, temporary fillings are useless; the patient requires systemic antibiotics and professional surgical drainage. If you observe swelling that compromises the airway or causes difficulty swallowing, this is a medical emergency of the highest order, requiring immediate evacuation to a hospital emergency department.
Field Tactics: Step-by-Step Emergency Protocols
Possessing an emergency dental kit is only half the battle; you must also know how to apply these materials safely and effectively under field conditions. Below are the standardized, step-by-step protocols for managing the most common dental emergencies you may encounter during a crisis.
Protocol A: Managing a Knocked-Out (Avulsed) Permanent Tooth
When a permanent tooth is completely knocked out of its socket, time is your enemy. The periodontal ligament (PDL) cells clinging to the root of the tooth must remain viable if the tooth is to be successfully replanted. Follow these steps immediately:
- Handle with Care: Retrieve the tooth, touching only the crown (the chewing surface). Never touch, scrape, or scrub the root, as this will destroy the delicate PDL cells.
- Rinse Gently: If the tooth is dirty, rinse it gently for no more than 10 seconds using sterile saline, Hank's Balanced Salt Solution, or clean water. Do not use soap, chemicals, or hot water.
- Attempt Replantation: If the patient is conscious and cooperative, immediately reinsert the tooth back into its socket. Have the patient bite down gently on a sterile gauze pad to hold it in place. This is the absolute best way to preserve the tooth.
- Alternative Preservation: If replantation is not possible (e.g., risk of swallowing or severe jaw trauma), place the tooth immediately into a tooth preservation system containing Hank's Balanced Salt Solution. If this is unavailable, place the tooth in a small container of cold whole milk, or as a last resort, have the patient spit saliva into a cup and submerge the tooth in it. Never store the tooth in dry gauze or plain tap water, as the osmotic pressure will kill the cells.
- Seek Urgent Care: Transport the patient and the preserved tooth to a dental professional immediately.
Protocol B: Replacing a Lost Filling or Securing a Loose Crown
A lost filling or dislodged crown leaves the underlying dentin exposed to thermal, chemical, and mechanical stimuli, causing sharp, localized pain. To temporarily seal the tooth:
- Clean the Cavity: Use your dental mirror and probe to gently remove any food debris or loose fragments from the cavity or the inside of the crown.
- Dry the Area Thoroughly: This is the most critical step. Isolate the tooth with sterile cotton rolls and use cotton pellets to dry the cavity completely. Temporary cements will fail to adhere if the surface is wet with saliva.
- Prepare the Material: If using a pre-mixed temporary cement (like Cavit or Dentemp), scoop a small amount onto your dental spatula. If using a two-part mix, follow the manufacturer's instructions to achieve a putty-like consistency.
- Apply and Pack: Carefully pack the cement into the cavity, or apply a thin layer inside the hollow of the loose crown. Place the crown back onto the prepped tooth.
- Adjust the Bite: Have the patient bite down gently but firmly. Ensure the temporary material is flush with the tooth surface and does not interfere with their natural bite. Use a cotton pellet or your probe to scrape away any excess cement before it fully hardens.
- Set and Cure: Instruct the patient to avoid chewing on that side of their mouth for at least one hour to allow the material to fully cure.
Protocol C: Managing a Fractured Tooth with an Exposed Nerve
A deep tooth fracture that exposes the internal dental pulp (characterized by a visible red or bleeding dot in the center of the white tooth structure) is incredibly painful. Air, cold water, and touch will trigger intense muscle spasms and throbbing pain. To stabilize this injury:
- Control Bleeding: Have the patient bite down on sterile gauze to control any bleeding from the tooth pulp or surrounding gums.
- Soothe the Nerve: Saturate a tiny sterile cotton pellet with Eugenol (clove oil). Using tweezers, gently place this pellet directly onto the exposed pulp chamber. Eugenol acts as a powerful local anesthetic and anti-inflammatory agent.
- Seal the Fracture: Once the pain has subsided slightly, carefully cover the cotton pellet and the fractured surface with temporary filling material to seal out air and bacteria. If the fracture has left sharp enamel edges that are lacerating the tongue, cover those edges with orthodontic silicone wax.
- Systemic Support: Administer a combination of Ibuprofen and Acetaminophen to manage the underlying inflammatory pain pathways.
Legalities, Ethics, and Safety Boundaries in Field Dentistry
When providing emergency dental care in a disaster or off-grid environment, you must operate within strict ethical and legal boundaries. The legal doctrine of the "Good Samaritan" typically protects individuals who provide reasonable, non-negligent emergency care to save a life or prevent further harm. However, this protection rarely extends to performing invasive dental procedures—such as attempting to extract a tooth, lancing a deep tissue abscess, or administering local anesthetic injections—unless you hold an active, valid professional license in that jurisdiction.
Beyond the legal risks, the medical dangers of DIY "battlefield dentistry" are immense. For example, attempting to extract a severely decayed tooth with pliers can easily fracture the tooth root, leaving infected fragments embedded deep within the alveolar bone. This can lead to a massive, uncontrollable bone infection (osteomyelitis) or severe hemorrhaging that is impossible to control without specialized surgical tools. Your role as a prepared citizen or first responder is strictly limited to stabilization and preservation. Your objective is to buy the patient time until they can safely reach a licensed dental professional.
Maintaining Your Dental Preparedness Kit
Like any critical emergency resource, an emergency dental kit is not a "set-it-and-forget-it" asset. Many of the specialized materials used in temporary dental restorations are sensitive to temperature fluctuations, moisture, and time. To ensure your kit remains fully operational when you need it most, implement a strict maintenance schedule.
- Check Expiration Dates: Temporary filling cements (like Cavit) and tooth preservation fluids have a finite shelf life—typically between 12 to 24 months. Mark these dates clearly on the outside of your kit and replace expired items promptly.
- Monitor Temperature: Avoid storing your dental kit in areas subject to extreme heat or freezing temperatures, such as a vehicle trunk during mid-summer or mid-winter. High heat can cause eugenol to degrade, temporary cements to dry out and harden prematurely, and sterile packaging to fail.
- Inspect Seals: Periodically inspect the waterproof seal of your kit's container. Moisture intrusion can ruin cotton rolls, degrade sterile gauze, and cause pre-mixed cements to cure inside their tubes.
True emergency preparedness is defined by your ability to manage the unexpected, high-consequence vulnerabilities that others overlook. A severe dental injury in the field can transform an otherwise manageable survival situation into a agonizing, high-risk medical crisis. By understanding the clinical progression of oral trauma, sourcing a safe, legal, and compact emergency dental kit, and mastering basic stabilization protocols, you transform yourself from a potential casualty into a resilient, capable asset. Equip yourself with the right tools, respect the boundaries of safe care, and ensure that a single broken tooth never stands between you and your survival.
Frequently Asked Questions
What should a emergency dental kit plan include?
Start with the immediate safety steps, the supplies and records your household needs, a communication plan, and a regular review schedule. Follow local official guidance during an active emergency.
How often should I review emergency dental kit preparations?
Review them at least twice a year and whenever your household, medication, location, or local risks change. Replace expired supplies and practice key steps.
Where can I find reliable emergency guidance?
Use local emergency management alerts and established public-health or emergency-management agencies. A blog guide should support, not replace, official real-time instructions.