⚡ Key Facts
- 10 to 15 Minutes: According to the National Oceanic and Atmospheric Administration (NOAA), this is the average lead time for a tornado warning, leaving zero margin for hesitation when selecting a shelter. For the practical checklist side, use the community emergency preparedness guide.
- The 2-Hour Limit: The Centers for Disease Control and Prevention (CDC) advises that a sealed "safe room" during a chemical emergency should only remain taped shut for up to 2 to 3 hours to prevent carbon dioxide buildup. For the practical checklist side, use the neighborhood preparedness network.
- Mass Equals Protection: During a radiological event, FEMA states that dense materials like concrete, brick, and earth can block up to 99% of external gamma radiation if you position yourself correctly. For the practical checklist side, use the family emergency planning guide.
- Preparedness Gap: Federal Emergency Management Agency (FEMA) surveys reveal that while 80% of Americans live in counties hit by a natural disaster, less than 50% have a dedicated family emergency plan.
Imagine sitting in your home or office when a sudden, high-pitched tone blares from your smartphone. The Emergency Alert System screen flashes: "Shelter in place immediately. Seek indoor shelter now." In that critical moment, your survival depends entirely on your ability to translate that single command into the correct physical action. The phrase "shelter in place" is not a singular, uniform directive; rather, it is a highly contextual mandate. Sheltering from a Category 4 hurricane requires an entirely different structural strategy than shielding yourself from an airborne industrial chemical plume or an active violence threat. Misunderstanding these nuances can lead to catastrophic errors. This guide establishes the definitive, agency-backed protocols to help you differentiate indoor sheltering scenarios and execute a precise, time-bounded response when every second counts.
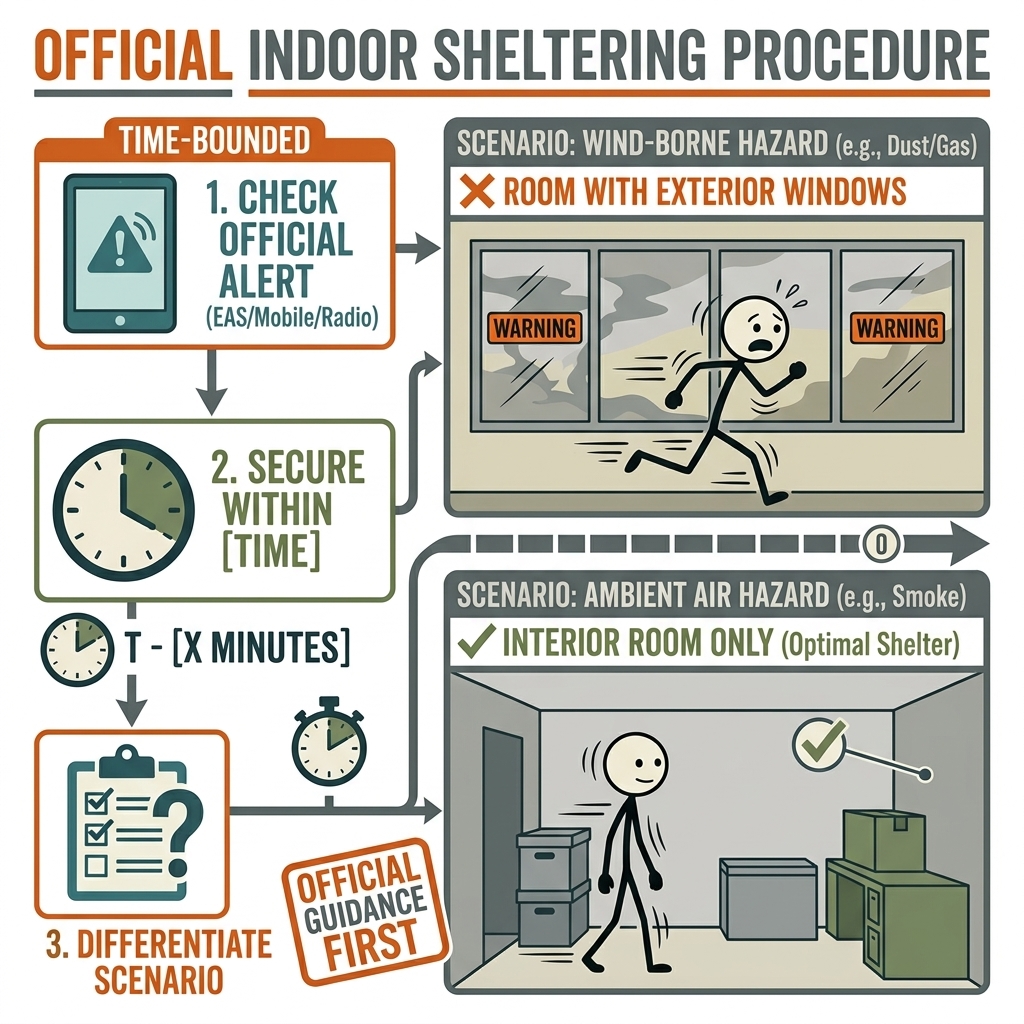
1. Decoding "Shelter in Place" – The Four Core Scenarios
To execute an effective emergency shelter in place strategy, you must first identify the nature of the hazard. Federal agencies, including the Environmental Protection Agency (EPA), the Occupational Safety and Health Administration (OSHA), and the Federal Emergency Management Agency (FEMA), categorize indoor sheltering into four primary operational profiles. Each profile demands a unique physical posture, room selection, and environmental seal protocol.
Scenario A: Hazardous Materials (HazMat) and Chemical Plumes
Whether caused by a train derailment, an industrial plant explosion, or a terrorist incident, airborne chemical agents present an immediate threat to your respiratory system. In this scenario, your primary objective is to isolate your indoor air volume from the toxic outdoor atmosphere.
According to the CDC and the EPA, chemical agents can be heavier than air or lighter than air. However, as a general rule of emergency preparedness, you should choose an interior room on the highest floor of the structure (unless official guidance specifies otherwise). Because many toxic industrial chemicals sink to ground level, subterranean basements are highly vulnerable to pooling gases. Your selected "safe room" should have as few windows and doors as possible, and you must be prepared to seal all air entry points mechanically.
Scenario B: Severe Weather and High Winds (Tornadoes and Hurricanes)
When the threat is mechanical—such as the 200+ mph winds of an EF5 tornado or the sustained forces of a major hurricane—your enemy is structural failure and flying debris. The National Weather Service (NWS) and NOAA emphasize that vertical and horizontal displacement are your primary shields.
Unlike a chemical scenario, you must head to the lowest level of the building, preferably a basement or storm cellar. If a subterranean space is unavailable, your target is an interior room on the lowest floor, such as a hallway, bathroom, or closet. You must put as many walls between yourself and the exterior of the building as possible. In this scenario, sealing air vents is useless; instead, your focus is on physical reinforcement and avoiding window glass, which can turn into lethal shrapnel under high wind pressures.
Scenario C: Radiological or Nuclear Incidents
A radiological dispersal device (RDD or "dirty bomb") or a nuclear detonation requires an immediate posture based on three physics-based principles: Shielding, Distance, and Time. FEMA and the Environmental Protection Agency (EPA) advise that your shelter selection must prioritize material density.
In a radiological scenario, you must get inside, stay inside, and stay tuned. The ideal shelter is the basement of a brick or concrete building, or the center-most room of a multi-story high-rise. Heavy materials like thick concrete, brick, stone, and earth absorb ionizing radiation. Unlike a chemical event, your primary concern is not sealing out microscopic gas molecules, but rather putting maximum mass between yourself and the settling radioactive fallout outside. You must remain in this shielded posture until officials conduct radiation mapping and declare evacuation routes safe.
Scenario D: Active Threat and Civil Disturbance
When the hazard is human-centric—such as an active shooter or violent civil unrest—the Cybersecurity and Infrastructure Security Agency (CISA) and the FBI dictate a "Run, Hide, Fight" framework. When evacuation is impossible, your indoor shelter becomes your defensive fortification.
Your shelter room must be highly securable. It should have heavy doors that lock from the inside, no windows (or windows that can be completely blacked out), and structural elements that can support a heavy barricade. In this scenario, environmental sealing is irrelevant; your priorities are silence, concealment, ballistics protection, and rapid access control.
---2. The Time-Bounded Protocol (0 to 12+ Hours)
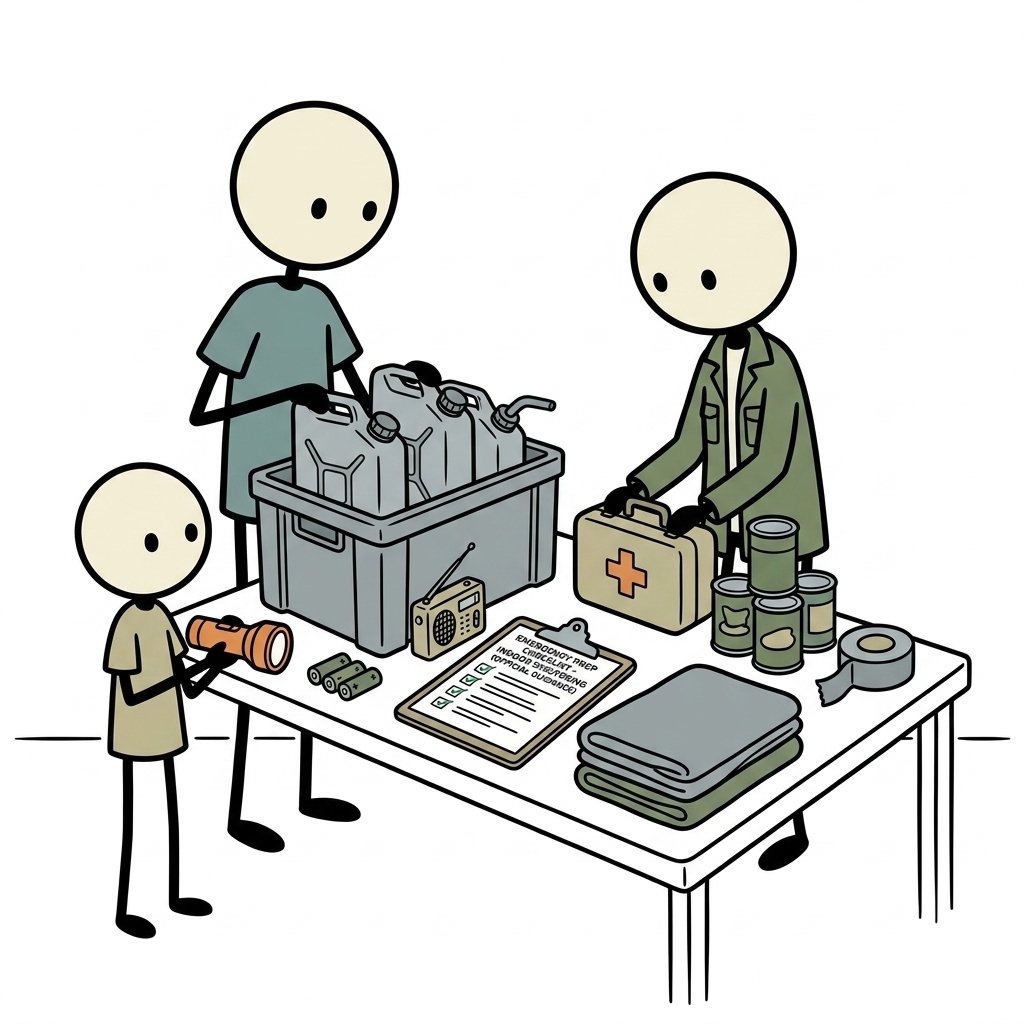
When an emergency shelter in place order is issued, panic is your greatest enemy. Having a time-bounded, step-by-step procedure ensures that you execute lifesaving actions in order of priority. This official-guidance-first timeline outlines exactly what to do from the first seconds of an alert up to the 12-hour mark.
Phase 1: The Golden 15 Minutes (Immediate Action & Assessment)
The first fifteen minutes of an emergency shelter in place event dictate your overall survival probability. This is the phase where you analyze the threat, secure your perimeter, and move occupants to safety.
- Minute 0 to 3: Identify and Select. Read the emergency alert carefully. Determine if the threat is atmospheric (chemical/radiological), meteorological (wind/tornado), or human (active threat). Instantly designate your shelter room based on the criteria in Section 1.
- Minute 3 to 7: Secure the Building Envelope. If dealing with an atmospheric threat, immediately shut down all HVAC systems. Turn off air conditioners, furnaces, heat pumps, and exhaust fans. Close all fireplace dampers. If the threat is severe weather or an active shooter, lock all exterior doors and windows to reinforce the building's structural integrity or security.
- Minute 7 to 12: Assemble Occupants and Pets. Gather all family members, coworkers, and pets. Instruct everyone to move to the designated shelter room. Ensure everyone has their mobile devices, but instruct them to switch them to silent or vibrate mode if sheltering from an active threat.
- Minute 12 to 15: Grab the Emergency Kit. Retrieve your pre-positioned emergency kit. If you do not have a dedicated kit, grab essential life-support items: water, a flashlight, a first-aid kit, and a hard-copy emergency shelter in place checklist. Enter the shelter room and close the door.
Phase 2: Hour 1 (Environmental Defense & Stabilization)
Once inside the shelter room, your focus shifts to stabilizing your immediate environment and establishing emergency communication plan channels with emergency services.
If you are sheltering from a chemical or hazardous material plume, this is the window where you must execute the "seal the room" protocol. Using pre-cut plastic sheeting (4-mil or thicker) and heavy-duty duct tape, seal all windows, doors, and vents. Tape the plastic over the entire opening, securing all four sides to prevent air exchange. Place wet towels along the gap at the bottom of the door to block drafting currents.
If you are sheltering from severe weather, use this hour to protect your body. Cover yourself with mattresses, thick blankets, or sleeping bags to shield against falling debris. If sheltering from a radiological threat, stay as close to the center of the room or basement as possible, avoiding exterior walls. Monitor your NOAA Weather Radio or local emergency management social media feeds for real-time updates.
Phase 3: Hours 2 to 12+ (Sustained Endurance & Mitigation)
Beyond the two-hour mark, your actions transition from active defense to resource management and physical monitoring. This phase requires discipline, situational awareness, and strict adherence to official broadcast instructions.
If you sealed your room for a chemical hazard, pay close attention to the clock. The CDC warns that sealing a room hermetically can lead to carbon dioxide buildup over extended periods. If local officials announce that the chemical plume has passed, you must immediately unseal the room, open all windows, and turn on ventilation systems to flush out any trapped contaminants. Do not leave the building entirely unless instructed to evacuate.
For radiological, severe weather, or active threat scenarios, you may need to remain in your shelter for 12 hours or more. During this time, conserve your water and food resources. Maintain hygiene using emergency sanitation setups, manage stress through breathing exercises, and keep communication lines open but clear of non-essential traffic to preserve device batteries.
---3. The Ultimate Emergency Shelter in Place Checklist
When executing an emergency shelter in place emergency preparedness plan, you cannot rely on memory. Having a physical, laminated checklist stored with your emergency supplies ensures that you do not overlook critical steps under stress. Use this comprehensive checklist to audit and assemble your shelter-in-place gear before a crisis occurs.
| Category | Essential Items | Operational Purpose |
|---|---|---|
| Environmental Sealing | Heavy-duty duct tape (2-inch width), plastic sheeting (4-mil to 6-mil thickness, pre-cut to window/door dimensions), utility knife, heavy towels. | Used to create a mechanical barrier against airborne chemical, biological, or radiological contaminants. |
| Hydration & Nutrition | 1 gallon of water per person per day (minimum 3-day supply), non-perishable high-calorie food bars, manual can opener. | Sustains metabolic function when municipal water systems are compromised or contaminated. |
| Communication | NOAA Weather Radio (hand-crank or battery-powered), extra batteries, fully charged power banks, whistle, permanent marker. | Provides access to life-saving emergency broadcasts and allows you to signal rescuers if trapped. |
| Medical & Hygiene | Comprehensive first-aid kit, 14-day supply of critical prescription medications, wet wipes, heavy-duty trash bags, 5-gallon bucket with lid. | Treats trauma injuries and provides an emergency sanitation system when plumbing is unusable. |
| Personal Protection | N95 or HEPA-rated respirators, safety goggles, heavy leather work gloves, sturdy closed-toe shoes. | Protects your eyes, respiratory tract, and limbs from dust, glass, and particulate debris. |
4. Building-Specific Adaptation Protocols
A standard suburban home offers a different set of sheltering challenges than a high-rise downtown apartment or a sprawling commercial office building. To ensure your emergency shelter in place emergency preparedness plan is robust, you must adapt your strategy to your specific architectural environment.
High-Rise Apartments and Condominiums
If you live in a multi-story residential building, you cannot easily access a traditional basement during a tornado or radiological event. In this case, your primary shelter zone should be the building's central stairwell or an interior hallway on the lowest floor possible.
Stairwells are engineered with reinforced concrete and structural steel to withstand immense loads and prevent collapse. Avoid elevators at all costs; power failures can trap you between floors. For chemical events, remember that high-rise buildings experience the "stack effect," where air moves rapidly upward through vertical shafts. Ensure your apartment's interior safe room is located away from elevator shafts and utility chases.
Commercial Office Buildings
In a corporate office environment, the sheer volume of occupants and complex HVAC systems complicate sheltering. Your organization should designate specific "floor wardens" who are trained to shut down building-wide HVAC systems immediately upon receiving a HazMat alert.
For severe weather, move away from perimeter offices with floor-to-ceiling glass. Relocate all staff to interior conference rooms, restrooms, or reinforced core corridors. In active threat scenarios, office workers should utilize heavy conference tables and filing cabinets to barricade doors, turn off all overhead lights, and disperse throughout the room rather than clustering in one corner.
Suburban Single-Family Homes
Suburban homes typically feature wood-frame construction, which offers minimal protection against high winds or radiological fallout unless a concrete basement is present. If your home lacks a basement, your best shelter is a central bathroom, closet, or hallway on the ground floor.
To prepare your home for a chemical emergency, pre-cut your plastic sheeting to fit each window and vent in your designated safe room ahead of time. Label each piece of plastic (e.g., "North Window," "Bathroom Vent") so that you do not waste precious minutes measuring and cutting material during an active crisis.
---5. Crucial Pitfalls and Myths Debunked
In the field of emergency preparedness, misinformation can be fatal. Several persistent myths surrounding indoor sheltering continue to circulate. Addressing these misconceptions with hard data and official agency guidelines is essential for maintaining operational safety.
Myth 1: "I should open my windows during a tornado to equalize pressure."
This is a highly dangerous myth that was debunked by the National Weather Service decades ago. Opening windows does not prevent a building from exploding due to pressure changes; instead, it allows high-velocity winds to enter the structure directly. This internal wind pressure lifts roofs and blows out interior walls, dramatically accelerating structural collapse. Keep all windows closed and locked to maintain structural integrity.
Myth 2: "Duct tape and plastic sheeting will protect me from radiological fallout."
Plastic sheeting and duct tape are designed to block particulate matter and gases; they have zero shielding capacity against ionizing radiation, such as gamma rays. Attempting to seal a room with plastic during a nuclear event is a waste of critical time. Your only defense against radiation is mass (concrete, brick, dirt) and distance. Focus on moving to the deepest subterranean area available.
Myth 3: "I should stay in my sealed chemical room until I feel it is safe to come out."
As established by the CDC and OSHA, you must never remain in a sealed "safe room" indefinitely. Standard rooms contain a finite volume of oxygen. As you breathe, oxygen levels deplete and carbon dioxide levels rise. This is why official guidelines stress that sealing a room is a temporary measure designed to let a concentrated toxic plume pass over your location. Keep your emergency radio on, and unseal the room the moment authorities declare the outdoor air is clear.
---6. The Empowered Path to Resilience
True emergency preparedness is not defined by fear, but by decisive, structured action. When an emergency shelter in place order is issued, you are not helpless; you are simply transitioning to a controlled, defensive posture. By understanding the distinct physical requirements of chemical, meteorological, radiological, and human threats, you remove the hesitation that costs lives. Take the time today to audit your physical space, print your emergency shelter in place checklist, and run a simple 15-minute sheltering drill with your household or team. The confidence you build through proactive planning today will be the anchor that keeps you safe when the sirens blow tomorrow.
Frequently Asked Questions
What should a emergency shelter in place plan include?
Start with the immediate safety steps, the supplies and records your household needs, a communication plan, and a regular review schedule. Follow local official guidance during an active emergency.
How often should I review emergency shelter in place preparations?
Review them at least twice a year and whenever your household, medication, location, or local risks change. Replace expired supplies and practice key steps.
Where can I find reliable emergency guidance?
Use local emergency management alerts and established public-health or emergency-management agencies. A blog guide should support, not replace, official real-time instructions.