⚡ Key Facts
- According to the National Fire Protection Association (NFPA), portable fire extinguishers successfully extinguish or contain 95% of household fires when operated correctly during their initial stages.
- The U.S. Fire Administration (USFA) notes that home fires claim thousands of lives and cause billions in property damage annually, with cooking remaining the leading cause of residential structure fires.
- Over 30% of residential fire extinguishers inspected in post-incident reviews were partially depressurized, blocked by clutter, or mechanically compromised due to a lack of routine inspection.
- Dry chemical extinguishing agents can settle and compact over time due to micro-vibrations and gravity, potentially hindering discharge if not inverted periodically.
- A systematic monthly fire extinguisher check requires zero specialized tools, takes less than 300 seconds, and forms the bedrock of an effective household emergency readiness posture.
Picture an ordinary Tuesday evening: a skillet left unattended for forty seconds suddenly flares into an aggressive grease fire, scorching the kitchen cabinets and rolling toward the ceiling. In that pulse-spiking moment, your survival plan boils down to three physical paces across the room, the grip of your hand on a metal handle, and the single compression of a lever. Now picture squeezing that trigger and feeling only a pathetic hiss of escaping nitrogen while the chemical agent remains cemented at the bottom of a dead canister. Equipment failure at the point of friction is not bad luck—it is the predictable outcome of neglected preventative maintenance. By integrating a disciplined monthly fire extinguisher check into your household cadence, you convert an uncertain metal cylinder into a verified life-safety asset. For the practical checklist side, use the community emergency preparedness guide.
The Hidden Mechanics of Extinguisher Failure
Most homeowners assume a fire extinguisher is a static, buy-it-and-forget-it appliance that stays indefinitely dormant until summoned. In reality, a portable extinguisher is a pressurized mechanical system held under continuous stress, vulnerable to thermal expansion, ambient humidity, vibrational packing, and chemical settling. Understanding how these units degrade explains why visual and physical audits are non-negotiable components of reliable fire extinguisher maintenance. For the practical checklist side, use the neighborhood preparedness network.
Most residential units rely on a stored-pressure configuration where dry chemical powder—typically monoammonium phosphate for Class ABC models or sodium bicarbonate for specific Class BC models—is kept suspended under an inert gas blanket, usually nitrogen, pressurized between 100 and 195 pounds per square inch (PSI). Over months of seasonal temperature swings, the mechanical rubber O-rings around the valve assembly subtly contract and expand. This thermal cycling can permit microscopic propellant leaks that do not register during a casual glance across the room, but silently sap the unit of the kinetic force required to expel the agent across a room. For the practical checklist side, use the emergency communication plan.
Furthermore, gravity and environmental vibrations—from passing traffic, slamming doors, or nearby laundry machines—cause the fine chemical particles inside the canister to settle downward, compacting into a dense, chalk-like cake at the base of the cylinder. If fired in this state, the pressurized gas may tunnel through the center of the caked agent, leaving the bulk of the suppressant trapped inside while expelling only an ineffective puff of nitrogen. Routine fire extinguisher inspection at home interrupts this compaction process, restoring the chemical to a fluid, aerated state ready for deployment. For the practical checklist side, use the family emergency planning guide.
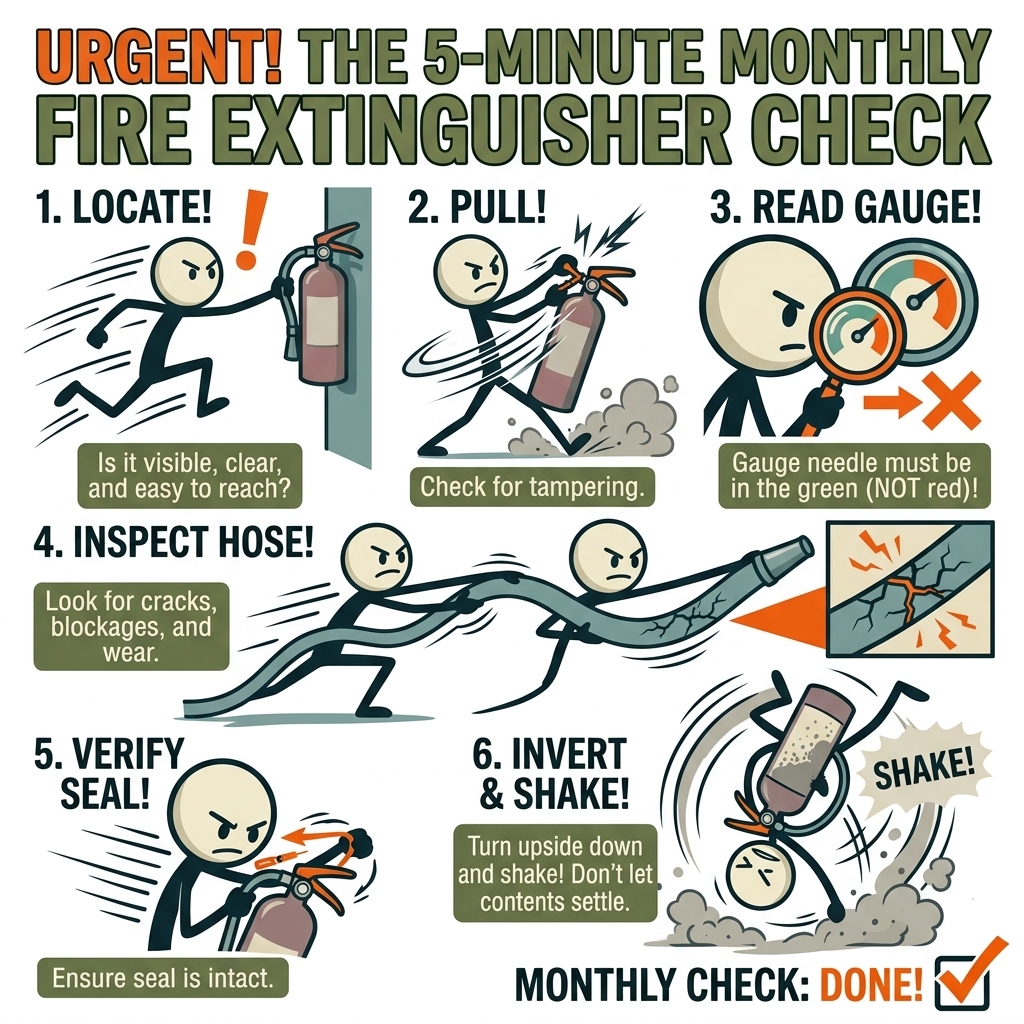
The 5-Minute Step-by-Step Inspection Checklist
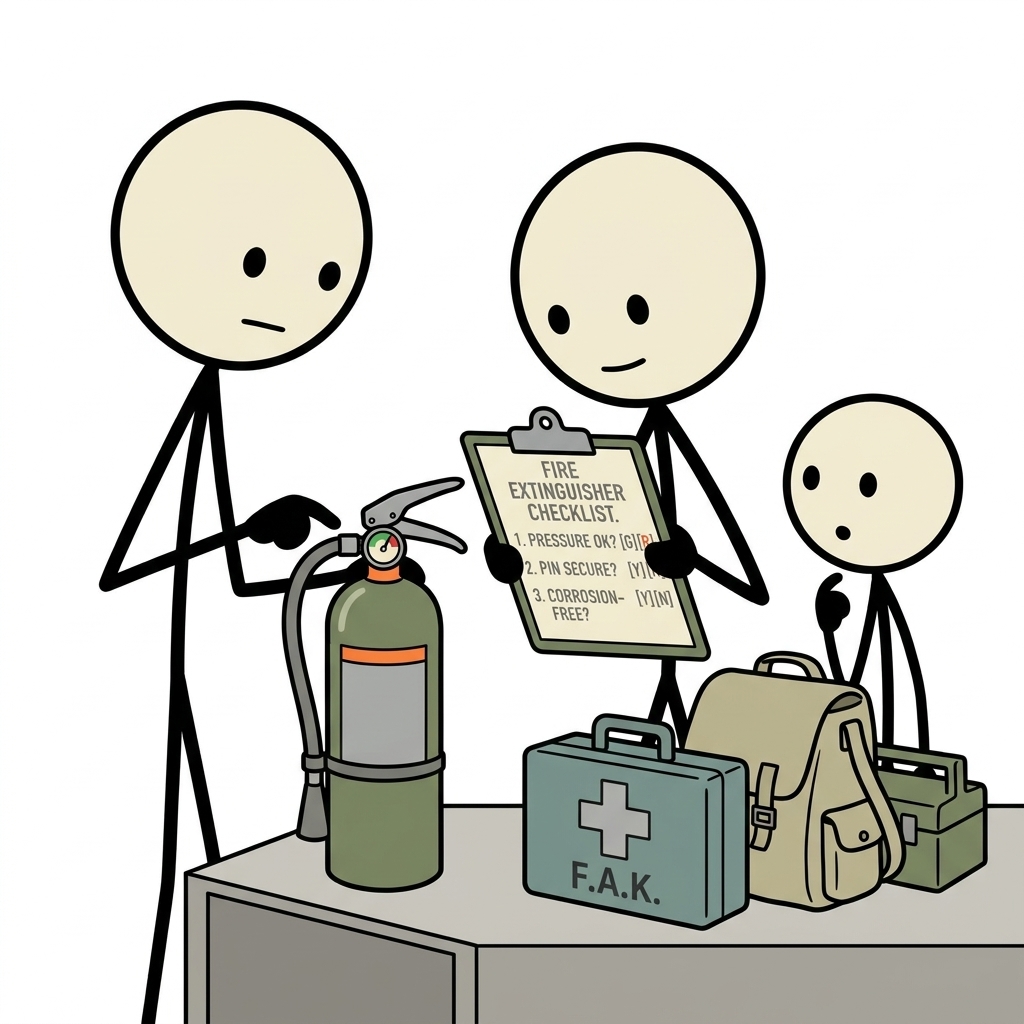
Conducting this life-safety evaluation does not require technical certification, specialized equipment, or disassembly. It requires deliberate observation, a basic understanding of mechanical components, and a systematic workflow. Follow this sequential protocol for every extinguisher in your home once every thirty days to build an airtight home fire safety checklist.
Step 1: Verify Unobstructed Access and Environmental Positioning (Minute 1)
Emergency gear is completely useless if it is inaccessible during an escalating structural event. Begin your monthly evaluation by observing how the extinguisher sits within its operating environment. Under guidance from both the Federal Emergency Management Agency (FEMA) and NFPA 10 standards, portable extinguishers must remain along an unimpeded exit pathway rather than tucked deep inside closets, buried beneath winter coats, or hidden behind heavy pantry storage bins.
- Clear the Path: Ensure a 36-inch clearance zone around the canister, allowing you to reach and retrieve the device in a zero-visibility or smoke-stratified scenario.
- Height and Mounting: Confirm that the wall bracket or cabinet hanger is structurally secure. Units weighing under 40 pounds should have their handles mounted between 3.5 and 5 feet off the floor to prevent tipping hazards and ensure comfortable reach for all adult family members.
- Thermal Hazards: Verify that the extinguisher is not positioned immediately adjacent to high-heat appliances, such as ovens, space heaters, or furnace flues, which degrade internal seals and over-pressurize the cylinder.
Step 2: Inspect Physical Integrity, Shell, and Fasteners (Minute 2)
Transition from the environment directly to the vessel itself. Pick up the unit and inspect the exterior shell under clear lighting, scanning for structural anomalies that could compromise cylinder integrity under pressure.
Look closely for blistering paint, rust patches, or pitted metal, particularly along the bottom rim and the circumferential weld seam where moisture accumulates. A corroded cylinder is a rupture hazard under high pressure. Inspect the operating lever, carrying handle, and valve assembly for cracks, bending, or excessive dust collection. If your extinguisher resides in an unconditioned workshop or humid garage, wipe down the exterior with a dry cloth to prevent chemical residue from eating through the clear-coat protection.
Step 3: Analyze the Pressure Indicator (Minute 3)
The pressure gauge is the diagnostic window into the health of your stored-pressure vessel. The gauge face features a calibrated dial with a distinct central green sector bordered by lower ("Recharge") and upper ("Overcharged") red quadrants.
- The Operable State: The needle must rest cleanly within the green zone. This indicates that internal pressure matches factory specifications, providing the design discharge velocity of 10 to 20 feet.
- Under-pressurized Defect: If the needle lists into the left-hand red field, the canister has lost its propellant blanket. Even if the unit feels heavy, it will fail to propel the agent across the minimum standoff distance, forcing the operator dangerously close to the thermal column.
- Overcharged Condition: If the needle leans into the right-hand red zone, excessive pressure has built up—frequently caused by elevated ambient heat. This introduces the risk of valve failure or erratic discharge dynamics upon activation.
Note on Small Disposable Units: Some lightweight aerosol-style or consumer extinguishers lack an analog needle dial, featuring instead a spring-loaded plastic push-button indicator. For these, depress the button with your thumb; if it pops back up immediately, pressure is intact. If it stays depressed, the internal pressure has dissipated.
Step 4: Audit the Locking Pin and Tamper Seal (Minute 4)
Every functional fire extinguisher features two interrelated security safeguards: a metal or heavy polymer pull pin (ring pin) that physically locks the discharge lever, and a thin plastic tamper seal (breakaway tie) wrapped through the pin and around the valve neck.
Verify that the pull pin is fully seated through both the upper trigger lever and lower carrying handle, preventing accidental discharge during transit. Inspect the plastic tamper seal to confirm it remains unbroken, taut, and intact. If the seal is snapped, missing, or loosely draped, someone may have discharged a test burst or tampered with the mechanism. In a stored-pressure model, even a quarter-second squeeze breaks the valve seal, releasing the propellant over the following 72 hours and rendering the unit useless.
Step 5: The Inversion Maneuver and Nozzle Inspection (Minute 5)
The final operational phase addresses the condition of the dry chemical suppressing agent and the discharge pathway. Take the canister firmly by the lower body with one hand and the carrying handle (not the trigger) with the other.
Slowly tilt the extinguisher upside down, holding it inverted for roughly five to eight seconds before returning it upright. Repeat this cycle two to three times. On dry chemical models, you will feel a distinctive, subtle shifting or sliding thud inside the canister. That tactile sensation is the compressed powder bed breaking free, falling through the nitrogen blanket, and re-fluidizing. This simple movement prevents agent solidification and ensures immediate suspension during discharge.
Next, look straight down the discharge hose or fixed nozzle opening. Spiders, dirt-dauber wasps, and household lint routinely nest inside the narrow orifices of extinguisher horns and nozzles. A blockage creates a high-pressure obstruction that can split the hose or vent the agent sideways into the operator's face. Clear any detritus using an unbent paperclip or a quick blast of compressed air; never insert sharp tools deeply into the mechanical valve seat.
Class ABCs: Matching Equipment to Household Zones
Executing an effective emergency preparedness home check requires confirming that you have the right class of suppressant deployed in the right spaces. Extinguishers carry standardized letter classes indicating the specific fuel categories they neutralize. Inspecting your units includes verifying that each room is backed by an appropriately rated agent.
| Class Rating | Target Fuel Source | Optimal Household Location |
|---|---|---|
| Class A | Ordinary combustibles: wood, paper, cardboard, textiles, plastics | Living rooms, bedrooms, home offices |
| Class B | Flammable liquids: gasoline, motor oil, paint thinners, kerosene | Garages, utility sheds, basements |
| Class C | Energized electrical equipment: panels, wiring, computers, appliances | Server closets, workshops, laundry rooms |
| Class K | High-temperature cooking media: commercial oils, animal fats, vegetable shortenings | Gourmet kitchens, deep-fryer staging zones |
For generalized residential protection, the American Red Cross recommends multi-purpose Dry Chemical Class ABC extinguishers. However, in modern residential kitchens, dry chemical ABC extinguishers can struggle against high-temperature deep-fat fryers because the chemical does not cool the fuel bed, risking immediate re-ignition. Consider pairing your standard kitchen unit with a dedicated Class K wet-chemical device or an appropriately sized fire blanket for stovetop oil fires.
Rechargeable vs. Disposable: Knowing Your Device's Lifespan
Not all extinguishers are engineered for multi-decade duty cycles. A key element of responsible fire extinguisher maintenance is identifying whether your hardware is serviceable or disposable, which determines your protocol when a unit fails inspection.
Disposable (Non-Rechargeable) Units
Disposable units are readily identified by their lightweight construction, plastic valve assemblies, and non-threaded nozzles. These consumer models carry a maximum service life of 12 years from their stamped manufacture date (located on the bottom edge or lower rim of the cylinder label). Once discharged—even for a partial second—or once the pressure drops into the red zone, they cannot be refilled. They must be safely depressurized and recycled through your municipal household hazardous waste collection program.
Rechargeable (Serviceable) Units
Serviceable units feature machined metal valve bodies (typically forged brass or cast aluminum), metal operating levers, and distinct threaded coupling collars. These units can be recharged indefinitely by a licensed fire equipment contractor. In alignment with NFPA 10 standards, rechargeable dry chemical cylinders require a professional 6-year internal teardown maintenance and a 12-year hydrostatic pressure test to confirm cylinder wall elasticity. If your rechargeable unit indicates depressurization, drop it off at a local fire protection dealer for an inexpensive refill and recertification rather than discarding it.
Establishing the Household Readiness Habit
Knowledge is purely theoretical until it is anchored into an ironclad domestic routine. Five minutes once a month is an exceptionally modest commitment, yet it demands structural consistency. Pair your monthly fire extinguisher check with an established recurring event: the first calendar day of the month, during monthly smoke and carbon monoxide detector tests, or alongside home air filter replacements.
Attach a physical inspection tag—a simple index card wrapped in clear tape or a traditional cardstock tag secured by a zip tie—to each cylinder neck. Record the date, the gauge status (Pass/Fail), and your initials after completing the 5-step loop. This written record does more than track equipment age; it forces you to lay hands on the device, reinforcing its spatial location in your subconscious memory. When adrenaline surges during an actual residential emergency, your hands will find the equipment through habit rather than panic.
The Complete Fire Readiness Mindset
Conducting regular equipment reviews is essential, but equipment constitutes only half of the life-safety equation. Even the most perfectly maintained 10-pound ABC extinguisher is an instrument with clear, non-negotiable limitations. A standard residential extinguisher provides approximately 10 to 18 seconds of continuous discharge time. It is engineered to knock down an incipient, localized fire—not to combat a room transitioning toward flashover.
Every adult and capable teenager in your home should understand the standard operating methodology, universally remembered through the PASS protocol endorsed by the U.S. Fire Administration:
- P - Pull the pin: Twist the plastic tamper seal to break it, then firmly draw the ring pin out of the valve assembly.
- A - Aim low: Point the discharge nozzle or flexible hose directly at the base of the flames, not into the dynamic smoke plume or upper flame tips.
- S - Squeeze the handle: Compress the upper lever smoothly downward to actuate the internal stem valve and release the agent.
- S - Sweep side to side: Move the nozzle across the width of the burning material in deliberate, steady motions until the fuel bed is completely blanketed.
Critically, never position yourself in a corner or tight interior pocket where the fire can cut off your means of egress. Always face the hazard with your back unobstructed toward a clear exit door. If your first attempt to knock down the flames does not suppress the combustion event within ten seconds, abandon the extinguisher, close the door behind you to limit oxygen supply, and execute your family family emergency plan immediately.
Empowering Household Resilience
Disaster mitigation is not defined by elaborate defensive bunkers or expensive tactical acquisitions; it is built on the quiet, uncelebrated mastery of basic preventative maintenance. When structural fires break out, the temporal window between an easily manageable incident and a devastating domestic catastrophe is measured in double-digit seconds. By taking five minutes once a month to inspect, invert, and verify your portable extinguishers, you systematically eliminate mechanical failure from your emergency equation. You guarantee that when an unexpected ignition occurs, your primary suppression tools will function precisely as designed—granting you the decisive upper hand when your home and family need it most.
Frequently Asked Questions
How often should I inspect my home fire extinguisher?
You should perform a visual inspection at least once every 30 days to ensure the unit is accessible, fully pressurized, and physically undamaged.
How do I read the fire extinguisher pressure gauge?
Check the dial on the pressure gauge; the indicator needle must rest squarely in the green operating zone, indicating the unit has proper operational pressure.
Do residential fire extinguishers expire?
Yes. Most disposable dry chemical extinguishers have a service life of 10 to 12 years from the date of manufacture, after which they should be replaced.
What physical defects should I look for during an inspection?
Inspect for rust, dents, a cracked or clogged nozzle hose, missing pull pins, broken tamper seals, and any evidence of chemical leakage.
What should I do if a fire extinguisher has been discharged even briefly?
Any extinguisher that has been partially discharged must be professionally recharged or replaced immediately, as pressure will gradually leak out and render it useless.