⚡ Key Facts: Winter Plumbing Defense
- Catastrophic Pressure Dynamics: Water expands by roughly 9% upon freezing, generating hydrostatic pressures exceeding 40,000 psi inside sealed pipe runs—far beyond the 300 to 1,000 psi burst tolerance of residential copper and PEX lines.
- The 20-Degree Threshold: The Insurance Institute for Business & Home Safety (IBHS) identifies 20°F (-6°C) as the critical ambient exterior threshold where uninsulated residential pipes enter the acute freezing danger zone.
- Thermal Envelope Decay: During winter grid failures, standard modern homes lose between 1°F and 3°F of indoor ambient temperature per hour, meaning indoor plumbing infrastructure can plunge to freezing levels within 12 to 24 hours of sustained power loss.
- Rupture Losses: The Federal Emergency Management Agency (FEMA) notes that a single 1/8-inch rupture in a pressurized pipe can discharge up to 250 gallons of water per day, causing an average of over $15,000 in structural damage.
- Fire Hazards from Thawing: The National Fire Protection Association (NFPA) warns that open-flame torches cause hundreds of residential structural fires annually when homeowners attempt to thaw plumbing using unapproved heating sources.
When an intense winter storm destabilizes the municipal electric grid, your home shifts from a climate-controlled sanctuary into an insulated box losing thermal energy by the minute. As ambient indoor temperatures plunge toward freezing, your domestic Water Calculator lines become vulnerable to rapid ice damming and catastrophic structural ruptures. Managing a frozen water pipes emergency requires deliberate, physics-grounded action rather than frantic improvisation. By understanding the thermodynamic behavior of residential infrastructure, you can aggressively prevent frozen pipes without power and execute safe, non-electric recovery procedures before structural flooding compromises your home.
The Physics of Freezing Pipes: Why Blackouts Accelerate Failures
Most property owners fundamentally misunderstand how sub-freezing temperatures destroy plumbing. A common misconception is that expanding radial ice splits the pipe wall at the exact point of the freeze. In reality, the failure mechanism is driven by trapped hydrostatic pressure. For the practical checklist side, use the community emergency preparedness guide.
When an ice blockage forms in an unheated line, it acts as an unyielding mechanical plug. As the freeze spreads along the length of the run toward an open or closed valve, the ice continues to expand downstream. Because liquid water is essentially non-compressible, this downstream expansion acts as a hydraulic piston, driving water pressure to extreme levels between the frozen plug and the closed plumbing fixture. Eventually, the pipe wall splits downstream of the ice dam at a microscopic point of structural fatigue, not necessarily where the initial freeze occurred. For the practical checklist side, use the neighborhood preparedness network.
During an extended winter power outage plumbing crisis, the structural materials in your home behave very differently depending on their composition: For the practical checklist side, use the emergency communication plan.
- Rigid Copper (Types M and L): Copper offers exceptional thermal conductivity, meaning it transfers cold from exterior wall voids directly into the water column with rapid speed. Once hydrostatic pressure exceeds structural capacity, copper splits along its longitudinal seams or blows outward at soldered 90-degree elbows and coupling joints.
- Cross-Linked Polyethylene (PEX): PEX possesses elastomeric memory and can expand slightly under radial ice expansion, providing greater freeze resistance than rigid metal. However, PEX is not freeze-proof; brass or plastic connection crimps, push-fit fittings, and manifolds regularly shear under sustained hydraulic load during a prolonged blackout.
- Chlorinated Polyvinyl Chloride (CPVC): CPVC becomes exceptionally brittle at freezing temperatures. Ice expansion typically shatters CPVC pipe walls into fragmented shards rather than producing clean pinhole tears, making CPVC the most fragile material in freezing environments.
- Galvanized Steel: Often found in older homes, heavy iron and steel pipes resist radial expansion up to a high threshold. However, internal mineral corrosion creates localized weak spots, and when failure happens, threaded union joints and rusted pipe walls split violently along the threads.
Immediate Lockdown: Proactive Measures Before the Deep Freeze Sets In
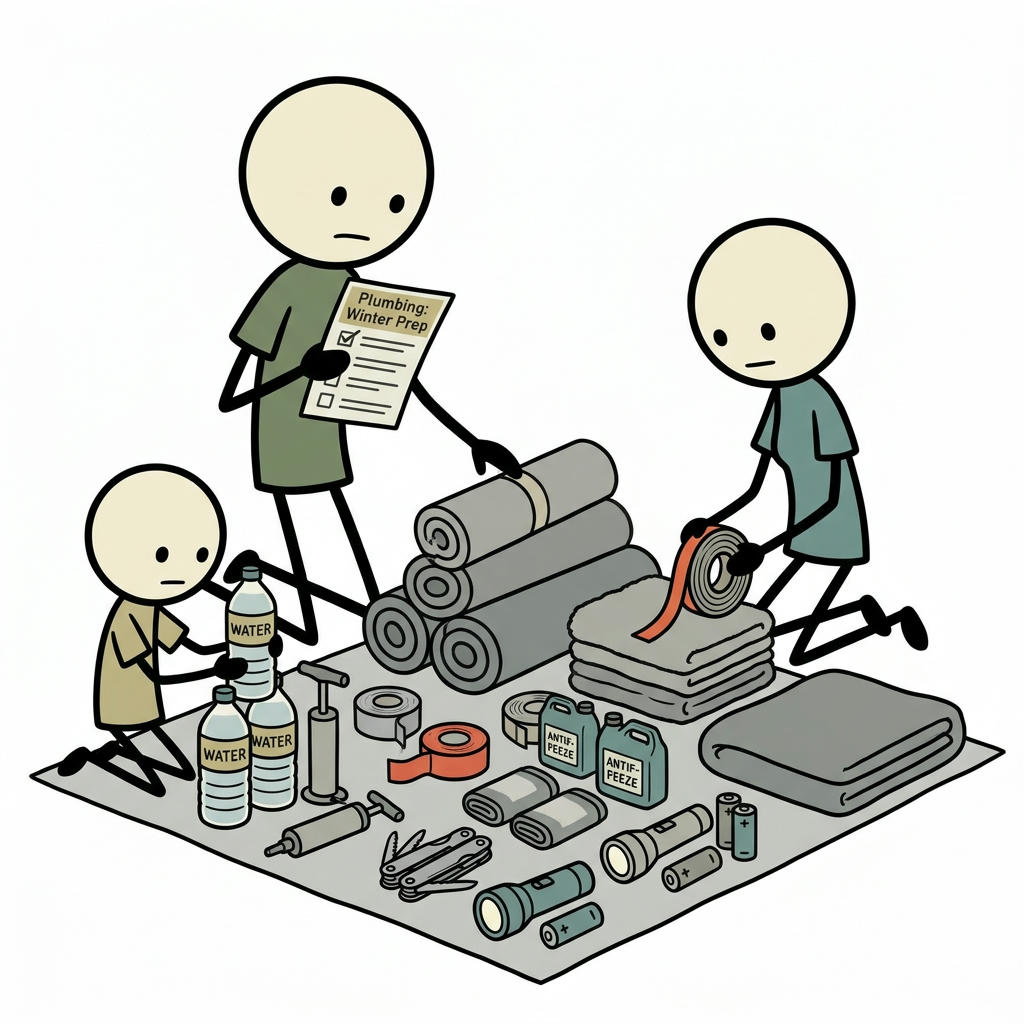
The moment power drops and forecasts project sustained sub-freezing weather, the clock begins ticking. Your primary objective is thermal containment: keeping residual warmth inside the plumbing envelope while shutting out external air infiltration. Cold air moving across a water line accelerates heat loss significantly faster than still, standing cold air.
Eliminate Infiltration Pathways
Walk the perimeter of your basement, crawlspace, and utility zones with a tactical light. Search for draft sources around rim joists, dryer exhaust vents, foundation wall cracks, and plumbing penetrations where utility lines enter the foundation.
Block these openings immediately using dense, closed-cell materials, foam insulation backer rods, or spare fiberglass batting. If commercial insulation is unavailable, pack draft points with rolled wool blankets, heavy towels, or salvage cardboard secured with duct tape. An exposed pipe subjected to a 10 mph sub-freezing draft can freeze solid in a third of the time required by a pipe resting in still, stagnant air of the exact same temperature.
Manage Interior Thermal Boundaries
Modern homes isolate plumbing runs inside exterior wall cavities, bathroom vanities, and kitchen sink cabinets. These cabinets act as secondary insulated barriers that keep warm interior air away from the plumbing runs.
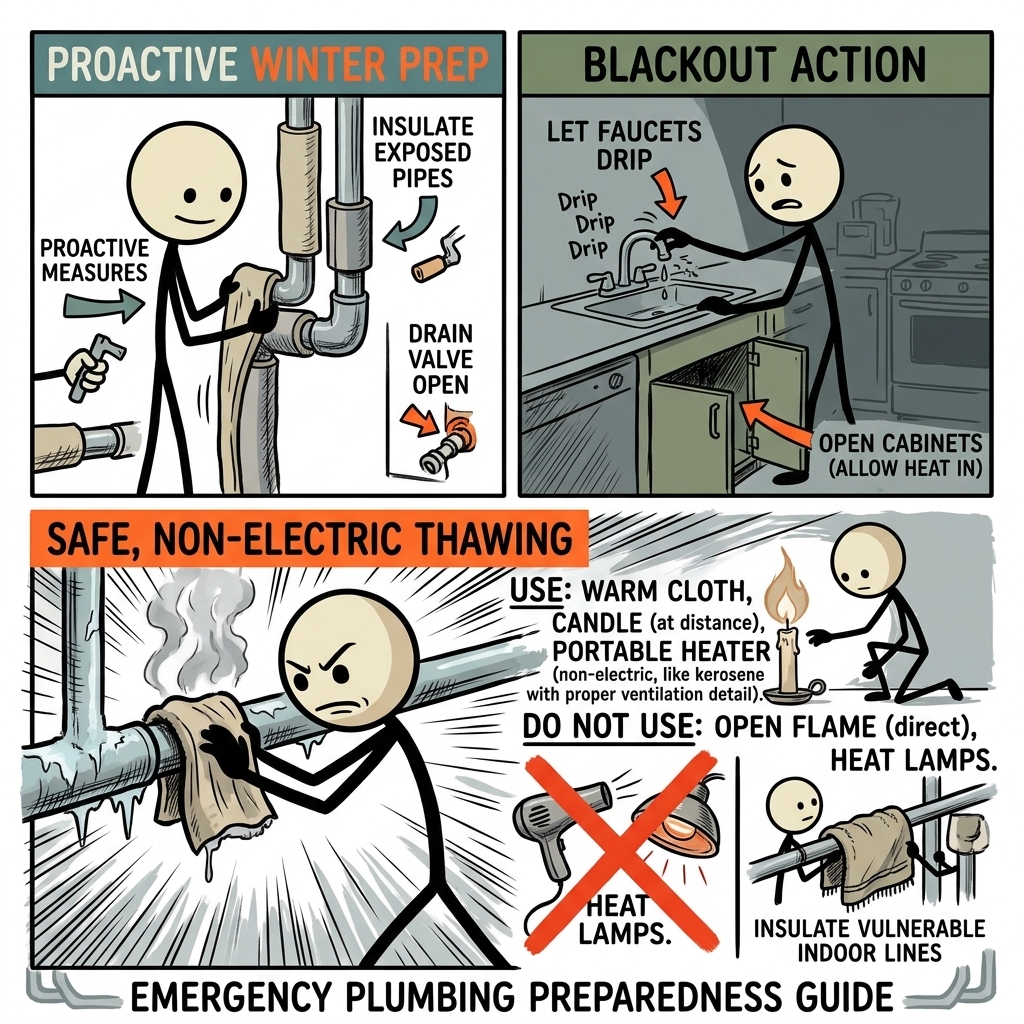
Open every cabinet door below kitchen sinks, bathroom vanities, and laundry utility stations to allow ambient interior room heat to circulate freely around the supply valves and P-traps. Pull back any stored cleaning products or decorative plastic bins, as these objects create thermal shadows that isolate the rear wall from warm room air currents. If you have interior rooms containing plumbing fixtures that are warmer than your perimeter walls, keep interior doors propped open to balance temperatures across the floor plan.
Deploy Passive Thermal Blanketing
Unconditioned crawlspaces, unheated basements, and attic bypasses host the highest concentration of vulnerable pipe runs. Before interior temperatures drop below 40°F, bundle these exposed lines manually to slow down thermal decay.
Snap-on closed-cell polyethylene foam pipe sleeves provide immediate thermal defense. If you lack manufactured pipe insulation, wrap the lines tightly in multiple layers of standard bubble wrap, securing the edges every six inches with electrical tape or zip ties. The trapped air chambers within bubble wrap mimic professional dead-air insulation. In extreme emergencies, wrapping your exposed pipes in thick newspaper or heavy shop towels, sealed with a final outer wrap of heavy-duty plastic sheeting or trash bags to repel moisture, will delay ice crystallization for several critical hours.
Active Water Management: Drain Down vs. The Continuous Drip Strategy
Homeowners facing frozen pipes during power outage conditions must decide between two fundamental water management strategies: keeping the water moving continuously to prevent ice crystallization, or evacuating the water entirely through a complete system drain down. Your decision should rest on municipal water pressure reliability, system drainage design, and projected outage duration.
The Continuous Drip Strategy: Managing Kinetic Energy
The standard guideline from the American Red Cross recommends keeping a constant drip running from vulnerable faucets. Liquid water contains latent thermal energy; as long as relatively warm ground water (typically 45°F to 55°F at the municipal main) flows through your home, it continually transfers heat into the pipe walls.
Crucially, an open faucet provides a direct pressure relief point. Even if an ice dam forms within the line, the open fixture prevents the catastrophic hydrostatic pressure spike that bursts pipes. Follow these baseline guidelines to run a drip safely:
- Select the Correct Faucets: Choose fixtures served by lines running along cold exterior walls, over crawlspaces, or through unheated garage attics. Always run faucets located at the structural extremities of the plumbing loop.
- Flow Rate Calibration: A tiny, single-drop drip is inadequate during severe sub-zero cold snaps. Maintain a steady, unbroken trickle of water roughly the thickness of a pencil lead or heavy sewing needle.
- Dual-Line Balancing: Both hot and cold supply lines must be protected. If you have a single-handle faucet, turn the handle to the center position to verify that both the hot and cold supplies pass water simultaneously. On dual-handle fixtures, crack both the hot and cold valves individually until an unbroken stream exits the aerator.
- Monitor Drain Performance: An open faucet running into a frozen exterior drainpipe or an unheated crawlspace trap will eventually cause a devastating sink overflow. Regularly inspect the sink drain to confirm water is clearing the P-trap properly.
The Complete System Evacuation Protocol
If local municipal water pressure collapses, your well pump loses power without backup generation, or temperatures drop below 15°F for multiple days, maintaining a continuous trickle becomes impossible or ineffective. In this situation, the definitive solution to prevent frozen pipes without power is to completely drain the residential water infrastructure using gravity.
Executing an orderly system drain down protects your plumbing infrastructure by removing the medium of expansion. Follow this exact technical sequence:
- Isolate the Water Main: Locate your primary residential water shutoff valve, typically found where the main line penetrates the foundation wall or basement slab. Rotate the quarter-turn ball valve 90 degrees until the handle sits perpendicular to the line, or turn a traditional gate valve fully clockwise until firmly seated.
- De-energize the Water Heater: If operating an electric water heater, shut off its designated dual-pole circuit breaker to prevent the heating elements from burning out if power returns while the tank is empty. For gas water heaters, rotate the gas control knob to the "PILOT" or "VACATION" setting. Never drain a residential water heater tank while burner assemblies are firing under normal operational cycles.
- Open the Lowest Drainage Point: Connect a heavy-duty garden hose to the lowest drain valve in the house—usually the basement wash-tub faucet, the water heater drain valve, or an exterior yard hydrant—and route the outlet outside or into a functioning floor drain.
- Vent the System from the Top: Travel to the absolute highest point in your home (typically a second-floor bathroom) and open every single hot and cold fixture valve completely. This breaks the internal hydraulic vacuum within the pipes, allowing atmospheric pressure to push water down toward the open basement drains, much like releasing your thumb from the top of an inverted drinking straw.
- Clear Intermediate Supply Fixtures: Progress systematically down through the home, opening every tub fixture, shower valve, wet bar, and utility sink. Flush every toilet repeatedly until the tanks are empty, and sponge out any residual water left pooling in the bottom of the toilet cisterns.
- Drain Appliance Water Lines: Disconnect the small braided supply tubes running to your refrigerator's ice maker, your washing machine's hot and cold mix valves, and your under-sink filtration systems. Purge all internal lines of standing water.
Treating Traps and Waste Lines with Antifreeze
Gravity draining evacuates your pressurized supply lines, but it leaves significant water trapped inside plumbing waste fixtures. Every sink, tub, shower, and toilet contains a curved "P-trap" designed to hold standing water to block hazardous sewer gases from entering your home. If this water freezes solid, it will crack PVC and porcelain fixtures.
Never use automotive ethylene glycol radiator coolant in residential plumbing lines, as it is highly toxic and presents severe environmental hazards to septic systems and municipal wastewater networks. Instead, use non-toxic marine/RV antifreeze formulated with propylene glycol (usually dyed bright pink). Pour approximately two to three cups of undiluted RV antifreeze directly down every sink, shower, and floor drain trap. Pour three to four cups into the toilet bowl and use a plunger to push the antifreeze down through the curved porcelain trapway, displacing the clear water entirely.
Diagnostic Assessment: How to Locate Frozen Water Pipes
Recognizing the warning signs of an active freeze allows you to intervene before a structural line fracture occurs. Systematically assess your home using physical observations and non-destructive inspection methods:
- Zero or Reduced Flow at Fixtures: If you open a faucet and receive only a faint hiss of air, a sputtering spit, or a weak trickle, an ice dam has formed within that line run. If one fixture fails while another works normally, the freeze is isolated to that specific branch line. If no fixtures produce water anywhere in the house, the freeze is likely at the main building shutoff, the incoming meter, or the primary intake line.
- Visible Surface Condensation and Rime Frost: Inspect exposed water pipes in basements, crawlspaces, and unheated utility closets. A pipe segment covered in thick, white rime frost or unusual surface sweating points directly to an internal ice core.
- Localized Structural Bulging: Run your bare hand along accessible pipe sections. A visible deformation, oval distortion, or radial bulge along a copper or plastic pipe indicates that ice has expanded to near-bursting limits within that sector.
- Faint Odors from Drains: If an ice blockage forms inside a waste stack or sewer vent pipe, sewer gases cannot escape through the roof and may back up through fixture traps into the living space.
Safe, Non-Electric Methods to Thaw Vulnerable Lines
Once you locate an active freeze, you must act deliberately to thaw frozen pipes safely. Panicked, aggressive heating methods are the leading cause of winter pipe ruptures and catastrophic structural house fires during deep freezes.
Absolute Safety Prohibitions
The Centers for Disease Control and Prevention (CDC) alongside the NFPA explicitly warn against using open flames indoors. Never use propane blowtorches, oxy-acetylene welding kits, kerosene space heaters, charcoal braziers, or candles to thaw water lines. Applying a direct flame to a metal pipe vaporizes trapped water within seconds, generating explosive steam pressures that can blow the pipe apart, throwing hot shrapnel and boiling water while instantly igniting adjacent framing timber, paper insulation backing, and dust inside the wall cavity.
Similarly, avoid placing portable fuel-fired heaters in unventilated crawlspaces or basements due to lethal carbon monoxide accumulation. Any non-electric heat generation strategy must be controlled, convective, and gradual.
Method 1: Thermal Conductive Towel Wraps (Hot Water Saturation)
Thermal conduction via saturated fabric is the safest, most reliable non-electric thawing technique available during a blackout. While modern electric heat guns require active power, boiling water can be generated on an off-grid wood stove, an outdoor propane camp burner, or a safe indoor catalytic burner with adequate ventilation.
- Prep the Run: Wrap the frozen pipe section tightly in several layers of heavy cotton terry towels, old burlap sacks, or thick rags. Secure the material loosely with wire or cord.
- Position Catch Basins: Place large buckets, rubber tubs, or heavy baking pans directly beneath the towel-wrapped section to catch running runoff water.
- Apply Hot Water: Slowly pour near-boiling water across the exterior of the towel wraps. The dense cotton absorbs the water, holding it against the pipe wall and transferring heat uniformly around the circumference without scorching the material or causing thermal shock.
- Maintain Saturation: Continue ladling hot water over the wraps systematically for 15 to 30 minutes. As the towels cool, pour fresh hot water over the wrap until you hear flow resume inside the line.
Method 2: Chemical and Air-Activated Heat Packs
In cramped crawlspaces, interior partition walls, or locations where running boiling water presents safety hazards or water damage risks, chemical heating provides an effective dry solution. Large-format chemical heating pads, therapeutic hot packs, or oversized air-activated thermal wraps (iron-powder oxidation packs) can deliver steady temperatures between 105°F and 135°F for several hours.
Activate the heat packs according to their instructions, line them directly along the frozen pipe section, and bind them tightly to the pipe wall using heavy duct tape or elastic stretch wrap. Wrap the exterior in foil-backed insulation or dry towels to direct the heat inward toward the frozen line rather than letting it escape into the cold room air. This method works more slowly than hot water saturation, but it requires zero active supervision once secured.
Method 3: Passive Heat Shrouding and Radiant Deflection
If you operate an indoor-safe radiant heat source (such as an indoor-approved Mr. Heater Buddy radiant propane heater) in an adjoining room, you can redirect its convective heat plume into cold service spaces without creating a fire hazard.
Position heavy Mylar emergency thermal blankets or sheets of reflective foil-faced foam insulation to create a temporary directional heat duct. Angle the reflective surfaces to catch ambient radiant heat from your primary safe room and bounce it directly into opened vanity cabinets, crawlspace access hatches, or basement ceiling joist bays. By capturing and funneling warm air currents into dead utility spaces, you elevate local temperatures enough to trigger a gentle, natural thaw.
The Cardinal Rule: Always Thaw from the Faucet Toward the Blockage
Regardless of which safe non-electric method you choose, the physical direction of your work determines your safety. Always begin thawing from the open faucet end of the pipe, moving backward toward the frozen blockage.
Never apply heat to the center of a frozen pipe run or start at the supply side. If you melt the center of an ice plug while both ends remain frozen solid, the newly liberated liquid water expands in a sealed, trapped chamber. Without an open pathway for this pressure to escape, the trapped water will rupture the pipe wall with explosive hydraulic force. Opening the downstream fixture and thawing backward ensures that melting water and expanding steam vent safely out through the faucet aerator.
Post-Thaw Structural Inspection and Contingency Protocol
The moment of maximum hazard in any frozen water pipes emergency does not occur during the deep freeze itself—it happens immediately after the ice dam releases. During the freeze, the ice block seals the very rupture it created. When the pipe thaws, that ice melts away, transforming a silent hairline crack into an active indoor flood.
Before leaving a newly thawed system unattended, execute a rigorous leak detection protocol:
- Perform a Visual Check: Carefully inspect the thawed section using a high-lumen flashlight and a dry paper towel. Wipe the towel along all copper soldered joints, fittings, and PEX crimp rings. The paper towel will pick up hairline weeping long before water droplets become visible to the naked eye.
- Meter Movement Inspection: If your home is connected to a municipal utility, turn off every single faucet completely. Go out to the street water meter box, clear away any surface snow, and look at the meter face. If the low-flow indicator triangle or digital flow digit continues spinning while all indoor fixtures are sealed, you have an active, pressurized leak buried somewhere within the building envelope.
- Gradual Pressurization: When bringing water back online after an emergency shutoff, open your main shutoff valve very slowly over several minutes. Opening a main gate or ball valve rapidly introduces a hydraulic hammer that can blow apart weakened, freeze-stressed fittings downstream.
Emergency Field Repair Measures for Ruptured Lines
If an inspection reveals a burst pipe during an active winter blackout, professional plumbers will be overwhelmed with emergency calls. You must be prepared to execute temporary mechanical pipe repairs using standard off-grid emergency supplies:
| Repair Method | Ideal Pipe Material | Effective Pressure Rating | Application Procedure |
|---|---|---|---|
| C-Clamp Pipe Repair Sleeve | Copper, Galvanized, Steel | Full system pressure (up to 125 psi) | Wrap high-durometer neoprene rubber pad over the split. Center the stainless steel sleeve over the pad and tighten carriage bolts evenly. |
| Self-Fusing Silicone Tape | PEX, Copper, PVC, CPVC | Low-to-moderate (up to 50–75 psi) | Clean pipe surface. Stretch tape to 300% elasticity and wrap tightly with a 50% overlap, extending two inches past each side of the fracture. |
| Push-Fit Slip Couplings (SharkBite) | Copper, PEX, CPVC | Full system pressure (up to 200 psi) | Cut out split section using a standard wheel pipe cutter. Deburr pipe ends and slide slip-coupling over the gap using a disconnect clip. |
| Slotted Hose Clamps & Rubber Sheet | Any rigid pipe | Emergency trickle containment (up to 30 psi) | Cut a section of heavy rubber hose or tire inner tube. Position over the pinhole and tighten two worm-gear hose clamps directly over the split. |
Long-Term System Hardening: Upgrading Resilience Before Next Season
real-world emergency scenarios guide procedures buy you time during an active disaster, but permanent resilience comes from structural mitigation. Once the winter emergency clears and standard grid power returns, update your home's vulnerable plumbing paths to prevent repeat incidents.
Consider re-routing plumbing runs out of cold exterior cantilever floor sections and exterior wall cavities entirely, placing them within interior partition walls where living space heat maintains safe thermal buffers. Replace failing fiberglass wrap with closed-cell elastomeric foam insulation (such as Armaflex), which does not absorb ambient humidity and delivers an R-value that resists extended exposure to cold air drafts.
Finally, replace aging, corroded gate valves at your main service entrance with modern full-port brass quarter-turn ball valves. In the middle of an emergency, having a shutoff valve that operates instantly without sticking can mean the difference between a minor cleanup and an uninhabitable, flood-damaged home.
Severe winter storms and extended grid outages are inevitable natural hazards, but catastrophic plumbing failures do not have to be your reality. By mastering the fundamentals of thermal conservation, system evacuation, and safe, pressure-conscious line thawing, you maintain full control over your home's integrity. Preparation, steady observation, and decisive action will always protect your living space far better than blind reliance on an external power grid.
Frequently Asked Questions
At what temperature are pipes at risk of freezing during a power outage?
Pipes are generally vulnerable when indoor or outdoor ambient temperatures fall below 20°F (-6°C), particularly along exterior walls, unheated basements, crawlspaces, and attics.
What is the very first step if you suspect a frozen pipe during an outage?
Immediately locate and shut off the home's main water supply valve to prevent severe indoor flooding if the pipe has ruptured and begins to thaw.
How can you safely thaw a pipe without electricity?
Wrap the frozen section with towels soaked in hot water heated via a camp stove, or apply chemical hand warmers wrapped in cloth; never use open flames, propane torches, or charcoal heaters indoors.
Should faucets be left dripping if the heat goes out?
Yes, opening faucets to a slow, steady trickle relieves internal hydrostatic pressure and keeps water moving, significantly reducing the likelihood of a freeze burst.
What should you do if an unthawed pipe shows visible cracking or splitting?
Keep the main water shut off, open all secondary taps to drain residual water from the system, place catch buckets under the damage, and contact an emergency plumber.