⚡ Key Facts
- Primary Failure Point: The Federal Emergency Management Agency (FEMA) and electrical safety engineers report that nearly 50% of backup generator failures during severe emergencies stem from dead starting batteries or degraded, stale fuel.
- Rapid Fuel Breakdown: Standard E10 unleaded gasoline begins oxidizing and absorbing ambient humidity within 30 to 60 days, leading to phase separation, gummed carburetors, and fuel system corrosion.
- Grid Vulnerability: Data from the U.S. Energy Information Administration (EIA) shows that American utility customers experience an average of over seven to eight hours of electrical interruptions annually, with major weather events multiplying that duration tenfold.
- Life Safety Imperative: The Centers for Disease Control and Prevention (CDC) documents that improper generator placement and maintenance cause an average of 85 fatal carbon monoxide (CO) poisonings and thousands of emergency room visits each year.
- Engine Wear Window: Small air-cooled generator engines operate at high RPMs (typically 3,600 RPM) and require engine oil changes every 50 to 100 operational hours—a threshold easily crossed in just 3 to 4 days of continuous grid failure.
When the sky turns slate-gray and a localized severe weather cell tears through the overhead transmission lines, a sickening silence settles over your neighborhood preparedness network. In that exact fraction of a second, your household switches from total reliance on public infrastructure to complete dependence on a localized mechanical engine sitting outside your wall. For millions of homeowners, flipping the manual transfer switch or waiting for an automatic standby unit to crank yields only a sickening mechanical cough, followed by dead silence. That failure is rarely bad luck; it is almost always the inevitable result of skipped upkeep, because a generator is an internal combustion engine that sits neglected in extreme thermal environments for months at a time and is then expected to sprint at peak capacity under instant load.
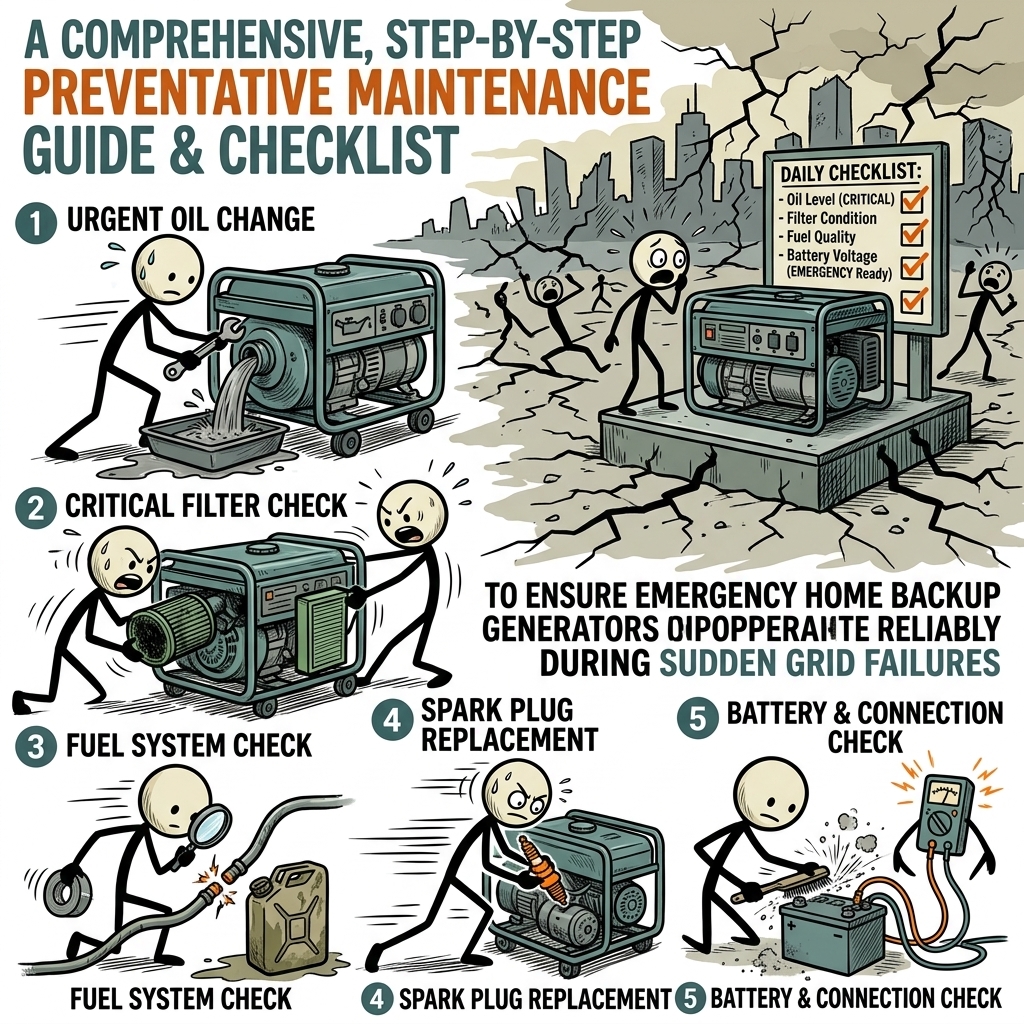
True resilience is built long before the National Oceanic and Atmospheric Administration (NOAA) issues a storm warning. Developing an uncompromising preventative generator maintenance routine transforms backup power from an unpredictable gamble into a dependable lifeline. Whether you rely on a 22kW whole-house liquid-propane standby system or a 7,500-watt dual-fuel portable unit wheeled out of the shed, this comprehensive guide provides the exact operational framework required to ensure your family never sits in the dark when the electrical grid collapses. For the practical checklist side, use the community emergency preparedness guide.
The Physics of Inaction: Why Backup Generators Fail Under Pressure
To keep an emergency engine operating reliably, you must first understand the unique chemical and mechanical degradation that occurs while the machine sits idle. Unlike your daily commuter vehicle, which cycles fluid, cleans its injectors, and burns off internal moisture almost every day, an emergency generator spends 99% of its life static. During this extended downtime, ambient thermal swings create interior condensation, gravity draws all protective oil films down into the sump, and volatile chemical compounds inside the fuel system steadily evaporate. For the practical checklist side, use the emergency communication plan.
The primary antagonist of small-engine reliability is modern fuel chemistry. Gasoline blended with up to 10% or 15% ethanol (E10/E15) is hygroscopic, meaning it actively pulls moisture out of the surrounding air. When enough water is absorbed, the ethanol and water bind together and sink to the bottom of the fuel tank in a process known as phase separation. When you attempt to start the engine, the carburetor draws this corrosive, non-combustible water-alcohol layer directly into the combustion chamber, immediately fouling the spark plug and refusing to ignite. For the practical checklist side, use the family emergency planning guide.
The secondary mechanical breakdown point is the 12-volt direct-current (DC) starting system. Lead-acid starting batteries lose roughly 1% of their state of charge each day through parasitic drain and natural internal resistance. Without continuous smart float charging, a generator battery drops below the critical voltage threshold needed to spin the starter motor against engine compression within three to four months. Furthermore, mechanical switches, low-oil sensors, and governor linkages can seize due to minor atmospheric corrosion, preventing fuel delivery or spark generation. For the practical checklist side, use the real-world emergency scenarios guide.
Finally, there is the phenomenon of lost residual magnetism. Brushless alternators rely on a small residual magnetic field in the rotor iron to initiate electrical current production when the engine starts spinning. When an alternator sits stationary for an extended period without spinning through an electrical load, this residual field can dissipate entirely. The engine may roar to life at precisely 3,600 RPM, but the unit will produce exactly zero volts at the electrical panel, leaving your home powerless despite a running engine.
Standby vs. Portable: Structural Maintenance Differences

While both categories of backup power rely on internal combustion, their engineering design, cooling systems, and operational parameters mandate distinct maintenance strategies. Understanding the baseline differences between these platforms prevents catastrophic service errors.
Whole-House Stationary Standby Systems
Permanently installed standby generators typically utilize pressurized oil systems, external oil filters, and automated digital control modules. Larger units often feature automotive-grade liquid cooling systems with water pumps, radiators, and coolant passages. Because these units are plumbed directly into pressurized natural gas (NG) or large liquid propane (LP) tanks, they avoid gasoline gumming issues. However, their vulnerability centers on computerized automatic transfer switches (ATS), electrical contact corrosion, rodents chewing internal wiring harnesses, and battery charger breakdown. Standby systems require regimented physical audits of the automated exercise cycle to confirm that internal self-tests actually pass.
Portable Emergency Generators
Portable systems are rugged, cost-effective machines, but they rely heavily on mechanical simplicity. The vast majority use single-cylinder, air-cooled engines with splash lubrication rather than pressurized oil pumps. They run hotter, hold significantly less oil (often under one quart), and lack automated diagnostic sensors. The maintenance burden falls completely on the operator: manual fuel draining, manual choke adjustments, physical valve lash adjustments, and manual load monitoring. Portable units require active, hands-on intervention every single calendar quarter.
| Feature | Portable Generators | Standby Systems |
|---|---|---|
| Cooling Type | Air-cooled (fan over engine fins) | Air-cooled or Liquid-cooled (radiator) |
| Lubrication Method | Splash lubrication or low-PSI pump | Full pressure with replaceable spin-on filter |
| Fuel Delivery | Carburetor or basic electronic fuel injection | Regulated Gaseous (LP/NG) mixer or EFI |
| Typical Oil Capacity | 0.6 to 1.1 Quarts | 1.5 to 4.5 Quarts |
| Starting Method | Recoil rope or 12V manual key switch | Automated 12V ATS-triggered start |
The Master Generator Maintenance Checklist
Executing preventative generator maintenance demands a disciplined schedule. Skipping a single maintenance window can transform a multi-thousand-dollar investment into dead weight when a blizzard knocks down the regional power grid. The following checklist separates your duties into time-based intervals that mirror the rigorous mechanical requirements established by the National Fire Protection Association (NFPA 110 guidelines for emergency power systems).
Monthly Operational Checklist (Run Time: 20 Minutes)
Do not simply walk past the generator and assume silence indicates readiness. Run this basic operational assessment once every four weeks without fail.
- Fluid Level Verification: Pull the dipstick, wipe it with a lint-free cloth, reinsert it fully without threading it down (check manufacturer instructions for your specific brand), and read the level. Ensure the oil is clear-to-amber, never opaque black or milky brown (which indicates water contamination).
- Physical Clearance Perimeter: Ensure the machine maintains a minimum clear zone of five feet on all sides from combustible material, brush, high grass, and structure walls, conforming to standard NFPA safety recommendations.
- Rodent Screen and Intake Inspection: Inspect the generator stator housing, cooling fins, and control box for wasp nests, rodent nesting materials, or leaf debris that blocks airflow and causes thermal overheating.
- Battery Terminal Audit: Check 12V lead-acid or lithium starter connections for white, blue, or green powdery corrosion. Inspect the terminal bolts for tightness using an insulated wrench.
- Operational Exercise Run: Fire up the engine. Run it for 15 to 20 minutes. If using an automatic standby, observe that the weekly automated self-test actually occurs; do not just trust the indicator LED.
Bi-Annual (Every 6 Months) Pre-Season Tune-Up
Conduct this service directly before seasonal peaks—typically late spring (ahead of severe convective weather and hurricane season) and late autumn (ahead of ice storms and blizzards).
- Air Cleaner Service: Remove the air filter element. For paper filters, hold them up to the sun; if you cannot see light through the pleats, discard and replace. For foam filters, wash them in warm soapy water, dry them thoroughly, and apply five drops of clean engine oil, squeezing to distribute evenly.
- Spark Plug Diagnostics: Remove the high-tension lead, use a deep spark plug socket to extract the plug, and inspect the electrode tip. A light tan or grayish deposit confirms normal combustion; heavy black soot indicates a rich fuel-air mixture or stuck choke; wet oil deposits indicate worn rings or valve guides. Measure and reset the gap using a feeler gauge to manufacturer specifications (typically 0.028 to 0.030 inches).
- Fuel Line and Grommet Survey: Inspect all rubber fuel supply lines running from the tank to the shutoff valve and carburetor. Flex the lines with your fingers; if you spot spiderweb cracking, hardening, or weeping fuel at the hose barbs, replace them immediately with SAE J30R7 fuel-rated hose.
- Exhaust System Integrity: Inspect the muffler body, spark arrestor screen, and exhaust manifold for rust perforations or loose clamping bolts. Clean the spark arrestor screen with a stiff wire brush to clear baked carbon deposits.
Annual / 100-Hour Deep Maintenance Cycle
Perform this comprehensive mechanical overhaul every 100 running hours or once per year, whichever milestone you hit first.
- Crankcase Oil Flush: Warm the engine up for five minutes to suspend contaminants, shut it down, disconnect the spark plug lead for safety, and completely drain the crankcase. Replace the crush washer on the drain plug. Fill with premium, high-detergent synthetic oil formulated for air-cooled small engines (e.g., 5W-30 or 10W-30 depending on winter temperature minimums).
- Oil Filter Replacement: If your generator utilizes a spin-on or cartridge oil filter, replace it every single oil change. Lubricate the rubber gasket with a thin film of clean engine oil, thread it on by hand until the gasket contacts the mounting base, then tighten an additional 1/2 to 3/4 turn.
- Inline and Tank Fuel Filter Replacement: Replace the inline plastic fuel filter. Drop the sediment bowl under the mechanical petcock (if equipped), clean out settled rust flakes or water droplets with carb cleaner, and replace the interior O-ring.
- Valve Lash Clearance Adjustment: Over dozens of heat cycles, the interface between the rocker arms and valve stems shifts out of specification, leading to hard starts, loss of compression, or burned exhaust valves. Remove the valve cover, rotate the engine to Top Dead Center (TDC) on the compression stroke, and verify clearance using flat feeler gauges according to the manufacturer's manual (typically 0.003 to 0.005 inches for intake; 0.005 to 0.007 inches for exhaust). Adjust the locknuts as necessary.
- Battery Capacity Testing: Do not rely on a simple multimeter voltage test, as a dying battery can maintain 12.6 volts with zero load. Use an automated carbon-pile or digital conductance battery load tester to verify cold-cranking amps (CCA). If the battery tests below 80% of its rated CCA, discard it and install a fresh unit.
Runtime Operational Maintenance: Surviving Prolonged Blackouts
When an ice storm or category-level hurricane knocks out the electrical grid for seven to ten consecutive days, routine maintenance changes dramatically. You are no longer managing storage conditions; you are managing a continuous industrial power generation plant under brutal working conditions. You must implement a dynamic operating schedule to avoid destroying the engine.
Never treat a generator like a municipal utility line that can run uninterrupted indefinitely. Small air-cooled internal combustion engines consume oil by design. Under high electrical load and ambient heat, an engine holding only 1.1 quarts of lubricant can burn through 4 to 8 ounces of oil within a 24-hour cycle. If the oil drops below the critical threshold, the low-oil shutdown sensor may kill the engine, or worse, the connecting rod will weld itself to the crankshaft journal, permanently destroying the block.
The 24-Hour Outage Protocol
- Load Shedding: Flip off the primary breakers on the transfer switch to remove all electrical resistance from the alternator head.
- Thermal Cool-Down: Allow the engine to idle with zero load for three full minutes. This allows the cooling fan to dissipate thermal soaking from the cylinder head and rotor windings.
- Shutdown and Fuel Isolation: Shut the engine down. If dealing with a portable unit, close the mechanical fuel valve.
- The 15-Minute Rest Period: Wait 15 minutes before touching the oil cap or fuel tank. This allows heat to equalize, oil to drain down completely into the sump for an accurate dipstick reading, and engine components to drop below the flashpoint of gasoline vapors. Refueling a hot, freshly killed generator causes hundreds of structure fires annually.
- Top-Off and Inspection: Pull the dipstick, check oil consumption, top off with your reserve supply to the high mark, clear any accumulated leaves from the air shroud, refuel the tank, and restart the unit.
Every 50 to 100 continuous operational hours—which occurs every two to four days during an extended grid failure—you must perform a full oil change. Maintain five to ten gallons of the correct weight synthetic oil and three to four spare spark plugs in your disaster prep supplies to support this emergency pace.
Fuel Management: Defeating the Ethanol Threat
More than 80% of portable generator non-starts are the direct result of bad fuel. If you fill your generator's tank with untreated gas station fuel, store it in your garage, and attempt to use it during a blackout nine months later, the engine will almost certainly fail to run without starting fluid, if it fires at all. Stabilizing and rotating fuel is not optional; it is mandatory.
Gasoline consists of hundreds of hydrocarbon compounds. The lightest of these compounds evaporate rapidly, reducing the fuel's volatility and making it impossible for the spark plug to ignite the compressed vapor. Simultaneously, the heavier components oxidize, forming a sticky, brown, varnish-like gum that plates the internal walls of the fuel bowl, clogs the microscopic passages of the pilot jet, and glues the float needle valve shut.
The Fuel Defense Strategy
- Run Non-Ethanol Fuel Whenever Feasible: Search for local marinas or dedicated fuel depots offering pure, ethanol-free gasoline (often designated as "REC-90"). Ethanol-free fuel stored in airtight, UV-resistant containers remains stable for up to six months without additives and over a year when stabilized.
- Immediate Chemical Stabilization: Treat every drop of fuel the moment you purchase it at the pump. Use advanced marine-grade fuel stabilizers that employ specialized antioxidants and metal deactivators. Run the generator for 10 minutes immediately after adding treated fuel so the chemical package protects the entire internal carburetor circuit, not just the tank.
- The "Run-Dry" Carburetor Rule: If you store a portable generator with gasoline in the fuel tank, shut the fuel petcock off while the engine is running and let the machine run until it starves out and stalls. Remove the 10mm drain bolt on the bottom of the carburetor bowl to drop the remaining ounce of fuel into a container. If there is no liquid fuel in the carburetor bowl, gum and varnish cannot form.
- The Tri-Fuel Advantage: Transitioning to a dual-fuel or tri-fuel setup utilizing Liquid Propane (LP) or Natural Gas (NG) eliminates fuel degradation entirely. Propane does not oxidize, gum up orifices, degrade over time, or draw moisture. A 100-pound propane cylinder stored for fifteen years will flow into an engine and combust just as cleanly as the day it was filled.
The Critical Spares Cache: What to Keep on the Shelf
When regional supply chains collapse during a major grid-down incident, hardware stores and small engine shops will be stripped bare within hours, or closed entirely due to power loss. A comprehensive preventative generator maintenance strategy requires keeping an on-site, sealed cache of critical mechanical spares designed specifically for your unit's engine model.
Store these components in an airtight, moisture-proof ammunition box or heavy-duty plastic storage container next to your generator installation:
- 3 to 4 Pre-Gapped Spark Plugs: Plugs can foul rapidly under intermittent electrical loads or during cold starting sequences. Having immediate, pre-gapped replacements saves hours of troubleshooting.
- Complete Replacement Carburetor: Small engine carburetors for portable units are inexpensive (often $20 to $40 online). If a jet becomes hopelessly varnished in the middle of a storm, swapping the entire carburetor takes twenty minutes with basic metric hand tools, whereas disassembling, soaking, and poking through micro-orifices with cleaning wires in the dark is a frustrating, error-prone task.
- Spare Recoil Starter Assembly: For portable generators, the nylon pull cord can fray and snap under emergency use, or the internal recoil spring can fail. A drop-in replacement recoil housing requires removing only three to four bolts and restores manual starting capability instantly.
- Two Spare Air Filter Elements: In dry, dusty, post-disaster environments or areas impacted by wildfire smoke, air filters load up with particulate matter rapidly, choking the air-to-fuel ratio and fouling the engine.
- Digital Multimeter and Spare Fuses: A rugged multimeter allows you to diagnose whether a power loss is caused by an engine RPM fluctuation (frequency deviation outside 60Hz), an Automatic Voltage Regulator (AVR) failure, or an open circuit breaker.
- 10 Quarts of Synthetic Engine Oil: This provides enough reserve lubrication to survive a prolonged, 10-day continuous outage including multiple required 50-hour drain-and-fill intervals.
Life-Safety Protocols: The Non-Negotiables
Preventative maintenance extends beyond protecting the mechanical integrity of the engine; it actively protects your household from deadly hazards. The physical setup and interconnection of your generator must be maintained with the exact same discipline as the engine's mechanical parts.
According to comprehensive data from the Consumer Product Safety Commission (CPSC), carbon monoxide emitted from portable generators represents one of the most lethal post-disaster hazards in modern history. Carbon monoxide is an odorless, colorless, non-irritating toxic gas produced by incomplete combustion. A single typical 7,000-watt portable generator produces as much carbon monoxide as hundreds of idling passenger cars, enough to incapacitate an entire household within minutes if exhaust fumes seep into interior living spaces.
Safe Operation Boundaries
- The 20-Foot Rule: Maintain your generator at a minimum distance of 20 feet from any exterior wall of your home, with the engine exhaust pointed directly away from all structures, doors, windows, and roof soffit vents. Never, under any circumstance, operate a generator inside a garage, carport, shed, basement, or partially enclosed porch, even if the primary bay door is fully open.
- Dual-Sensor CO Alarms: Install battery-backed, digital-readout carbon monoxide alarms on every level of your home, especially directly outside sleeping quarters. Test these alarms on the first day of every month when executing your generator's physical check.
- Never "Backfeed" via a Dryer Outlet: Feeding generator power into a home using a homemade double-male extension cord plugged into a standard 240V utility receptacle is an extraordinarily dangerous practice. Backfeeding bypasses domestic circuit breakers, introduces immediate fire risks, and energizes neighborhood power lines backward. This sudden high-voltage backfeed can kill or maim utility linemen working down the street to restore the regional grid.
- Use Code-Compliant Transfer Switches: Always connect your generator to your home's breaker panel through an isolated, mechanically interlocked transfer switch installed by a licensed electrician, fully conforming to National Electrical Code (NEC) Article 702 requirements.
Operational Exercising: The Art of Testing Under Real Load
The single greatest mistake made by well-intentioned preppers is starting their generator, letting it idle smoothly for five minutes with zero electrical accessories plugged in, and shutting it off with a sense of accomplishment. This kind of "unloaded" running provides false confidence and actively damages the engine over time.
Running an engine without an electrical load fails to elevate combustion chamber temperatures high enough to burn off raw fuel deposits, leading to wet-stacking, carbon crusting on valve seats, and crankcase moisture condensation. Furthermore, the voltage regulator, brushes, slip rings, and circuit breakers remain completely untested. An alternator can easily output nominal voltage with zero resistance, only to collapse the instant a deep inductive load—like a well pump or refrigeration compressor—demands heavy starting wattage.
When you conduct your scheduled monthly or bi-monthly maintenance exercise, load the generator to at least 50% to 75% of its rated running capacity. If testing a portable generator disconnected from your house, plug in two heavy-duty industrial electric space heaters, a large heat gun, or high-draw water heating elements. Keep that load active for at least 15 continuous minutes.
Watch and listen carefully to the machine's behavior when the load engages. The mechanical governor should immediately open the throttle butterfly valve to compensate for the sudden rotational drag, recover the RPM quickly, and stabilize the electrical output frequency at roughly 60 Hertz (or 3,600 engine RPM) without excessive surging or hunting. If the engine hunts up and down rhythmically under load, you have caught a partially clogged carburetor idle circuit or out-of-adjustment governor spring *before* an emergency forces the issue.
The Cost of Preparedness vs. The Cost of Failure
Developing and adhering to a rigid generator maintenance checklist requires time, focus, and a minor financial investment in fluids, spare hardware, and testing equipment. However, the alternative is extraordinarily costly. When winter storms compromise regional infrastructure and freeze domestic water lines, or when prolonged summer brownouts kill deep freezers full of food and knock out essential home medical devices, a non-functional generator ceases to be a simple inconvenience—it becomes a high-stakes domestic crisis.
Take charge of your power security today. Set your calendar reminders, walk out to your generator shed or exterior enclosure, pull the dipstick, evaluate your fuel supply, and run your machine through a realistic, loaded operational test. When sudden catastrophic grid failures roll across your state, you will not join the frantic crowds scouring stripped store shelves for oil and spark plugs. Instead, you will flip your transfer switch with total confidence, knowing that your meticulous preventative care has guaranteed your family light, warmth, safety, and operational power throughout the storm.
Frequently Asked Questions
How often should I run an emergency backup generator for maintenance?
Exercise your generator once every 30 days under a moderate electrical load for 15 to 30 minutes to lubricate internal engine components, prevent moisture buildup, and keep the carburetor clear.
How often does generator engine oil need to be changed?
Change the engine oil after the initial 20 to 30 operating hours on a new unit, and then every 50 to 100 runtime hours thereafter, or at least once per year before peak severe weather seasons.
How do I prevent fuel from degrading and clogging my generator?
Add a fuel stabilizer to fresh gasoline immediately upon purchase, run the engine to circulate treated fuel through the system, and drain the carburetor bowl if storing the unit unused for over 30 days.
What maintenance items should be inspected before starting a generator during a power outage?
Check engine oil and fuel levels, inspect fuel lines for cracks or leaks, confirm the air filter is clean and dry, examine the spark plug connection, and ensure cooling fins are free of debris.
What is the most critical safety rule when operating a backup generator?
Run the generator strictly outdoors on a dry, level surface at least 20 feet away from all windows, doors, and vents, directing engine exhaust away from occupied structures to prevent fatal carbon monoxide poisoning.