⚡ Key Facts
- Weight of Destruction: According to the National Oceanic and Atmospheric Administration (NOAA), an accumulation of just 1/4 inch of ice can add up to 500 pounds of weight to a single span of power lines, while a 1/2 inch of ice can increase the weight of tree branches by up to 30 times.
- Prolonged Outages: Federal Emergency Management Agency (FEMA) historical data shows that utility restoration after major ice storms typically takes 3 to 14 days due to blocked roadways and dangerous working conditions for utility crews.
- Carbon Monoxide Risks: The Centers for Disease Control and Prevention (CDC) reports that winter storm power outages trigger a 300% spike in carbon monoxide poisoning cases, primarily caused by the improper indoor use of portable generators and alternative heating sources.
- Hazardous Roads: The Federal Highway Administration (FHWA) attributes over 150,000 vehicle crashes and thousands of fatalities annually to icy pavement and freezing rain conditions.
Imagine waking up in the dead of winter to a strange, metallic clicking sound echoing from the trees outside. It sounds almost beautiful, like delicate glass wind chimes swaying in a gentle breeze. But to an experienced emergency planner, that sound is a stark warning. It is the sound of freezing rain—a stealthy, highly destructive meteorological event that coats every branch, power line, road, and roof in a heavy, unrelenting sheath of ice. Unlike snow, which can be plowed, or wind, which passes quickly, an ice storm is a slow-motion disaster. It builds weight minute by minute until towering oak trees snap like toothpicks, high-voltage transmission towers buckle under the load, and entire regions are plunged into dark, freezing isolation for days—or even weeks.
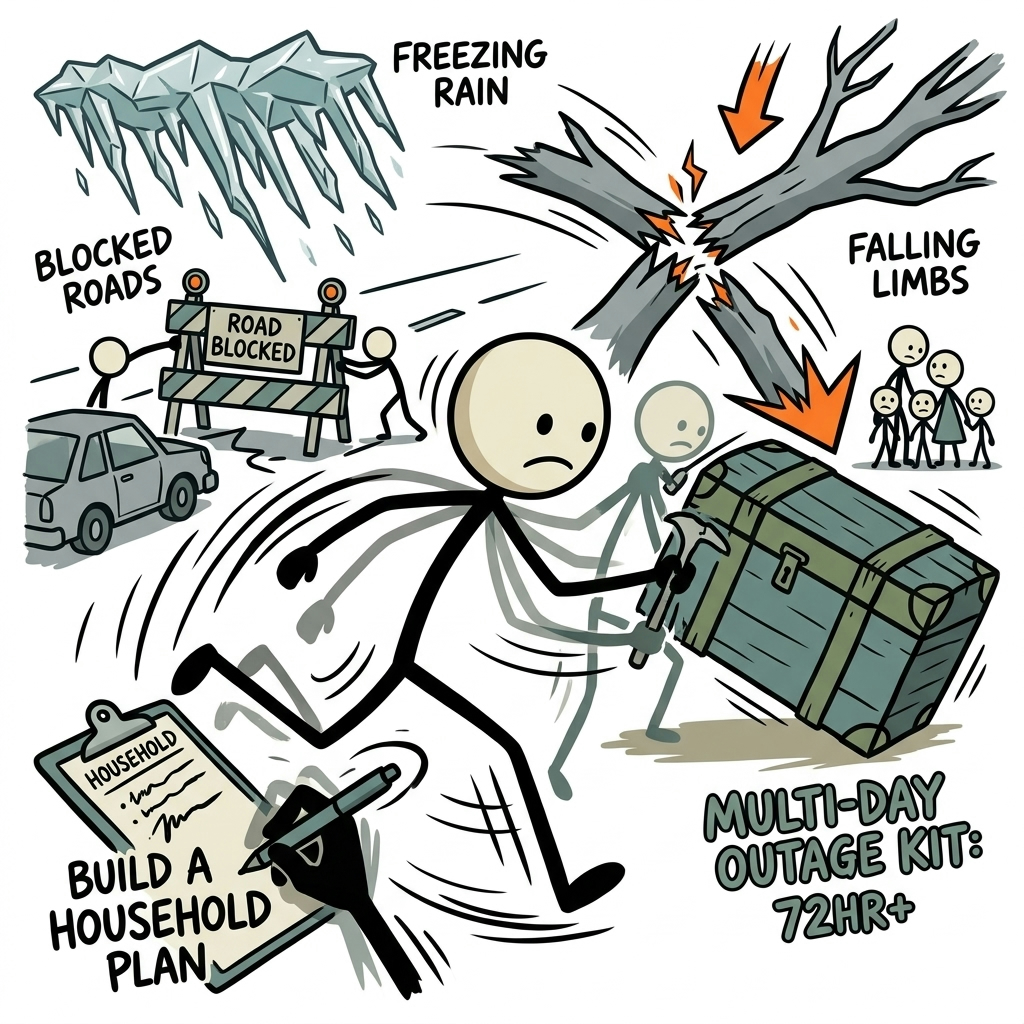
When the grid goes down and the roads turn into skating rinks, you cannot rely on immediate external help. Emergency services will be stretched to their absolute limits, and utility crews cannot safely climb poles until the ice melts or the winds subside. Survival during and after an ice storm depends entirely on your household’s self-reliance. By implementing a rigorous, structured approach to ice storm preparedness, you can transform a potentially life-threatening Survival Scenarios into a manageable, comfortable inconvenience. This guide outlines the precise steps, scientific realities, and practical strategies required to build a resilient household plan for freezing rain, blocked roads, falling limbs, and multi-day power outages.
The Physics of Freezing Rain: Why Ice Storms are Unique
To prepare effectively, we must first understand the enemy. Freezing rain is not sleet, and it is not snow. Sleet consists of frozen ice pellets that bounce off surfaces and accumulate like tiny beads. Freezing rain, however, is supercooled liquid water. According to the National Weather Service (NWS), freezing rain occurs when snow falls from high in the atmosphere, passes through a deep layer of warm air (above 32°F/0°C) where it melts completely into rain, and then enters a shallow, sub-freezing layer of air just above the earth's surface.
Because this cold layer is so thin, the raindrops do not have time to freeze before they strike the ground. Instead, they remain liquid but supercooled. The moment these liquid droplets make contact with any surface that is at or below freezing—such as a tree branch, a road, a deck, or a power line—they instantly freeze into a smooth, dense layer of glaze ice. This ice is incredibly heavy, weighing approximately 57 pounds per cubic foot.
The Thresholds of Destruction
Understanding the thresholds of ice accumulation is critical for executing your ice storm preparedness checklist. Meteorologists categorize ice accumulations into three distinct hazard levels:
- Nuisance Ice (Less than 1/4 inch): Causes slick spots on roads, elevated walkways, and stairs. Some minor tree branches may break, and isolated power outages may occur, but infrastructure remains largely intact.
- Disruptive Ice (1/4 inch to 1/2 inch): Widespread damage begins. Tree limbs snap, falling onto power lines and blocking secondary roads. Power outages become common and can last for 24 to 72 hours. Driving becomes highly dangerous.
- Crippling Ice (1/2 inch to 1 inch or more): Catastrophic damage. Whole trees collapse, pulling down utility poles and transmission lines. Roads are completely blocked by debris and ice, trapping residents in their homes. Outages routinely last from 5 days to over two weeks. Emergency services are severely restricted.
Phase 1: Structural Mitigation (Pre-Storm Action Steps)
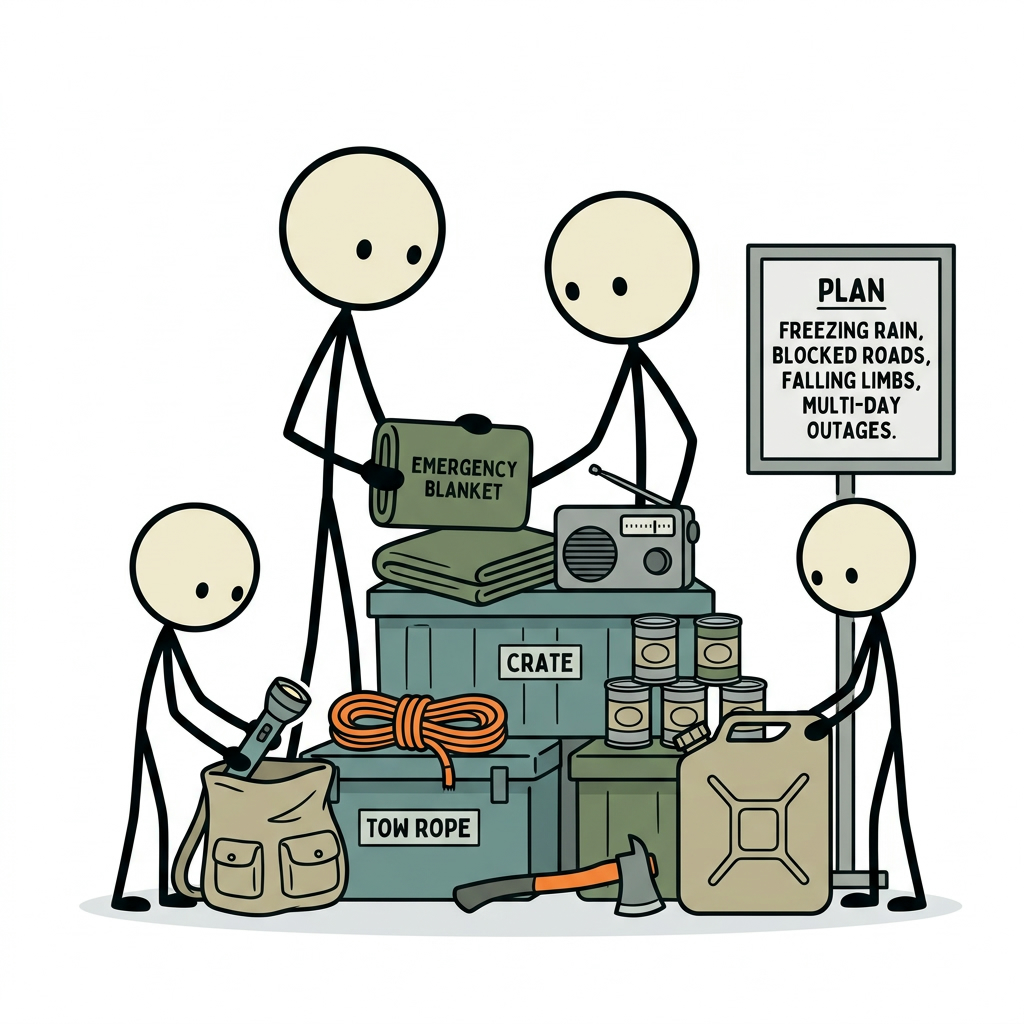
True ice storm preparedness emergency preparedness begins long before the first drop of freezing rain falls. Your home is your primary shelter; if its structural integrity is compromised or its mechanical systems fail, your survival plan will quickly unravel. Structural mitigation focuses on minimizing the risk of physical damage to your property and preparing your home’s systems for extreme cold.
Vegetation Management and Tree Trimming
The single greatest threat to your home’s structural integrity and your local power grid during an ice storm is falling timber. Dead, diseased, or poorly pruned trees are highly susceptible to ice loading. When a branch is coated in a half-inch of ice, its weight increases exponentially, creating immense leverage at the joint where the branch meets the trunk.
Conduct an annual inspection of your property’s trees, preferably in the late autumn. Identify any limbs that overhang your roof, driveway, utility lines, or outdoor HVAC units. FEMA recommends hiring a certified, insured arborist to remove deadwood and prune structurally weak limbs. If you have limbs encroaching on the main power drop running from the utility pole to your home, contact your power company immediately; do not attempt to trim branches near live electrical lines yourself.
Sealing and Insulating the Building Envelope
When the power grid fails, your home immediately begins losing heat to the outside environment. The rate of this heat loss determines how long you can remain comfortable inside without active heating. To slow this process down:
- Inspect Weatherstripping: Check the seals around all exterior doors and windows. Replace worn or cracked weatherstripping and apply fresh silicone caulk to gaps in window casings.
- Insulate Exposed Pipes: Water expands when it freezes, exerting up to 25,000 psi of pressure—more than enough to rupture copper, PEX, or PVC pipes. Use foam sleeve insulation or fiberglass wrap to insulate pipes in unheated crawlspaces, basements, and attics.
- Clean Your Gutters: Clogged gutters trap water. When freezing rain falls, this trapped water freezes solid, forming heavy ice dams that can tear gutters from your roof and force water backward under your shingles, leading to severe interior water damage once the thaw begins.
Alternative Power and Heating Preparation
If you plan to use a portable generator or an alternative heating source, such as a wood stove or a propane heater, you must service these systems before the winter season starts. A generator that has sat idle for nine months with stale gasoline in its carburetor will not start when the temperature drops to 20°F.
Run your generator under load at least once every three months. Fresh gasoline should be treated with a fuel stabilizer, and you should maintain a minimum of 5 to 7 days' worth of fuel (typically 15 to 25 gallons, depending on your generator's consumption rate) stored in approved, heavy-duty containers. Ensure you have a high-quality transfer switch installed by a licensed electrician to safely power critical home circuits, or have heavy-duty, outdoor-rated extension cords ready to run directly from the generator to your appliances.
Phase 2: The Ice Storm Preparedness Checklist
When an ice storm warning is issued by the National Weather Service, you must immediately transition from mitigation to active preparation. This is the time to assemble, audit, and position your supplies. Use this comprehensive ice storm preparedness checklist to ensure your household is fully stocked before the roads become impassable.
1. Water and Hydration (The 10-Day Standard)
While standard disaster guides recommend a 3-day supply of water, ice storms demand a more robust inventory. If water mains freeze, water treatment plants lose power, or your home relies on an electric well pump, you will have zero running water.
- Potable Water: Store a minimum of 1 gallon of Water Calculator per day, for at least 7 to 10 days. For a family of four, this means a minimum of 28 to 40 gallons of drinking water.
- Sanitation Water: Store an additional 10 to 20 gallons of non-potable water in large utility jugs or by filling your bathtubs right before the storm hits. This water will be used for manual toilet flushing and basic handwashing.
- Pet Needs: Allocate an additional 1 quart of water per day for medium-sized dogs and cats.
2. Non-Perishable, High-Calorie Food
Digestion is one of the body's primary methods of generating internal heat. During a cold-weather outage, your caloric intake should increase slightly to compensate for lower ambient indoor temperatures. Focus on foods that require no cooking, minimal preparation, and very little water:
- Canned meats (tuna, chicken, salmon) and hearty stews/soups.
- Nut butters, nuts, seeds, and dried fruits.
- Granola bars, protein shakes, and high-calorie emergency food rations.
- Manual can openers (always keep a spare in your kit).
- A camp stove or portable butane burner (for outdoor use only) to heat water for hot drinks or dehydrated meals.
3. Thermal Protection and Warmth Kit
Do not rely on a single heating source. Instead, build a multi-layered thermal defense system for every member of your household:
- Base Layers: High-quality merino wool or synthetic thermal underwear (avoid cotton, as it retains moisture and robs the body of heat).
- Insulating Layers: Fleece pullovers, down vests, and heavy wool sweaters.
- Outer Shells: Windproof, water-resistant jackets to wear if you must step outside.
- Sleeping Gear: Sub-zero rated sleeping bags, heavy wool blankets, and thermal Mylar space blankets to reflect body heat.
- Hand and Foot Warmers: Chemically activated heat packs (keep at least two dozen in stock).
4. Illumination and Communication
Winter days are short, and an ice-induced blackout means long hours of complete darkness. Avoid candles, which present an extreme fire hazard in drafty, closed-up homes during a freeze.
- Headlamps: The ultimate lighting tool, keeping your hands free for tasks. Stock one high-lumen LED headlamp per family member.
- LED Lanterns: Safe, cool-burning lanterns to illuminate common rooms.
- NOAA Weather Radio: A battery-powered or hand-crank radio to receive real-time emergency broadcasts and weather updates.
- High-Capacity Power Banks: Fully charge all external phone chargers, laptops, and rechargeable batteries 24 hours before the storm arrives.
Phase 3: Tactical Survival During a Multi-Day Outage
Once the ice storm hits and the power grid inevitably fails, your household plan transitions into active tactical management. Your primary goals are to prevent hypothermia, avoid carbon monoxide poisoning, protect your home's plumbing, and manage your emergency food storage guide safely.
The Silent Killer: Preventing Carbon Monoxide Poisoning
According to the CDC, carbon monoxide (CO) is an odorless, colorless, tasteless gas that kills hundreds of people during winter storm outages. CO is produced by the incomplete combustion of hydrocarbon fuels.
Never, under any circumstances, operate a portable generator, charcoal grill, camp stove, or propane heater inside your home, garage, basement, or crawlspace. Even if the garage door is open, deadly levels of CO can quickly accumulate and seep into your living areas.
Keep your generator at least 20 feet away from any window, door, or ventilation intake. Ensure you have battery-operated carbon monoxide detectors installed on every level of your home, and test them monthly. If a CO alarm sounds, immediately evacuate the house into the cold air and call emergency services.
Micro-Zoning: Creating a "Warm Room"
Trying to heat an entire 2,000-square-foot home with alternative heating methods is inefficient and dangerous. Instead, implement "micro-zoning"—the practice of isolating and heating a single, small room where the entire family gathers to live, sleep, and eat.
Choose your warm room carefully. Ideally, it should be a room on the south side of the house to take advantage of passive solar heating during the day. It should have minimal exterior walls and few windows. A family room with a fireplace or a small interior bedroom is often the best choice.
To set up your warm room:
- Seal the Openings: Hang heavy blankets, quilts, or plastic sheeting over all doorways, archways, and windows. Tape the edges to prevent drafts.
- Insulate the Floor: If the room has hardwood or tile floors, cover them with thick rugs, mattresses, or sleeping pads to prevent heat loss through the subfloor.
- Consolidate Body Heat: Pitch a small camping tent inside the room. The confined space of a tent will trap the natural body heat of two or three people, keeping the interior temperature inside the tent up to 15 degrees warmer than the rest of the room.
- Dress in Layers: Put on dry, clean thermal layers immediately. Do not wait until you feel cold to put on your heavy clothing.
Protecting Your Plumbing from Catastrophic Freezes
When indoor temperatures drop below 32°F, the water inside your pipes will begin to freeze. As it turns to ice, it expands, causing pipes to burst. When the power returns and the ice melts, pressurized water will flood your home, causing catastrophic structural damage. To prevent this:
- Run a Constant Drip: Keep a very slow, steady drip of water running from your faucets—both hot and cold. Moving water is much harder to freeze than standing water. Focus on faucets located on exterior walls.
- Open Cabinet Doors: Open the cabinet doors under your kitchen and bathroom sinks. This allows whatever ambient warmth is left in your home to circulate around the pipes.
- Shut Off and Drain the System: If the indoor temperature continues to plummet and you cannot maintain any heat, the safest course of action is to shut off your home's main water valve. Once shut off, open every faucet in the house and flush all toilets to drain as much water out of the plumbing system as possible.
Managing Your Food Supply in a Blackout
Do not open your refrigerator or freezer doors unless absolutely necessary. Every time you open the door, cold air escapes, accelerating food spoilage.
An unopened refrigerator will keep food safely cold for about 4 hours. A full, unopened chest freezer will maintain its temperature for approximately 48 hours (24 hours if it is only half full).
If the outage extends beyond 24 hours, you can utilize the freezing temperatures outside to preserve your food. Place perishables in heavy-duty, animal-proof plastic coolers and store them outside on a secure deck or patio. Be sure they are locked tightly; hungry local wildlife will be active and looking for easy meals during a storm.
Phase 4: Navigating the Frozen Aftermath
The storm has passed, the sky is clear, but the danger is far from over. The days immediately following a major ice storm are often more hazardous than the storm itself. Falling ice, downed power lines, and improper cleanup techniques present significant safety risks.
The Lethal Threat of Downed Power Lines
Heavy ice accumulations will continue to cause tree limbs to snap and power lines to fall for days after the precipitation stops. Never assume a downed line is dead or de-energized. The utility company may attempt to re-energize lines remotely, or a neighbor’s improperly installed generator could "backfeed" electricity back into the local grid, turning a downed wire into a silent killer.
Stay at least 35 feet away from all downed power lines. Be aware of "step potential"—when a live wire touches the wet, icy ground, electricity radiates outward in concentric circles. If you walk near the wire, the voltage difference between your feet can cause electricity to flow up one leg and down the other, resulting in severe injury or electrocution. If you must move away from a suspected live area, keep your feet close together and shuffle slowly without lifting your feet off the ground.
Safe Chainsaw Operation and Debris Removal
Once roads are safe enough to traverse, you may need to clear fallen limbs from your driveway or roof. If you are using a chainsaw, safety must be your absolute priority. The Red Cross and OSHA recommend the following protocols:
- Wear Proper PPE: Always wear a chainsaw helmet with a face shield, hearing protection, heavy leather gloves, and chainsaw chaps.
- Watch for "Springpoles": A springpole is a branch or sapling that is bent under the immense weight of a fallen tree. When you cut into a springpole, the stored mechanical energy can release violently, striking you with enough force to cause fatal injuries. Always cut springpoles carefully, making multiple small relief cuts on the underside of the bend.
- Clear the Work Area: Ensure you have a clear, unobstructed escape path before making any cuts. Never cut branches that are higher than your shoulders.
Avoiding Physical Overexertion
Clearing heavy, ice-laden branches and shoveling thick ice is incredibly strenuous physical labor. Cold weather constricts blood vessels, raising your blood pressure and increasing the workload on your heart. Every year, thousands of people suffer heart attacks while clearing winter storm debris. Take frequent breaks, stay hydrated, and do not push past your physical limits.
Building a Community Resilience Network
While individual self-reliance is the foundation of ice storm preparedness emergency preparedness, no household is an island. True resilience is built through community cooperation. Before the winter season begins, connect with your immediate neighbors to establish a community emergency preparedness guide plan.
Identify vulnerable individuals in your neighborhood preparedness network—such as the elderly, disabled, or families with newborn infants. Create a simple emergency communication plan plan, such as a designated radio channel on family-band walkie-talkies (FRS/GMRS) or a physical signal, like placing a colored card in a front window (e.g., green for "OK", red for "Help Needed").
By pooling resources, sharing generator power, or coordinating neighborhood debris-clearing teams, you can dramatically reduce the strain on local emergency services and ensure that everyone in your community makes it through the freeze safely.
Preparation is the Ultimate Defense
An ice storm is a powerful reminder of nature’s ability to disrupt our modern, interconnected lives in an instant. It tests the limits of our infrastructure, our homes, and our personal resolve. Yet, as daunting as freezing rain and multi-day outages can be, they are entirely survivable when met with deliberate, methodical preparation. By understanding the science of ice accumulation, winterizing your home’s structural envelope, maintaining a rigorous ice storm preparedness checklist, and mastering the tactical skills of cold-weather survival, you replace fear with capability. You cannot control the weather, but you can control your readiness. Build your household plan today, secure your supplies, and stand ready to face the storm with confidence and resilience.
Frequently Asked Questions
What should a ice storm preparedness plan include?
Start with the immediate safety steps, the supplies and records your household needs, a communication plan, and a regular review schedule. Follow local official guidance during an active emergency.
How often should I review ice storm preparedness preparations?
Review them at least twice a year and whenever your household, medication, location, or local risks change. Replace expired supplies and practice key steps.
Where can I find reliable emergency guidance?
Use local emergency management alerts and established public-health or emergency-management agencies. A blog guide should support, not replace, official real-time instructions.