⚡ Key Facts
- Maximum Shelf Life: Refined white flour sealed in airtight 7-mil Mylar bags with appropriate oxygen absorbers can maintain culinary utility and caloric stability for 20 to 25 years when kept below 70°F (21°C).
- Insect Eradication: The United States Department of Agriculture (USDA) notes that chilling flour to 0°F (-18°C) or lower for a continuous minimum of 4 to 7 days successfully terminates all life stages of flour weevils (Sitophilus granarius), including microscopic eggs.
- Atmospheric Threshold: Oxygen absorbers reduce headspace oxygen levels within sealed containers to below 0.01% (100 parts per million), creating an anoxic environment where both biological infestation and oxidative rancidity cannot occur.
- Whole Wheat Limitations: Whole wheat flour contains germ oil rich in polyunsaturated fats that oxidize quickly; even under optimal storage conditions, whole wheat flour lasts approximately 2 to 5 years, compared to white all-purpose flour which lasts several decades.
- Emergency Agency Consensus: FEMA and the American Red Cross recommend rotating and inspecting grain reserves periodically, emphasizing that moisture content must stay below 12% to prevent lethal anaerobic pathogen proliferation such as Clostridium botulinum.
When supply chains experience shock events or inflationary pressure degrades purchasing power, basic pantry staples become your household's baseline survival asset. Flour provides an exceptionally dense concentration of accessible carbohydrates and calories, functioning as the foundational building block for bread, hardtack, pasta, and emergency survival rations. Yet, thousands of well-intentioned preparedness advocates open five-gallon buckets after five years only to discover grayish, bitter powder crawling with adult weevils and pungent with rancid lipids. Long term flour storage is entirely achievable, but it forgives no procedural shortcuts. For the practical checklist side, use the community emergency preparedness guide.
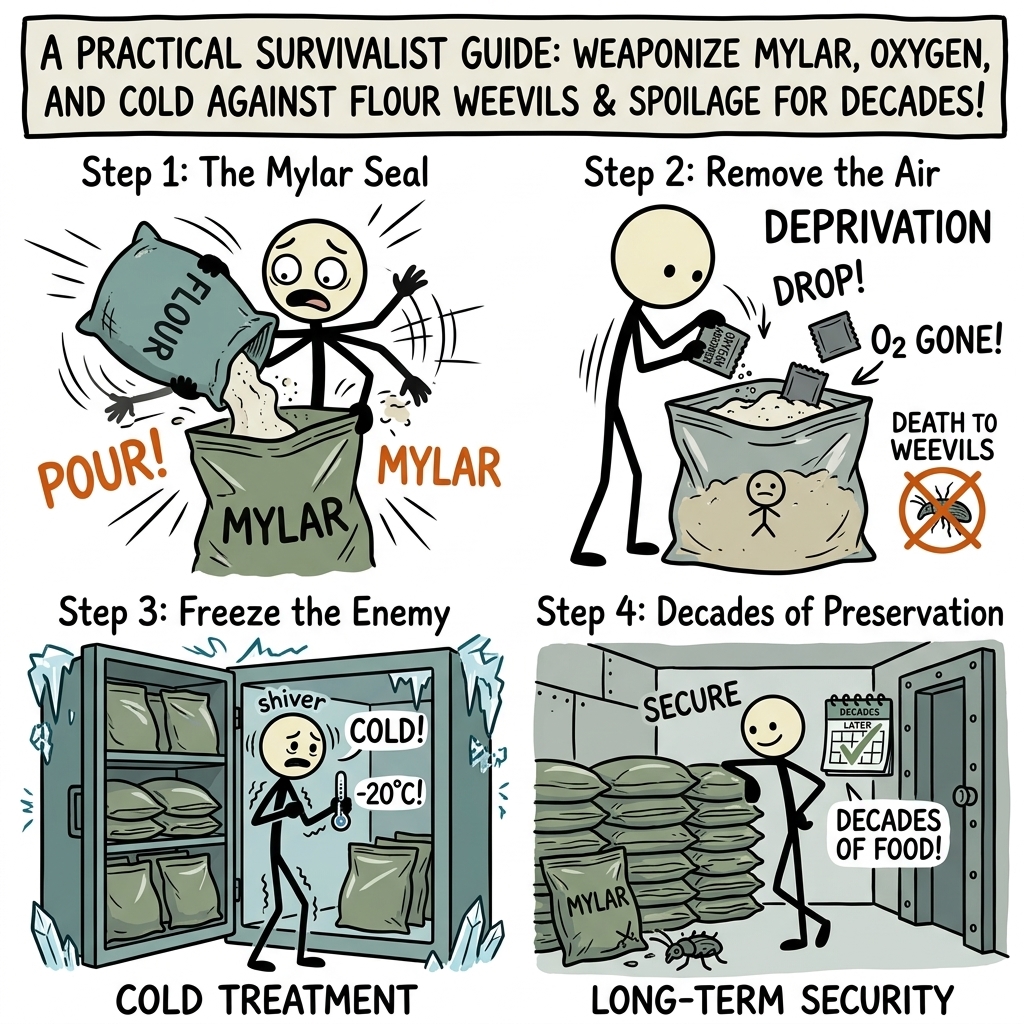
The secret to keeping bulk flour viable across decades lies in engineering a controlled micro-environment that simultaneously attacks the two primary vectors of grain degradation: chemical oxidation and biological contamination. By leveraging cold-treatment methods, industrial-gauge Mylar barriers, and precisely calculated oxygen absorbers, you can effectively pause the clock on grain decomposition. This guide walks you through the step-by-step science and field execution needed to store flour safely, economically, and indefinitely. For the practical checklist side, use the neighborhood preparedness network.
The Hidden Threats to Bulk Flour Storage
To preserve flour over decades, you must first understand why it degrades in standard packaging. Commercial paper flour bags are designed for rapid consumer turnover within six to twelve months. These bags are completely permeable to ambient moisture, atmospheric oxygen, and biological intruders. For the practical checklist side, use the emergency communication plan.
Microscopic Life: The Grain Weevil Dilemma
Many people incorrectly assume insect infestations emerge because pests chew through external packaging while sitting in the pantry. While external boring can occur, the primary threat already lives inside the grain before you bring it home from the retail store or mill. Female grain weevils (Sitophilus granarius) and flour beetles (Tribolium confusum) drill microscopic cavities into intact grain kernels during cultivation and post-harvest holding, deposit their eggs inside, and seal the opening with a gelatinous secretion.
When the grain is milled into white or whole wheat flour, commercial roller mills pulverize the bulk matter, but microscopic eggs routinely survive the sifting process. If left in a warm, oxygen-rich environment, these eggs hatch into larvae, consume the starches around them, pupate, and emerge as adult insects. Knowing how to keep weevils out of flour requires killing those dormant eggs before sealing the container, then ensuring no ambient oxygen remains to sustain any surviving biological organism.
Chemical Oxidation and Lipid Rancidity
The second primary failure point is chemical rather than biological. Flour is not an inert powder; it contains trace proteins, starches, and essential fatty acids. When atmospheric oxygen comes into direct contact with these fatty acids, it triggers a chain reaction known as lipid autoxidation.
This chemical reaction produces volatile aldehydes, ketones, and free fatty acids that impart a sharp, sour, or play-dough-like aroma and taste to the flour. More importantly, heavily oxidized flour suffers from degraded gluten networks. The proteins gliadin and glutenin lose their capacity to bond effectively, meaning your flour will fail to rise, hold gas, or produce viable dough during an emergency.
Moisture and Anaerobic Hazards
Moisture is the universal catalyst for food destruction. According to the USDA Agricultural Research Service (ARS), commercially packaged white flour typically holds an internal moisture content between 11% and 13.5%. If flour is sealed into an airtight container with excessive internal moisture or stored in humid environments without vapor-proof barriers, molds such as Aspergillus and Penicillium will flourish.
Worse, combining high moisture levels with an oxygen-free environment creates ideal conditions for anaerobic bacterial proliferation, including the deadly pathogen Clostridium botulinum. For safe, long term flour storage, internal grain moisture must consistently remain below the critical threshold of 12% to 13%, and external humidity must be entirely locked out by non-porous barriers.
White Flour vs. Whole Wheat: Understanding the Chemistry
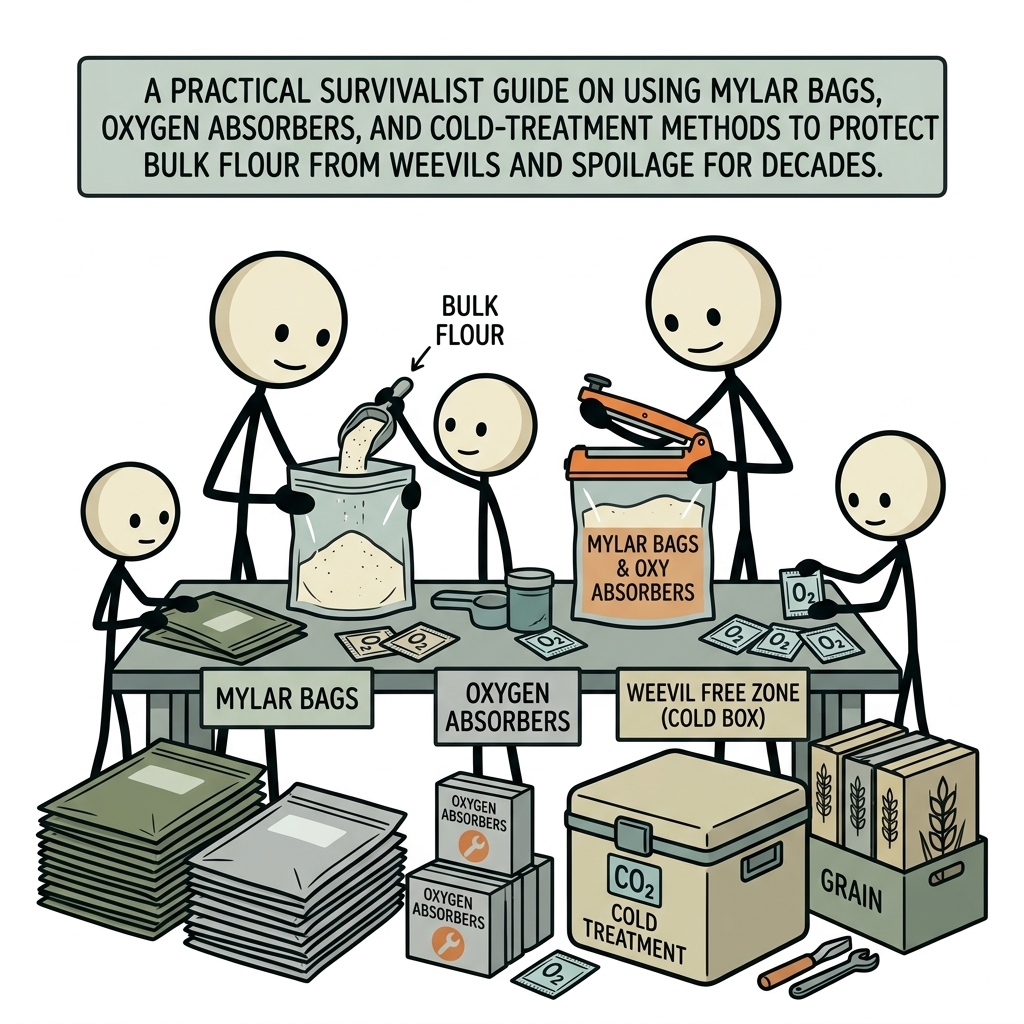
Before buying hundreds of pounds of bulk grain, you must select the right type of flour for your long-term objectives. The structural anatomy of the wheat kernel determines how well the milled product survives across multi-decade storage timelines.
| Flour Type | Fat Content | Expected Shelf Life (Properly Sealed) | Primary Degradation Vector |
|---|---|---|---|
| All-Purpose White Flour | ~1.0% – 1.2% | 20 to 25+ Years | Protein/Gluten denaturation |
| Bread Flour (White) | ~1.2% – 1.5% | 15 to 20 Years | Oxidation of trace germ fats |
| Whole Wheat Flour | ~2.5% – 3.0% | 2 to 5 Years | Rapid lipid rancidification |
| Intact Wheat Berries | Protected internally | 30+ Years | External moisture breach |
All-purpose white flour has had both its bran (the hard outer husk) and germ (the nutrient-dense reproductive core) removed during processing, leaving behind only the starchy endosperm. Because the oil-rich germ is gone, white flour contains negligible fat, making it exceptionally stable for multi-decade survival pantries.
Conversely, whole wheat flour retains the germ and bran. While this preserves dietary fiber, B vitamins, and trace minerals, it also introduces volatile polyunsaturated oils. These oils rapidly spoil, turning whole wheat flour acrid within two to three years regardless of packaging. If your preparedness strategy calls for 100% whole grain nutrition over decades, the proper strategy is storing intact hard red or white wheat berries and grinding them with an emergency hand mill, rather than relying on pre-milled whole wheat flour.
Step 1: The Pre-Treatment Phase (Cold-Treatment Protocols)
Executing sound emergency emergency food storage guide flour prep begins long before the powder ever touches a Mylar bag. Cold treatment acts as an organic, non-chemical sterilization step designed to break the reproductive life cycle of stored-grain insects.
Thermal Mortality Parameters for Stored-Product Pests
Research published by university agricultural extensions (notably Utah State University Extension and Kansas State University) demonstrates that stored-product insects are vulnerable to prolonged thermal depression. Adult weevils die quickly under cold stress, but eggs and pupae possess physiological cryoprotectants that allow them to endure short freezes.
To guarantee complete mortality across all life stages, bulk flour must be exposed to 0°F (-18°C) or lower for a continuous period of at least 96 hours (4 full days). If your residential deep freezer operates closer to -10°F (-23°C), a 72-hour exposure is typically adequate. Standard refrigerator-freezer compartments that cycle between 10°F and 25°F will fail to provide reliable core temperatures and should not be relied upon for bulk treatment.
The Critical Moisture Hazard During Thawing
The single greatest operational error made during the cold-treatment process occurs during the post-freeze thawing phase. When you pull a frozen, cold bag of flour out of sub-zero temperatures into a 70°F room with average ambient humidity, condensation instantly forms on the outside of the bag and wicks straight through paper walls into the flour.
Introducing surface moisture creates localized hot spots of elevated water activity, setting up prime breeding grounds for mold colonies once the container is sealed. To execute cold treatment correctly without introducing moisture, follow this strict protocol:
- Place original paper sacks of flour inside heavy-duty contractor trash bags or zip-top bags while at room temperature, squeezing out excess air.
- Place the sealed bags into your deep freezer set to 0°F (-18°C) or below for 5 to 7 days. This allows the core temperature of dense bulk flour to thoroughly drop to the target thermal floor.
- Remove the flour from the freezer, but do not open the outer plastic containment bag.
- Allow the entire package to sit undisturbed at room temperature for a full 24 to 48 hours. Let all condensation form on the external plastic bag while the internal flour slowly acclimates to ambient room temperature.
- Once the flour reaches equilibrium with room temperature and the outer surfaces are completely dry, carefully unpack the paper flour sacks and immediately transition to the sealing phase.
Step 2: Selecting Proper Equipment (Mylar and Buckets)
Storing flour in mylar bags is widely recognized by real-world emergency scenarios guide organizations and survival specialists as the premier preservation standard. However, material specifications vary wildly across the consumer marketplace, and choosing the wrong materials will compromise your long-term supplies.
Why Plastic Buckets Alone Are Insufficient
A common survival myth claims that pouring flour straight into a standard food-grade five-gallon bucket with an airtight gasketed lid guarantees long-term preservation. This is false. High-density polyethylene (HDPE #2), while food safe and physically durable, is a semi-porous polymer at the molecular scale.
Atmospheric oxygen slowly permeates HDPE plastic walls over time via gas diffusion. A standard food-grade bucket allows oxygen transmission rates that can spoil fat and sustain insect life within two to three years. HDPE buckets serve as exceptional armor against rodents, punctures, and mechanical impacts, but they are not true gas barriers. Mylar provides that missing gas-impermeable seal.
Mylar Material Specifications: The 7-Mil Standard
Mylar is a biaxially-oriented polyethylene terephthalate (BoPET) polyester film laminated with an ultra-thin layer of aluminum foil. This metallic barrier reduces the Oxygen Transmission Rate (OTR) and Water Vapor Transmission Rate (WVTR) to practically zero.
For fine powdery foodstuffs like flour, material thickness is critical:
- 3.5 to 4.5 Mil Bags: These light-duty films are prone to micro-fractures when folded and can be punctured by the shifting weight of dense flour during transit. Avoid them for critical long-term stores.
- 5.0 to 5.5 Mil Bags: Acceptable baseline performance, but require delicate handling to avoid pinhole fractures near the base seams.
- 7.0 to 7.5 Mil Bags: The professional survival standard. These heavy-duty bags offer superior puncture resistance, structural rigidity, and optimal thermal retention during heat-sealing, ensuring your barrier remains unbroken for 20+ years.
Step 3: Calculating and Deploying Oxygen Absorbers
The core mechanism that makes long term flour storage work across multi-decade spans is anoxic packaging. By removing chemically reactive oxygen, biological pests suffocate and oxidative breakdown stops completely. This is achieved using iron-based oxygen absorbers (OAs).
The Biochemical Action of Oxygen Absorbers
Oxygen absorbers do not contain toxic synthetic fumigants; they contain a simple mixture of fine iron powder, sodium chloride, activated carbon, and a small amount of trapped moisture. When unpacked and exposed to ambient air, the salt catalyzes an exothermic chemical oxidation reaction: the iron powder rusts, permanently bonding free O2 molecules into stable iron oxide (Fe2O3).
Standard ambient air consists of roughly 20.9% oxygen, 78% nitrogen, and trace inert gases. Oxygen absorbers only consume the 21% that is oxygen; they do not absorb nitrogen. Consequently, a properly sealed Mylar bag will not collapse into a hard, vacuum-formed brick like freeze-dried foods do. Flour is exceptionally fine and dense, packing closely together with minimal air voids. The bag will pull in slightly, but it will not appear fully vacuum-sealed. This is normal and chemically sound.
Sizing Equations: Calculating Necessary CC Capacity
Oxygen absorber capacity is rated in cubic centimeters (cc) of oxygen absorbed. Using too few absorbers leaves residual oxygen inside the container, allowing weevil eggs to survive and spoiling the flour. Using more than the minimum calculated capacity poses zero danger to the food and provides an essential safety margin.
To accurately determine the necessary capacity, measure the volume of the container and account for the space occupied by the flour:
- A 1-Gallon Mylar Bag holding roughly 6 pounds of flour requires approximately 300cc to 500cc of absorption capacity.
- A 5-Gallon Mylar Bag holding 25 to 30 pounds of compacted flour requires 1,500cc to 2,000cc of absorption capacity.
If you are packaging flour in humid summer weather, or if you do not manually squeeze out maximum headspace volume before sealing, increase your 5-gallon container baseline to 2,500cc. The marginal cost of extra oxygen absorbers is trivial compared to losing an entire 30-pound container of food.
The Critical Warning: Never Use Desiccants with Oxygen Absorbers
One of the most frequent errors in emergency food packaging is combining silica gel desiccant packs with iron-based oxygen absorbers in the same container. Desiccants pull moisture out of the air. Iron-based oxygen absorbers require trace atmospheric moisture to initiate and complete the chemical oxidation process.
If you pack silica gel desiccant beside an oxygen absorber, the desiccant can pull ambient moisture away from the iron powder, stalling the absorption reaction entirely. The absorber fails, leaving residual oxygen in your storage bag and rendering the entire preservation attempt useless. Keep your flour dry through cold-treatment protocols and sealed Mylar barriers, and omit desiccant packs from the assembly entirely.
Step 4: The Step-by-Step Sealing Protocol
Achieving a reliable, multi-decade hermetic seal demands clean surfaces and precise temperature application. Flour creates airborne dust that can settle on the sealing margins of your Mylar bag, which can cause micro-voids in the heat seal if not handled properly. Follow this systematic field protocol.
Required Tools and Staging
- 5-Gallon, food-grade HDPE buckets with tight-fitting gasketed lids.
- 7-mil Mylar bags sized for 5-gallon containers (typically 20" x 30").
- 2,000cc to 2,500cc worth of sealed oxygen absorbers.
- A 1.5-inch to 2-inch wide commercial impulse heat sealer, or a clean household flat iron/hair straightener with adjustable temperature settings.
- A clean, flat 2x4 wooden board or hard metal straight edge.
- A clean microfiber towel and rubbing alcohol.
- Permanent marker for labeling batch records.
Execution Protocol
Step 1: Container Insertion and Alignment. Place the empty 7-mil Mylar bag directly into the 5-gallon food-grade bucket before filling it. Trying to drop a filled, 30-pound unsupported Mylar bag into a bucket later risks tearing the seams and creating pinholes.
Step 2: Transfer and Compaction. Carefully pour your pre-treated, room-temperature flour into the Mylar-lined bucket. Every 5 to 10 pounds, firmly tap the bucket against the floor or use a sanitized press to consolidate the powder. Compacting the flour minimizes internal headspace air and prevents the bag from settling unevenly over time.
Step 3: Clean the Sealing Lip. Flour dust naturally drifts upward during transfer, leaving a thin film along the inner walls of the Mylar bag. Take a clean, dry microfiber cloth and wipe down the top 4 inches of the inner plastic liner. If grease or heavy dust is present, lightly moisten the cloth with rubbing alcohol, wipe the inside rim, and let it dry completely before sealing. Contaminants along this seam prevent the internal polyethylene layers from fusing into a solid hermetic barrier.
Step 4: Create the Primary Heat Seal. Fold the top edges of the Mylar bag together over your straight wooden backing board. Using an impulse sealer (or a household flat iron set to 375°F–400°F / 190°C–205°C), run a uniform 1-inch to 2-inch heat weld across the top of the bag. Leave an open gap of 2 to 3 inches on one side. This gap allows you to purge remaining air and insert your oxygen absorbers at the very last moment.
Step 5: Insert Absorbers and Final Purge. Open your sealed package of oxygen absorbers. Quickly insert your calculated capacity (e.g., one 2,000cc pack or four 500cc packs) deep into the open side of the bag, pushing them past the flour surface. Immediately press down on the container with both hands to push out as much headspace air as possible through the remaining gap, then seal the opening shut with your iron.
Step 6: Inspection and Double-Sealing. Inspect the seal across the entire top edge of the bag. The Mylar should appear smoothly bonded with no wrinkles, bubbles, or unlaminated sections. For maximum reliability, run a second parallel heat seal slightly above or below the first one. This redundancy ensures your seal holds even if one track has an invisible flaw.
Storage Environment & Long-Term Rotation Dynamics
Once your flour is sealed within an anoxic Mylar envelope, external environmental factors determine how long it will remain usable. Mylar stops gas diffusion and moisture transfer, but it cannot insulate against ambient thermal degradation.
The Arrhenius Equation: Temperature Dictates Longevity
Chemical reactions accelerate with heat and slow with cold. In food science, this dynamic is governed by the Arrhenius equation: as a broad baseline, the rate of chemical degradation doubles for every 18°F (10°C) increase in temperature. Conversely, lowering the ambient storage temperature significantly delays that same degradation.
- Stored at 85°F–90°F (Hot attic, garage, outbuilding): Flour proteins lose their functional elasticity within 3 to 5 years, and internal trace fats spoil rapidly.
- Stored at 70°F (Standard air-conditioned living space): Shelf life extends reliably to 10 to 15 years.
- Stored at 50°F–60°F (Deep cellar, dry basement, subterranean vault): Flour remains nutritionally intact and bakes reliably for 20 to 25+ years.
Protect your containers from dramatic temperature swings. Cycles of heating and cooling cause repeated internal pressure shifts that put mechanical stress on your Mylar heat seams.
Physical Protection: Buckets, Pests, and Light
While Mylar forms an exceptional barrier against light and air, rodents like mice and rats can easily chew through it if they smell grain or need nesting material. Never store free-standing Mylar bags directly on open shelves or concrete floors.
Always house sealed Mylar bags inside rigid, food-grade HDPE buckets fitted with rubber-gasketed lids or threaded Gamma Seal lids. Keep buckets elevated at least two inches off raw concrete floors using wood pallets or composite shelving to avoid moisture condensation under the containers. Store them in a dark space, since exposure to ultraviolet radiation breaks down plastic and bucket polymers over time.
Quality Assurance, Testing, and Baking with Aged Flour
Knowing how to store flour long term means little if you do not know how to evaluate your food once it is opened. When you unseal a bucket 10 or 20 years from now, follow this systematic quality assurance process before cooking with it.
The Unsealing and Sensory Inspection
Open the outer bucket and inspect the Mylar bag. The bag should display a mild inward tension, confirming that the internal oxygen was successfully consumed by your absorbers. Carefully cut across the top of the bag beneath the heat seal, saving enough material so the bag can be resealed later if needed.
- The Visual Scan: The flour should be completely powdery, white to pale off-white, and free from clumped moisture balls, discoloration, or webbing (which indicates larval insect activity).
- The Olfactory Check: Dip your hand in and smell a handful of the flour. Good flour smells clean, neutral, and dusty. If it smells sour, sharp, metallic, or resembles old oil paint or wet cardboard, it has oxidized and gone rancid. Discard it.
- The Texture Test: Rub the flour between your fingers. It should feel smooth, soft, and uniform, with no grittiness or hard, crystallized moisture clumps.
Baking Adaptations for Long-Stored Flours
Even under near-perfect storage conditions, flour aged for over a decade experiences minor structural changes. Atmospheric nitrogen exposure and natural aging cause proteins to lose some of their original elasticity, weakening the gluten matrix when worked into a dough.
If you find that your 15-year-old stored flour produces dense, flat loaves of bread that struggle to rise, you can easily restore its performance with basic pantry additives:
- Vital Wheat Gluten: Add 1 to 2 tablespoons of vital wheat gluten per 4 cups of aged flour. This supplements degraded glutenin and gliadin proteins, restoring elasticity and helping dough rise properly.
- Dough Conditioners: Adding 1/4 teaspoon of ascorbic acid (pure Vitamin C powder) per batch strengthens gluten bonds and improves oven spring.
- Hydration Adjustments: Highly aged flour is often exceptionally dry. You may need to increase recipe hydration levels by 3% to 5% to achieve standard dough consistency.
Securing Your Household's Caloric Baseline
A resilient survival strategy relies on proven, practical fundamentals rather than high-tech shortcuts. Grains have sustained civilization through centuries of famine, geopolitical upheaval, and economic decline for a straightforward reason: when handled with care, they outlast the crises that disrupt our access to fresh food.
Storing bulk flour does not require commercial laboratory equipment or expensive industrial services. By maintaining clean cold-treatment protocols to eliminate insect pests, packaging in puncture-resistant 7-mil Mylar, using properly calculated oxygen absorbers, and storing everything in cool, dark conditions, you construct an enduring emergency resource. Take ownership of your pantry preparedness today; secure your bulk staples methodically, and ensure your home retains its fundamental food independence no matter what the future holds.
Frequently Asked Questions
How long can white flour be stored for long-term emergencies?
When sealed in airtight Mylar bags with oxygen absorbers and kept in a cool, dark environment below 70°F (21°C), refined white all-purpose flour can remain safe and usable for 10 to 15 years.
What is the best way to prevent weevils and insect pests in stored flour?
Freeze unsealed flour at 0°F (-18°C) or lower for at least 72 hours before packaging to kill any dormant insect eggs. Then immediately package the flour into airtight containers with oxygen absorbers, which deprives remaining pests of oxygen.
Why does whole wheat flour have a shorter storage life than white flour?
Whole wheat flour retains the grain's germ and bran, which contain natural oils and fats. These oils break down through oxidation over time, causing whole wheat flour to turn rancid within 1 to 2 years, even under sealed storage conditions.
Can you safely store flour in its original paper packaging?
No. Original paper packaging readily absorbs ambient moisture, allows oxygen exposure, and offers no defense against pantry pests or rodents. Paper-stored flour typically degrades and risks infestation within 6 to 12 months.
How do you identify flour that has gone bad?
Spoiled flour usually exhibits a distinct sour, musty, or cardboard-like rancid odor. Visual cues include clumping from moisture, mold growth, or fine silk webbing and crawling larvae produced by pantry pests.