⚡ Key Facts
- Widespread Devastation: According to the National Oceanic and Atmospheric Administration (NOAA), flooding is the most common and costly natural disaster in the United States, accounting for billions of dollars in infrastructure damage annually. For the practical checklist side, use the community emergency preparedness guide.
- The Cost of Delay: The Federal Emergency Management Agency (FEMA) warns that just one single inch of floodwater can cause up to $25,000 in structural and cosmetic damage to a one-story home. For the practical checklist side, use the neighborhood preparedness network.
- Rapid Bio-Growth: The Centers for Disease Control and Prevention (CDC) states that mold and toxic fungi can begin colonizing damp surfaces within 24 to 48 hours of initial water exposure. For the practical checklist side, use the emergency communication plan.
- Contaminated Waters: The Environmental Protection Agency (EPA) classifies outdoor floodwater as Category 3 ("black water"), meaning it is highly likely to contain raw sewage, chemical runoff, heavy metals, and virulent pathogens. For the practical checklist side, use the family emergency planning guide.
- Systemic Risk: Data from the U.S. Geological Survey (USGS) indicates that over 75% of declared federal disasters involve flooding, proving that both coastal and inland properties are vulnerable to water-driven structural failure. For the practical checklist side, use the real-world emergency scenarios guide.
The floodwaters have finally receded, leaving behind a silent, mud-slicked landscape. While the immediate physical threat of the storm has passed, the true survival phase for your property and your family's health is just beginning. Stepping back into a water-damaged home is not merely a chore; it is a high-stakes tactical operation. The environment inside a flooded building is highly volatile, filled with compromised structural supports, volatile electrical hazards, and a biological clock ticking rapidly toward a massive mold outbreak. To safely reclaim your sanctuary, you must set aside emotion and approach your post-flood home recovery with methodical, military-grade precision.
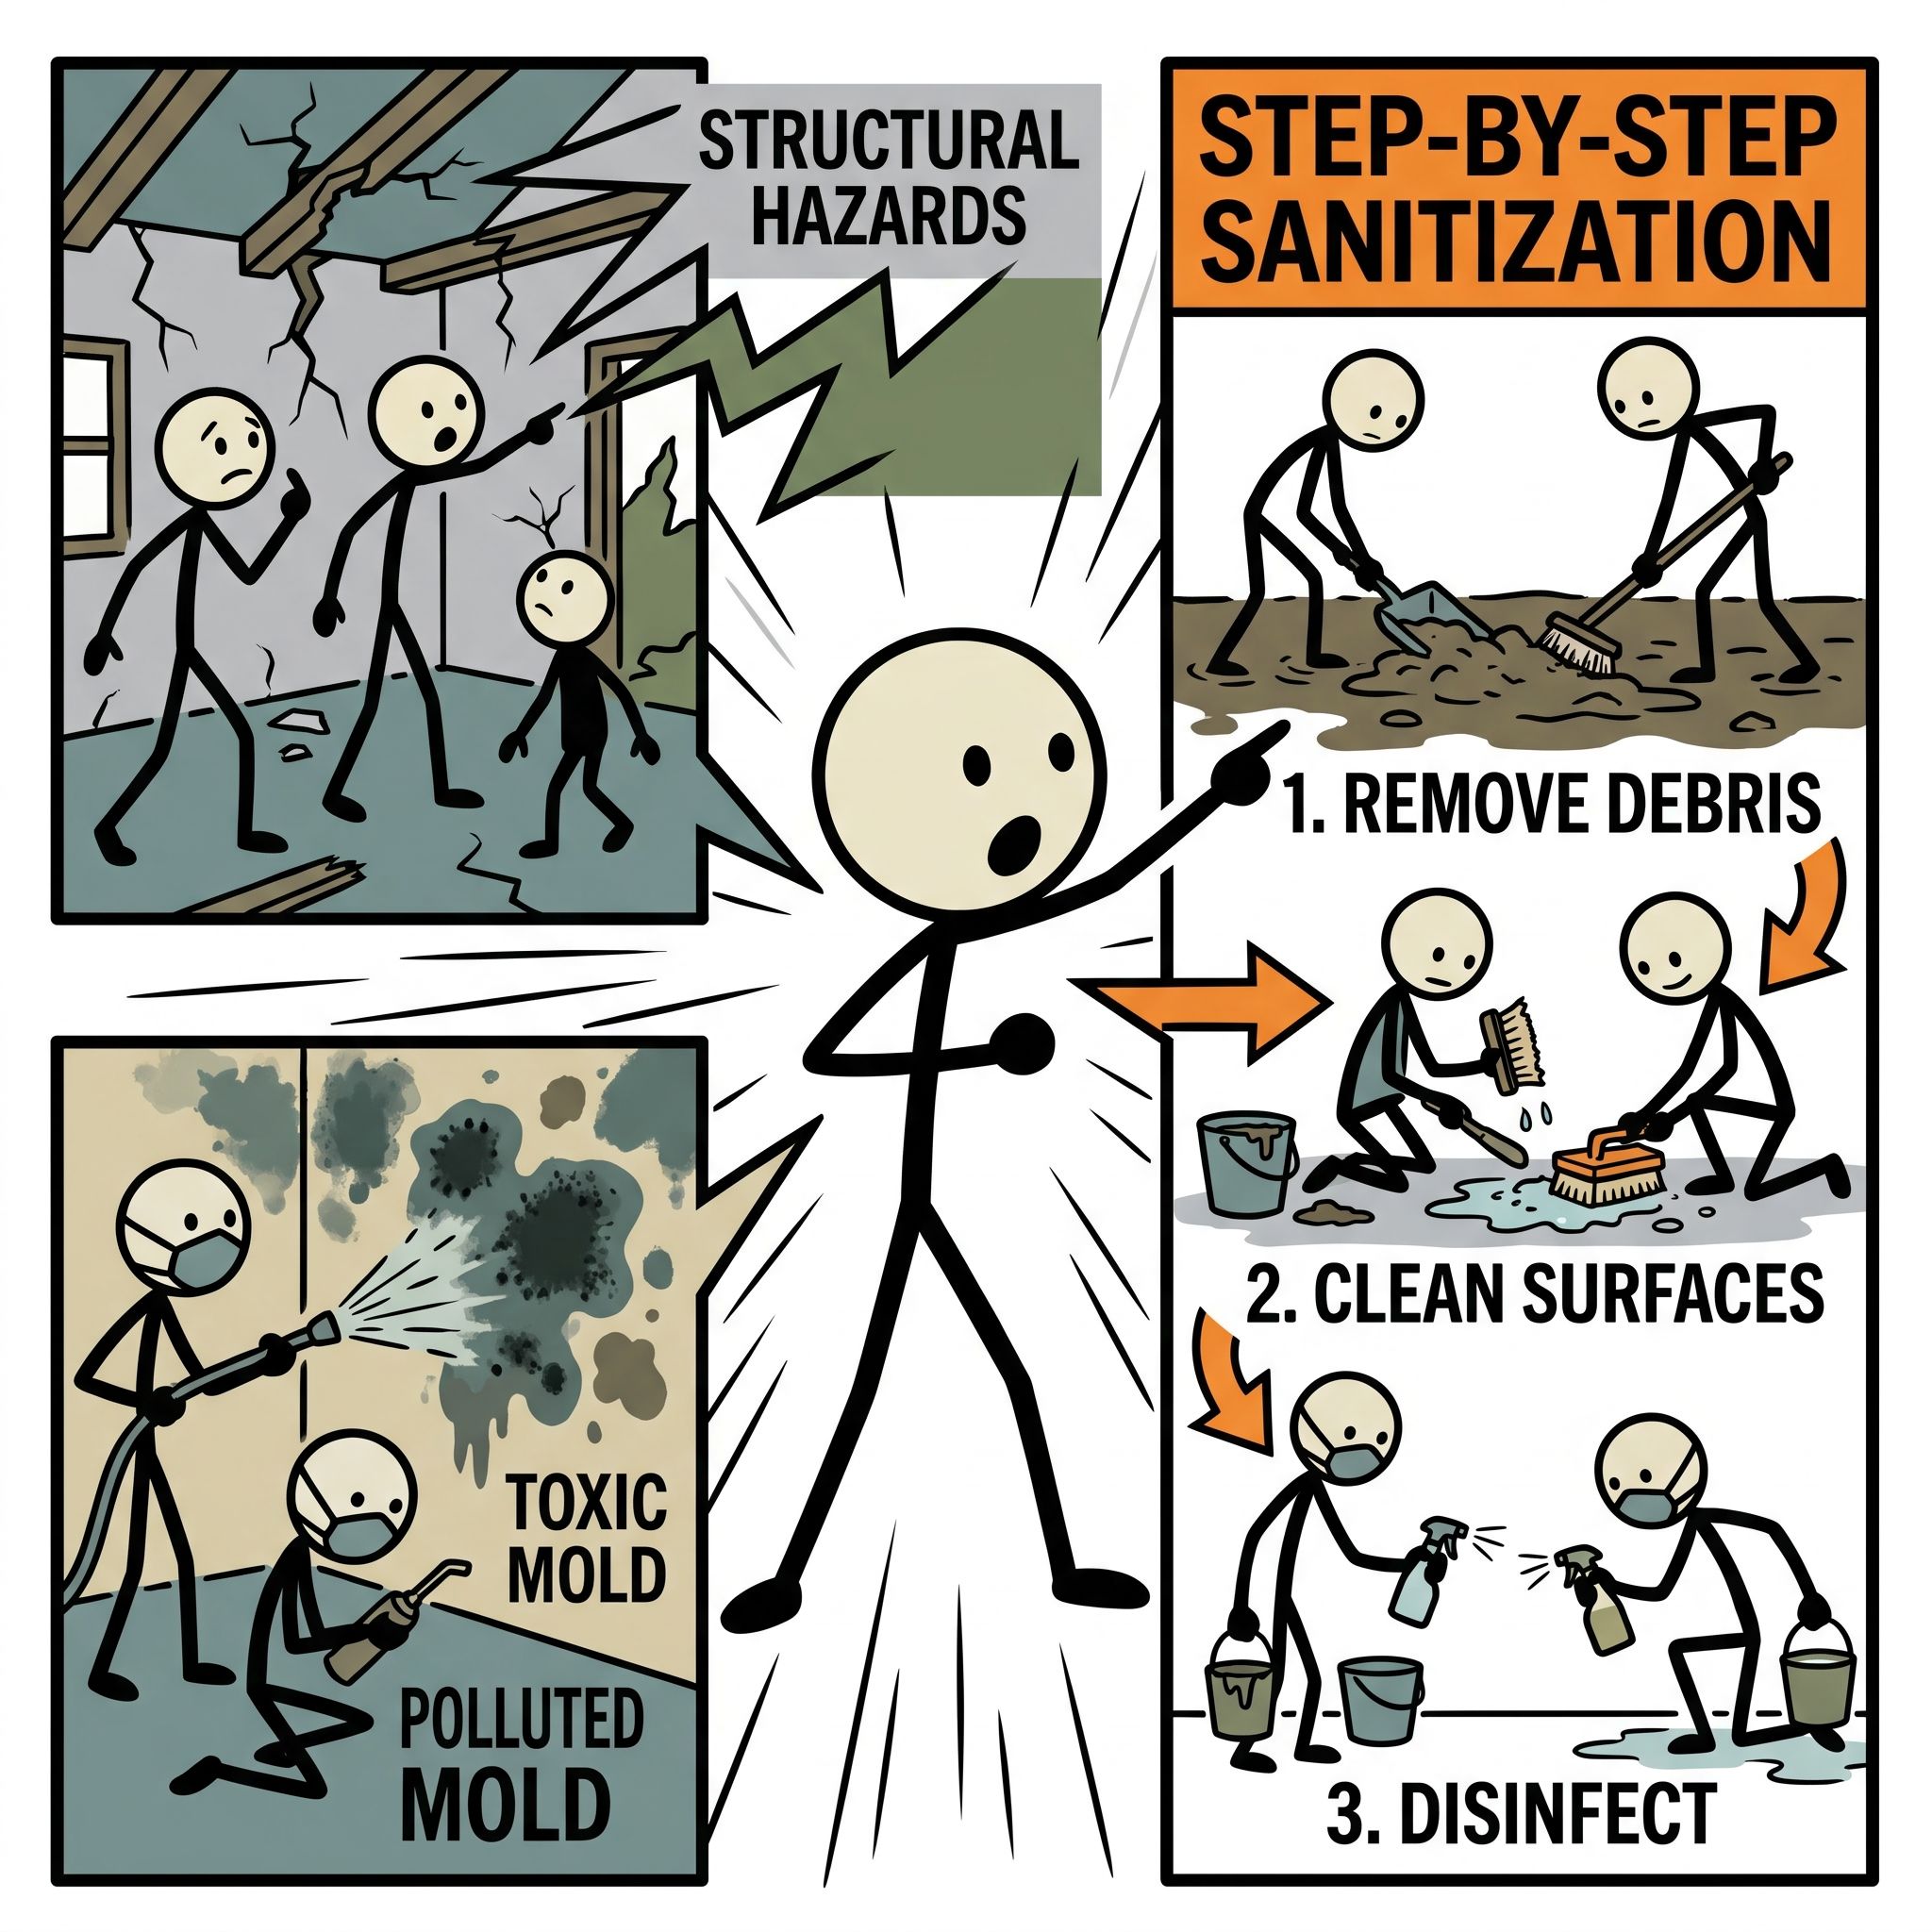
This comprehensive guide serves as your operational blueprint. By combining real-world emergency preparedness protocols with guidelines from FEMA, the CDC, and the American Red Cross, we will walk you through the critical steps of identifying structural hazards, mitigating toxic biological growth, and executing a rigorous, step-by-step sanitization protocol. In the wake of a disaster, knowledge is your primary line of defense. Let us begin the process of rebuilding safely from the ground up.
Phase 1: Navigating the Threshold – Structural Safety and Re-Entry
Before you turn a single doorknob or take a step across your threshold, you must verify that the structure is physically stable. Floodwaters exert immense hydrostatic pressure against foundation walls, saturate load-bearing timbers, and wash away the supporting soil beneath concrete slabs. Rushing into a compromised building can result in catastrophic injury. Your first priority is establishing structural safety after water damage.
1. Perimeter Reconnaissance and Exterior Inspection
Begin with a thorough exterior walk-around. You are looking for signs of shifting, settling, or structural failure. Inspect the foundation line closely for new cracks, bulging masonry, or separation between the sill plate and the foundation. Look upward at the roofline; any new sagging or bowing indicates that the load-bearing walls have shifted or weakened.
Pay close attention to the soil surrounding your home. The USGS notes that receding waters often cause soil erosion and sinkholes, which can leave concrete porches, walkways, and foundation footings suspended in mid-air. If you observe deep trenches alongside your foundation, or if the exterior walls are visibly leaning or bowing outward, do not enter. Contact a licensed structural engineer immediately.
2. Utility Isolation: Eliminating Silent Killers
Do not enter a flooded home until you have absolute confirmation that all utility services are safely isolated. Water and electricity are a lethal combination, and damaged gas lines can turn a flooded home into a volatile explosive hazard.
- Electrical Systems: Never enter a flooded basement or room if the water level is above the electrical outlets, or if the main breaker panel is still active. If you can safely access the main disconnect switch from a dry, exterior location, shut off the power. If not, wait for a certified utility technician or electrician to pull your meter. Do not trust that the grid is down; power can be restored unexpectedly, sending lethal currents through standing water.
- Gas Lines: If you smell gas, hear a hissing or whistling sound, or notice bubbling in standing water near gas appliances, immediately evacuate the area. Do not attempt to turn on any lights, strike a match, or operate electronic equipment, as even a tiny spark can trigger an explosion. Locate the main gas shut-off valve at the meter and use a non-sparking wrench to turn the valve to the "off" position (perpendicular to the pipe).
- Water and Sewer Lines: Municipal water systems are frequently compromised during major flood events. Assume your tap water is contaminated until local authorities declare it safe. Shut off your home's main water valve to prevent contaminated municipal water from backflowing into your interior plumbing lines.
3. Interior Structural Hazards: Ceilings and Floors
Once you have cleared the exterior and isolated the utilities, you may carefully step inside. Your movements must be slow and deliberate. Water-logged materials are incredibly heavy; drywall absorbs water like a sponge, increasing its weight by up to several hundred percent. This added weight poses a severe collapse hazard.
Look up at the ceilings. If you see sagging plaster or drooping drywall, there is likely trapped water pooling on the upper side. To prevent a sudden, catastrophic ceiling collapse, you must drain this water safely. Stand well clear of the sagging area, place a large bucket underneath, and use a long pole or drywall saw to carefully puncture a small weep hole in the center of the sag. This relieves the hydrostatic weight and allows you to control the drainage.
Underfoot, inspect the subfloor for warping, buckling, or soft spots. Saturated plywood and particleboard lose their structural integrity rapidly. If a floor feels spongy or gives way under your weight, do not walk on it. Keep your weight distributed on joists and structural beams whenever possible.
Phase 2: Facing the Toxic Tide – Floodwater Contaminants and PPE

A common mistake in flood water damage restoration is treating floodwater like clean tap water. In reality, floodwaters are highly toxic chemical and biological soups. The EPA and CDC categorize outdoor floodwater as Category 3 "black water," meaning it contains pathogens, industrial chemicals, and physical hazards that pose an immediate risk to human health.
The Biological and Chemical Threats
During a flood, municipal sewer systems overflow, agricultural fields drain, and industrial facilities shed chemicals. This runoff mixes directly with the water entering your home. Exposure to this mixture can lead to severe gastrointestinal illnesses, skin infections, and respiratory distress. Pathogens such as Escherichia coli, Salmonella, and Vibrio thrive in these environments, alongside hepatitis A viruses and various parasitic protozoa.
Furthermore, as water sits inside your home, it dissolves household chemicals, fuel, pesticides, and lead-based paints. This creates a toxic residue that coats every surface as the water recedes. Protecting your skin, eyes, and lungs during the cleanup process is non-negotiable.
The Essential Post-Flood PPE Kit
Before beginning any hands-on post-flood home recovery work, equip yourself with the following personal protective equipment (PPE):
| PPE Item | Specification Required | Protection Purpose |
|---|---|---|
| Respirator | NIOSH-approved N95 or N100 respirator (half-face elastomeric respirator with organic vapor cartridges is highly recommended). | Filters out airborne mold spores, dried silt dust, and aerosolized pathogens. |
| Eye Protection | Non-vented safety goggles. Do not wear safety glasses with side shields, as they do not seal against airborne dust. | Prevents contaminated splash water and mold spores from entering the eyes. |
| Gloves | Heavy-duty, puncture-resistant nitrile or neoprene gloves worn underneath heavy leather work gloves. | Nitrile protects against chemical and biological pathogens; leather protects against sharp debris, nails, and glass. |
| Footwear | Steel-toe, steel-shank waterproof rubber boots. | Prevents puncture wounds from hidden nails and keeps feet dry from toxic standing water. |
| Body Suit | Disposable Tyvek protective suit with hood and booties, or heavy-duty long-sleeved clothing that can be laundered separately. | Prevents direct skin contact with toxic sludge, chemicals, and mold colonies. |
Phase 3: The 48-Hour Window – Strategic Mold Prevention
When it comes to mold prevention after flood events, time is your absolute enemy. Mold spores are omnipresent in the air, requiring only moisture, oxygen, and an organic food source (such as the paper facing on drywall, wood studs, or carpet backing) to germinate. Under optimal conditions, mold colonies form and begin releasing millions of new spores within 24 to 48 hours of water exposure.
To win this race, you must execute an aggressive "muck-out" and drying strategy designed to strip moisture from the environment before mold can establish a foothold.
1. The "Muck-Out" and Gutting Protocol
You cannot dry out materials that are hopelessly saturated. Your first step is removing all porous materials that have come into contact with floodwater. If in doubt, throw it out. This is a foundational rule of flood water damage restoration.
- Drywall and Insulation: Drywall acts like a wick, drawing water upward far above the high-water mark. Using a utility knife and a crowbar, perform a "flood cut." Measure 12 to 24 inches above the highest visible water line, snap a chalk line, and cut away all drywall below that mark. Remove all insulation behind the drywall—including fiberglass batts, cellulose, and mineral wool. Saturated insulation will never dry properly inside a wall cavity and will rapidly breed toxic black mold (Stachybotrys chartarum).
- Flooring and Carpeting: Saturated carpeting and the underlying foam padding must be cut into manageable strips, rolled up, and discarded. Laminate, engineered wood, and vinyl flooring that have been submerged must also be pulled up to expose the subfloor. Only solid hardwood flooring can occasionally be saved, but this requires professional drying equipment and specialized training.
- Baseboards and Trim: Remove all wooden and MDF baseboards, casing, and trim. MDF (medium-density fiberboard) swells and disintegrates when wet and must be thrown away immediately. Solid wood trim can sometimes be cleaned, dried, and reinstalled later.
2. Aggressive Ventilation and Drying Techniques
Once you have stripped the rooms down to their bare structural elements (exposed wood studs and concrete or plywood subfloors), you must actively lower the relative humidity inside the home. Your goal is to drop the indoor relative humidity below 50% as rapidly as possible.
If the outdoor air is dry and the weather permits, open all doors and windows to facilitate natural cross-ventilation. However, if the outdoor air is humid, rainy, or damp, keep the windows closed and rely entirely on mechanical drying.
Deploy high-velocity air movers and commercial-grade dehumidifiers. Position the air movers so they blow air directly across the wet wood studs and floor joists in a continuous, circular pattern. This constant airflow breaks the boundary layer of saturated air clinging to the wet wood, speeding up evaporation. Run dehumidifiers continuously to pull the evaporated moisture out of the air.
Safety Warning: If you are using portable generators to power your drying equipment, keep the generators positioned outdoors, at least 20 feet away from any doors, windows, or fresh-air intakes. Carbon monoxide poisoning is a major hazard during post-flood recovery efforts.
Phase 4: The Step-by-Step Emergency Sanitization Protocol
With the structural elements exposed and the bulk drying process underway, you must transition to deep sanitization. Simply drying out contaminated mud and silt is not enough; dried silt turns into highly toxic dust that can be inhaled. You must physically remove the contaminants and chemically neutralize the pathogens through a systematic emergency home sanitization protocol.
Step 1: Physical Silt and Mud Removal
Before applying any disinfectants, you must remove the physical barrier of mud, silt, and organic debris. Disinfectants cannot penetrate thick layers of dirt; they will be neutralized before they can reach the underlying pathogens.
Use shovels, squeegees, and heavy-duty wet/dry vacuums to remove the bulk of the wet mud and silt from floors and walls. Once the bulk is removed, use clean, clear water and a stiff-bristled scrub brush to wash down all exposed wood framing, concrete surfaces, and non-porous materials. Work from the top down, washing the upper portions of the studs first and rinsing the dirt down to the floor where it can be vacuumed up.
Step 2: Deep Cleaning with a Surfactant
Once the visible silt is gone, scrub all surfaces with a heavy-duty, non-ammonia detergent or soap solution. The purpose of this step is to break down the greasy, organic biofilms that bacteria and mold use to cling to wood and concrete surfaces.
Mix your detergent with hot water and scrub all exposed wood studs, sill plates, and subfloors vigorously. Use a sponge or rag to wipe away the loosened grime, rinsing your cleaning tools frequently in a bucket of clean water. Change your wash and rinse water often to avoid simply spreading the contaminants around.
Step 3: Chemical Disinfection (The Pathogen Kill Step)
Now that the surfaces are physically clean and free of organic film, you can apply your chemical sanitizer. The gold standard for residential disinfection after a flood is a dilute solution of regular, unscented liquid household chlorine bleach (typically 5.25% to 8.25% sodium hypochlorite concentration).
To mix a highly effective sanitizing solution recommended by the CDC and FEMA, use the following ratio:
Mix 1 cup (8 ounces) of regular, unscented liquid household bleach per 1 gallon of clean water.
Never mix chlorine bleach with ammonia, vinegar, or other household cleaners. Doing so creates highly toxic chloramine or chlorine gases, which can cause severe respiratory damage or death.
Apply the bleach solution to all hard, non-porous surfaces and structural wood studs using a garden sprayer, sponge, or mop. Ensure the surfaces remain visibly wet with the solution for at least 10 minutes. This "wet contact time" is critical; pathogens are not killed instantly on contact, and drying too quickly will reduce the effectiveness of the sanitizer.
After the contact time has elapsed, allow the surfaces to air-dry completely. Do not rinse the bleach solution off the structural timbers; the residual bleach will continue to inhibit mold growth as the wood dries.
The Salvage vs. Discard Matrix
To help you make fast, logical decisions during your cleanup, use this tactical decision matrix for household items:
| Material Class | Examples | Action Required | Sanitization Protocol / Rationale |
|---|---|---|---|
| Highly Porous | Mattresses, pillows, stuffed animals, upholstered furniture, box springs. | DISCARD | These items act like giant sponges for pathogens and cannot be thoroughly sanitized internally. Attempting to save them poses a severe health risk. |
| Semi-Porous (Hard) | Solid wood furniture, structural framing lumber, hardwood flooring. | SALVAGE (with care) | Can be saved if they are structurally sound. Clean thoroughly with detergent, sanitize with the bleach solution, and dry completely over several weeks. |
| Non-Porous | Glass, metals, plastics, ceramic tile, concrete blocks. | SALVAGE | Wash with detergent, rinse, and apply bleach sanitizer. These materials do not absorb water and can be 100% restored. |
| Food & Medicine | Cardboard food boxes, screw-top jars, medicines, baby formula. | DISCARD | Any food or medicine exposed to floodwater must be thrown away. The only exception is commercially canned goods, provided you remove the labels, wash the cans with soap, and sanitize them in bleach water. |
Phase 5: Rebuilding Safely – Verifying Moisture Content
The final phase of post-flood home recovery is ensuring you do not seal remaining moisture into your walls. The single biggest mistake made during flood water damage restoration is hanging new drywall too quickly. If you cover wet wood studs with fresh drywall and insulation, you create a dark, humid, oxygen-poor environment—the perfect incubator for toxic mold to colonize inside your walls, completely hidden from view.
1. Testing with a Moisture Meter
Do not rely on your eyes or hands to determine if wood framing is dry. Wood can feel bone-dry to the touch on the surface while still holding high levels of internal moisture. You must use a professional, pin-type wood moisture meter to verify that the framing is ready for reconstruction.
Insert the meter's pins deep into the wood studs, particularly near the base plates (sill plates) where water pools longest. Take readings at multiple points throughout the flooded rooms.
- Safe Rebuilding Level: The moisture content of the wood framing must be below 15% (ideally between 10% and 12%) before you install insulation or drywall.
- Unsafe Level: Any reading above 15% means the wood is still actively drying. Keep your air movers and dehumidifiers running and delay reconstruction until the levels drop.
2. Resilient Rebuilding Strategies
When you do begin the rebuilding process, consider incorporating flood-resilient materials and design choices to protect your home from future events. This is an essential tenet of modern emergency preparedness.
Use closed-cell spray foam insulation instead of traditional fiberglass batts in lower wall cavities. Closed-cell foam is highly water-resistant, does not lose its R-value when wet, and helps reinforce the structural strength of your walls. Additionally, consider installing paperless drywall (which features a fiberglass face instead of paper), as it removes the organic food source that mold needs to grow. Finally, elevate your electrical outlets and switches at least 12 to 24 inches above the local base flood elevation to protect your electrical grid from future high-water events.
The Path to Recovery
Reclaiming your home after a devastating flood is a monumental physical and emotional undertaking. It is easy to feel overwhelmed by the sheer volume of mud, debris, and damaged memories. However, by breaking the recovery process down into distinct, logical phases—prioritizing structural safety, protecting yourself with proper PPE, aggressively managing the 48-hour mold window, and executing a meticulous sanitization protocol—you can systematically strip the danger from your home and rebuild a structure that is stronger, cleaner, and more resilient than before. Survival is not just about enduring the storm; it is about having the discipline, knowledge, and resolve to safely reclaim your sanctuary in its aftermath.
Frequently Asked Questions
How quickly does mold begin to grow after a flood?
Mold can begin growing on damp surfaces within 24 to 48 hours of water exposure.
Is it safe to enter a flooded home before the electricity is turned off?
No, never enter a flooded home until the main power has been professionally disconnected or verified safe by an electrician to prevent electrocution.
What structural warning signs should I look for before entering a post-flood home?
Inspect the exterior for sagging rooflines, cracked foundations, leaning walls, warped stairs, and loose porch supports before attempting to enter.
How do I safely clean up mold on hard surfaces after a flood?
Clean hard surfaces using a mixture of commercial mold-remover or a solution of 1 cup of household bleach per gallon of water, while wearing an N95 mask, gloves, and goggles.
Can drywall and insulation be saved after being submerged in floodwater?
No, porous materials like drywall, fiberglass insulation, and carpets absorb contaminated floodwater and must be removed and discarded to prevent mold growth.