⚡ Key Facts
- Infiltration Reduction: According to the Federal Emergency Management Agency (FEMA), properly sealing a room with 4-to-6 mil plastic sheeting and heavy-duty duct tape can reduce the infiltration of outdoor airborne contaminants by up to 90% during the critical initial hours of an emergency. For the practical checklist side, use the community emergency preparedness guide.
- The 2-to-4 Hour Rule: The Centers for Disease Control and Prevention (CDC) warns that a fully sealed, airtight room should not be occupied for more than 2 to 4 hours due to the rapid buildup of carbon dioxide (CO2) and depletion of oxygen. For the practical checklist side, use the neighborhood preparedness network.
- Fallout Protection Factors: For nuclear events, the Department of Homeland Security (DHS) states that shielding, distance, and time are paramount; sheltering in a basement or the windowless core of a concrete building reduces your radiation exposure by up to 90% compared to remaining outdoors. For the practical checklist side, use the emergency communication plan.
- Wildfire Smoke Penetration: The Environmental Protection Agency (EPA) notes that fine particulate matter (PM2.5) from wildfire smoke can easily infiltrate unsealed homes, raising indoor air pollution to hazardous levels within hours if active filtration is not deployed. For the practical checklist side, use the family emergency planning guide.
Radiological releases require the same shelter-in-place discipline with tighter timing, shielding, and decontamination decisions. The course Surviving a Radiation Emergency: The First 72 Hours walks through that specific first-three-days protocol.
When an industrial chemical tank ruptures, a wildfire plume blankets your city in toxic ash, or a national security emergency releases radiological or biological materials, the space between safety and severe exposure is measured in millimeters of plastic and the seals around your doors. For many, the instinctive reaction to an environmental disaster is to flee. However, atmospheric physics and emergency management data from agencies like FEMA and the EPA demonstrate that evacuation can often be more hazardous than staying put. Taking to the roads during an active airborne plume exposes you to concentrated contaminants, traffic gridlock, and mechanical failures. True safety lies in understanding how to transform your home, office, or school into a temporary, life-saving fortress. This guide provides the exact scientific protocols for executing a shelter-in-place order against airborne hazards, ensuring you can protect your respiratory health when every breath counts.
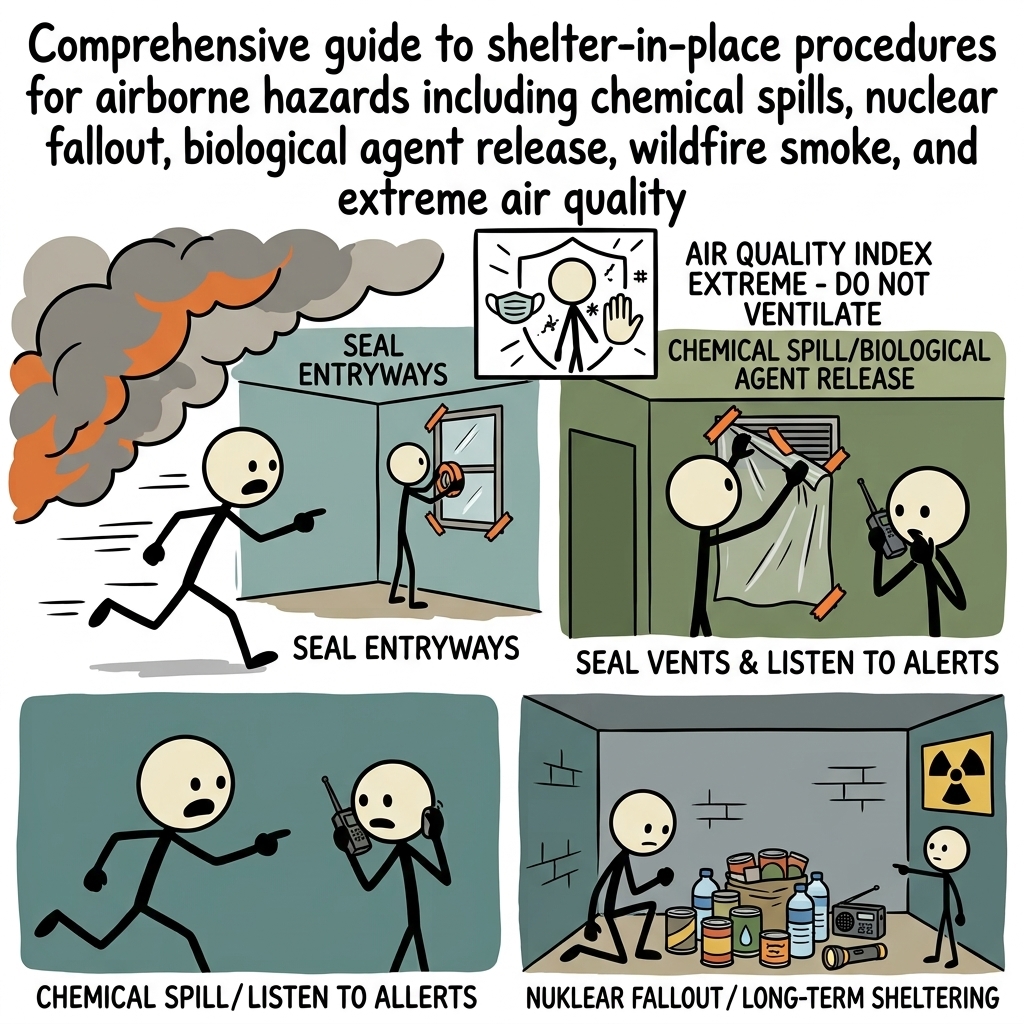
Understanding the Threat Matrix: Airborne Hazards Explained
To defend against an invisible threat, you must first understand its physical behavior. Airborne hazards do not behave uniformly. They differ in particle size, molecular weight, volatility, and how they interact with residential building envelopes. When preparing a shelter in place airborne hazard plan, you must categorize the threat to apply the correct protective measures.
Chemical Spills and Toxic Industrial Chemicals (TICs)
Chemical releases, whether from a derailed train, a facility explosion, or an agricultural accident, typically involve gases or highly volatile liquids that vaporize rapidly. Common culprits include chlorine, ammonia, sulfur dioxide, and hydrogen halide gases. Some of these gases are heavier than air (such as chlorine), meaning they will pool in low-lying areas, basements, and ground floors. Others, like ammonia, are lighter than air and rise rapidly. When managing a chemical release shelter home scenario, understanding the density of the chemical dictates which floor of your home is safest to occupy.
Nuclear Fallout and Radiological Particulates
A nuclear detonation or a radiological dispersal device (dirty bomb) lofts highly radioactive debris, dust, and ash into the upper atmosphere. As these particles cool, they fall back to earth as nuclear fallout. Unlike gases, fallout consists of physical, solid particles (mostly alpha and beta emitters adhering to dust and soil). Your primary threat is not gas inhalation, but rather the penetrating gamma radiation emitted by these settled particles and the inhalation of alpha-active dust. Therefore, a nuclear fallout shelter in place protocol prioritizes shielding mass (concrete, brick, dirt) and tight particulate filtration over gas-tight sealing alone.
Biological Agent Releases
Biological threats involve the intentional or accidental release of pathogens, such as bacteria (e.g., Bacillus anthracis or anthrax), viruses (e.g., smallpox), or biological toxins (e.g., ricin). These agents are typically dispersed as liquid aerosols or dry micro-powders. Because these particulates are microscopic—often ranging from 1 to 10 microns in size—they can remain suspended in the air for long periods and drift on gentle drafts. Your defense must focus on high-efficiency particulate air (HEPA) filtration and minimizing indoor air currents that could draw these pathogens inside.
Wildfire Smoke and Extreme Air Quality Index (AQI) Events
Wildfire smoke is a complex mixture of carbon monoxide, volatile organic compounds (VOCs), and fine particulate matter known as PM2.5 (particles smaller than 2.5 micrometers in diameter). These particles bypass the human respiratory system's natural filtration, settling deep within the lungs and entering the bloodstream. Unlike sudden chemical spills, wildfire smoke events are prolonged, often lasting weeks. Consequently, the sealing techniques used for short-term chemical threats must be adapted to allow for safe, long-term habitation with active filtration.
| Hazard Type | Primary Threat Vector | Key Physical Behavior | Shelter Location Strategy |
|---|---|---|---|
| Chemical Spill | Gas inhalation / skin absorption | Vapor plumes; can be heavier or lighter than air | Above-ground interior room (unless gas is lighter than air) |
| Nuclear Fallout | Ionizing radiation / dust inhalation | Solid particulates settling on flat surfaces | Basement or subterranean core of concrete structures |
| Biological Release | Pathogen inhalation | Microscopic suspended aerosols (1–10 microns) | Interior room with HEPA filtration running |
| Wildfire Smoke / AQI | Fine particulate matter (PM2.5) | Prolonged atmospheric suspension; penetrates cracks | Well-insulated rooms with active MERV 13+ or HEPA filtration |
The Physics of Air Exchange: Why Sealing Works
Every building "breathes." This natural air exchange is driven by three main forces: wind pressure acting on the exterior walls, temperature differences between the indoors and outdoors (known as the stack effect), and mechanical ventilation systems (such as HVAC units, bathroom exhaust fans, and clothes dryers). The rate at which a building exchanges its internal volume of air with outdoor air is measured in Air Changes per Hour (ACH).
A typical modern, energy-efficient home might have an ACH of 0.2 to 0.5, meaning it takes two to five hours for the indoor air to be completely replaced by outdoor air. An older, draftier home can have an ACH of 1.5 or higher, exchanging its air in less than 45 minutes. During an outdoor toxic plume release, your goal is to temporarily drive your home's ACH as close to zero as possible. By executing a proper air seal home emergency protocol, you create a static pocket of clean air. Because the outdoor plume is dynamic and moving with atmospheric winds, it will pass over your home. If your ACH is sufficiently low, the toxic concentrations outside will dissipate before they can penetrate your sealed indoor environment to a dangerous degree.
Step-by-Step Guide: How to Air Seal Your Home
When authorities issue a shelter-in-place order, you must act with speed and precision. Knowing the exact sequence of shelter in place how to protocols saves precious minutes when a plume is actively dispersing in your direction. Gather your emergency supplies and execute the following steps systematically.
Step 1: Shut Down All Mechanical Ventilation
Immediately turn off all systems that actively move air into, out of, or throughout your home. This includes:
- Central heating, ventilation, and air conditioning (HVAC) systems.
- Window-mounted air conditioners and portable AC units that draw air from the outside.
- Bathroom exhaust fans, kitchen range hoods, and clothes dryers.
- Whole-house attic fans and crawlspace ventilation systems.
Close all fireplace dampers, woodstove flues, and passive fresh-air intake vents. Your goal is to eliminate all mechanical pressure differentials that force outdoor air inside.
Step 2: Gather Your Sealing Materials
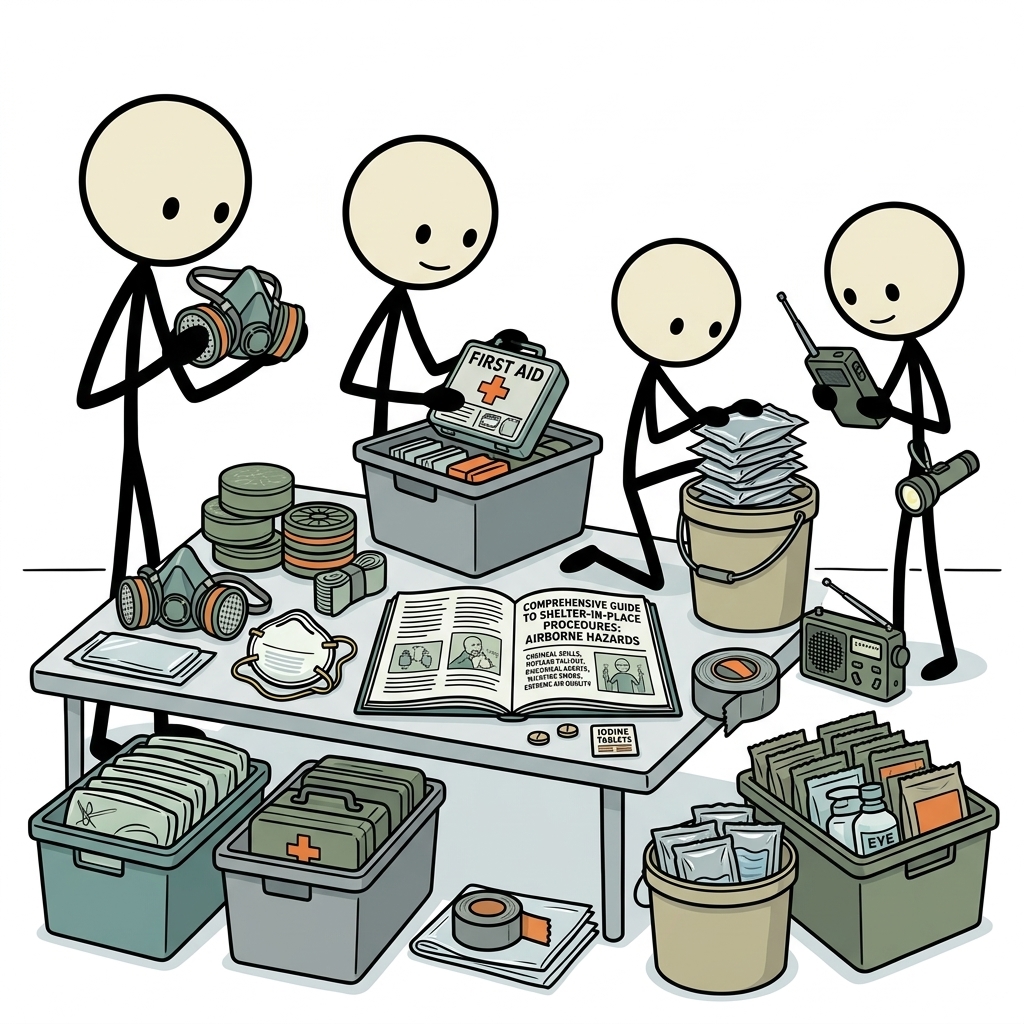
Keep a dedicated "Shelter-in-Place Kit" in an easily accessible location. This kit must contain:
- Plastic Sheeting: Heavy-duty polyethylene sheeting, ideally 4-to-6 mil thick. Pre-cut sheets to fit your designated shelter room's windows, doors, and vents, leaving a 6-inch overlap on all sides. Label each sheet for quick deployment.
- Duct Tape: High-adhesion, heavy-duty duct tape or professional-grade clean-removal duct tape (which leaves less residue on painted drywall). Do not use painter's tape or masking tape, as they lack the adhesive strength to hold heavy plastic under pressure.
- Shears or Utility Knife: For rapidly cutting tape and plastic.
- Towel and Water: A heavy towel to be dampened and placed at the base of the entry door.
Step 3: Seal the Room's Boundary Points
Go to your pre-selected shelter room. Close and lock all windows and exterior doors. Tight locks compress the weatherstripping, creating a superior seal. Begin sealing the room's openings in this order:
- Windows: Tape the pre-cut plastic sheeting over the entire window frame, not just the glass. Apply tape continuously along all four edges of the plastic. Ensure there are no wrinkles, gaps, or fish-mouth folds in the tape where air could bypass.
- HVAC Registers and Grilles: Cover all supply and return vents in the room with plastic and tape. This prevents contaminated air resting in the ductwork from drifting into your clean room.
- Electrical Outlets and Light Switches: In older homes, significant air leakage occurs through wall cavities via electrical boxes. Apply duct tape directly over unused outlets and switch plates.
- Exhaust Fans and Keyholes: Seal any ceiling exhaust fans, keyholes, or utility access panels.
Step 4: Secure the Entry Door
The door you used to enter the room must be sealed from the inside. Tape the top and vertical sides of the door frame with plastic sheeting. For the gap at the bottom of the door, wet a heavy towel with water, wring it out so it is damp but not dripping, and pack it tightly into the threshold gap. The moisture in the towel helps trap fine particulates and organic vapors while creating a physical barrier against drafts.
Step 5: Monitor and Manage the Space
Once sealed, sit quietly. Minimize physical exertion to reduce your oxygen consumption and carbon dioxide production. Keep your emergency radio tuned to local emergency management channels, NOAA Weather Radio, or local news broadcasts for updates on the plume's movement and instructions on when it is safe to unseal the room.
Hazard-Specific Shelter-in-Place Adjustments
While the basic sealing protocol remains consistent, specific hazards require critical adjustments to your shelter location, filtration choices, and physical posture.
Chemical Releases: The Height Factor
When dealing with an industrial chemical release, the molecular weight of the gas is your primary concern. If you do not know the specific chemical involved, assume it is heavier than air, as many common industrial gases (like chlorine and phosgene) are.
- Where to Shelter: Choose an interior room on the highest floor of your home that can be effectively sealed. Avoid basements and ground-floor rooms, as heavy toxic gases will settle into low-lying areas and seep through foundation cracks.
- Sealing Priority: Focus heavily on floor-level cracks, baseboard joints, and low-lying wall penetrations where heavy gases might creep in.
Nuclear Fallout: The Mass and Shielding Rule
During a nuclear event, your primary threat is ionizing radiation from falling particulate debris. Sealing is important to prevent the inhalation of radioactive dust, but your absolute priority is maximizing the mass between you and the outdoor environment.
- Where to Shelter: Go to the lowest, most central area of the building. A basement is ideal. If a basement is unavailable, choose a windowless interior room (such as a bathroom, closet, or hallway) on the lowest floor.
- The Shielding Principle: Place heavy objects (books, mattresses, filled water jugs, furniture) against exterior-facing walls to increase your protection factor. The thicker the barrier of concrete, brick, or earth between you and the fallout settling on the roof and ground, the lower your radiation dose will be.
Biological Agents: Active HEPA Filtration
Because biological agents are solid particulates (spores or viruses) rather than gases, they can be mechanically filtered out of the air.
- Where to Shelter: An interior room, preferably above ground.
- Active Filtration: If you have a portable air purifier equipped with a True HEPA filter (which captures 99.97% of particles down to 0.3 microns), run it on its highest setting inside your sealed shelter room. The purifier will continuously scrub any microscopic biological particles that bypass your plastic seals, dramatically lowering the viral or bacterial load in your breathing zone.
Wildfire Smoke and Extreme AQI: Long-Term Management
Wildfire smoke events last for days or weeks, making airtight plastic sealing impractical due to oxygen depletion. Instead, you must practice "dynamic sealing" and active indoor air scrubbing.
- Dynamic Sealing: Use high-quality weatherstripping, door sweeps, and silicone caulk to seal permanent air leaks around windows and doors. Do not use plastic and duct tape, as you will need to live in this space for an extended period.
- HVAC Upgrades: If you have a central HVAC system, install a MERV 13 or higher rated air filter. Run the system fan continuously (set the thermostat to "ON" rather than "AUTO") to keep air circulating through the filter.
- DIY Air Scrubbing: If commercial HEPA purifiers are unavailable, construct a DIY Corsi-Rosenthal Box. Tape four MERV 13 furnace filters into a cube with a standard 20-inch box fan on top, blowing air outward. This low-cost system can clean the air of a large room in minutes, removing PM2.5 particulates with remarkable efficiency.
The Critical Clock: Duration Limits and Oxygen Depletion
One of the most dangerous mistakes an individual can make during a shelter in place airborne hazard event is overstaying the seal. A room sealed with plastic and duct tape is a closed ecological system. As you breathe, you consume oxygen and exhale carbon dioxide. Over time, CO2 concentrations will rise to toxic levels, and oxygen levels will deplete, leading to cognitive impairment, headaches, asphyxiation, and eventually death.
The rate of CO2 buildup depends on the volume of the room and the number of occupants. To calculate the safety margin, family emergency planners use the following physical parameters:
- An average adult at rest consumes about 0.9 cubic feet of oxygen per hour and produces about 0.8 cubic feet of CO2 per hour.
- Normal outdoor air contains roughly 400 parts per million (ppm) of CO2 (0.04%).
- The Occupational Safety and Health Administration (OSHA) sets the maximum safe workplace limit for CO2 at 5,000 ppm (0.5%) for an 8-hour shift.
- At 30,000 ppm (3.0%), occupants will experience rapid breathing, headaches, and visual disturbances. At 80,000 ppm (8.0%), unconsciousness and death occur within minutes.
For a standard interior bedroom measuring 10 feet by 10 feet with an 8-foot ceiling (800 cubic feet of volume), two adults occupying the space will push CO2 levels past the safe threshold of 5,000 ppm in approximately 3 to 4 hours if the room is perfectly sealed.
Therefore, the absolute maximum duration for a fully sealed, plastic-and-tape shelter-in-place room is 2 to 4 hours. This is why emergency management agencies emphasize that sheltering in place is a temporary, stop-gap measure designed to let a concentrated chemical or biological plume pass over, rather than a long-term survival strategy. After 2 to 4 hours, the danger of CO2 poisoning inside your sealed room may exceed the danger of the dispersing plume outside.
The Pivot Point: When to Evacuate
Survival requires knowing when to transition from static defense (sheltering) to active movement (evacuation). Remaining in a sealed room when conditions dictate evacuation can be fatal. You must recognize the critical triggers that signal it is time to break the seal and move.
Trigger 1: Official Emergency Broadcast Instructions
Monitor your NOAA Weather Radio, local Emergency Alert System (EAS) broadcasts, or official social media channels from local emergency management agencies. When incident commanders announce that the outdoor plume has passed, they will issue instructions to "ventilate your shelter." At this point, you must immediately tear down the plastic, open all windows, turn on all exhaust fans, and run your HVAC system on high to flush out any trace contaminants that seeped inside during the event.
Trigger 2: Physiological Signs of Carbon Dioxide Poisoning
If you or any other occupants begin to experience the following symptoms, you must immediately terminate the seal, regardless of whether you have received an official broadcast:
- Unexplained hyperventilation or shortness of breath.
- Throbbing headaches, dizziness, or mental confusion.
- Lethargy, extreme drowsiness, or nausea.
- A heavy, suffocating sensation in the air.
If these symptoms manifest, crack a window slightly on the side of the house opposite the direction of the wind (the leeward side) to allow fresh air to enter, or prepare to evacuate the structure if the outdoor air is clear of visible plumes.
Trigger 3: Structural Compromise of the Building
If your shelter building suffers structural damage from an explosion, falling trees, seismic activity, or advancing fire, the integrity of your seal is lost. In this scenario, remaining inside offers no protection. Evacuate immediately, wearing whatever respiratory protection you have available (such as an N95 mask, a full-face respirator, or a damp cloth held tightly over your nose and mouth) and move crosswind—perpendicular to the direction the wind is blowing—to escape the path of the airborne plume.
Trigger 4: Advancing Wildfires
During wildfire events, if local authorities issue a mandatory evacuation order, you must pack your emergency supplies and leave immediately. Do not attempt to shelter in place to protect your home. Wildfire smoke is a precursor to extreme heat and active flames; a residential home cannot protect you against the radiant heat of an advancing wildfire front, which can exceed 2,000°F.
Preparation Prevents Panic
In the face of an airborne crisis, knowledge and pre-staged materials are your shield. By understanding the physical behavior of chemical vapors, radiological particulates, and biological aerosols, you can make informed, life-saving decisions under pressure. Remember that the act of sealing your home is a highly effective but temporary tactic, governed by the strict mathematics of air exchange and oxygen consumption. Assemble your shelter kit today, pre-cut your plastic sheeting, and ensure every member of your household knows the exact steps to execute a shelter-in-place protocol. When the emergency sirens sound, you will not panic; you will execute your plan with the quiet confidence of a prepared survivalist.
Frequently Asked Questions
What is the difference between shelter-in-place for chemical, nuclear, and biological hazards?
Chemical hazards: immediate tight sealing of all air gaps, turn off HVAC, use N95/P100 respirators, shelter for 2-4 hours maximum before CO2 buildup. Nuclear fallout: seal as tightly as possible, the first 24-48 hours are most critical, thick interior walls and mass provide best protection. Biological agent: maintain sealing until all-clear, focus on preventing any outdoor air penetration.
What materials do I need to shelter in place effectively?
Pre-cut plastic sheeting (4-6 mil) sized for each window and door in your shelter room, duct tape (3-4 rolls), a battery-powered air purifier with HEPA filter, water (3-day supply already inside the room), and a battery-powered radio for official updates. Practice the sealing before any emergency — you want to be able to do it in 5 minutes in the dark.
How long can I shelter in place before air quality inside becomes a problem?
A well-sealed room with limited occupants has a CO2 limit. For chemical hazards, FEMA recommends sealing for no more than 2-4 hours before the buildup of indoor air pollutants becomes a concern. For nuclear fallout (where staying in for 24+ hours is recommended), plan ahead: crack a window briefly every few hours for 2-3 minutes when radiation levels are lower (further from the detonation time).
How do I know when to break shelter-in-place and evacuate?
Follow official orders exclusively for this decision — do not make it independently except in extreme circumstances. Break shelter when: official all-clear is given, your building is threatened by fire, flooding, or structural damage, you have a medical emergency requiring outside intervention, or indoor air quality has deteriorated to immediately dangerous levels.
What is the best room in a house for shelter-in-place?
For most hazards: an interior room on an upper floor (above ground-level gas concentrations) with the fewest windows and doors. For nuclear fallout specifically: the center of a large building or basement has the most shielding from gamma radiation — the more mass (concrete, earth, brick) between you and the outside, the better. Never shelter in a room with forced-air HVAC vents that cannot be sealed.