In an unpredictable world, emergencies can strike at any moment, from severe weather to hazardous material spills or even active threats. Knowing how to react quickly and effectively is paramount to ensuring your safety and the safety of your loved ones. While evacuation is often the default thought for many crises, there are specific situations where the safest course of action is to 'shelter in place.' This comprehensive guide from Protocol Survival will demystify the concept of shelter in place, equip you with the knowledge to make informed decisions, and walk you through the practical steps to secure your indoor environment during an emergency. For a quick definition, see bug in. For a quick definition, see shelter in place.
For nuclear emergencies specifically, see our nuclear fallout first 24 hours guide - the actions you take in the first hour are critical.
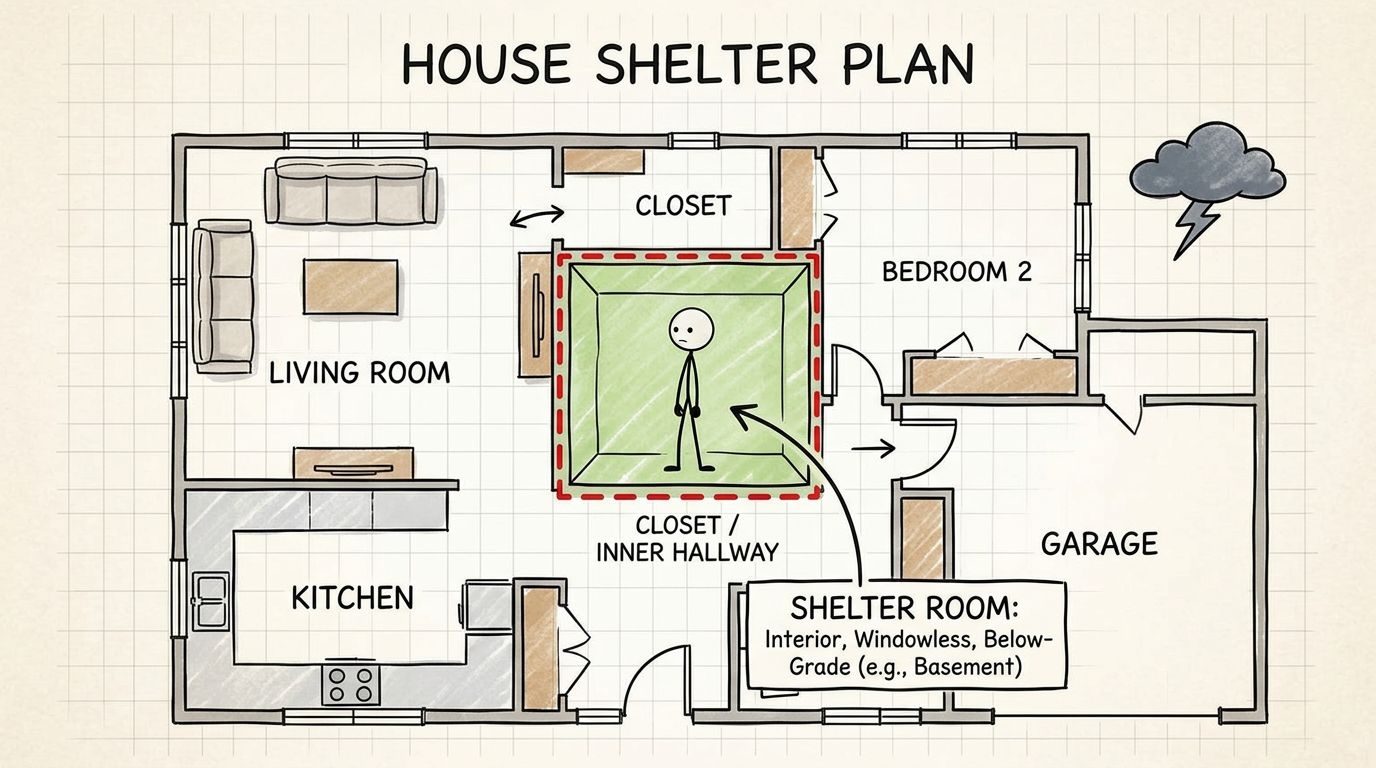
Understanding Shelter in Place: Your First Line of Defense
The term 'shelter in place' refers to the act of seeking immediate refuge indoors and remaining there during an emergency, rather than attempting to evacuate. It is a critical protective action taken when it is safer to stay inside a building than to go outside or to travel to another location. This strategy is typically employed for short-term threats where outdoor conditions pose a greater immediate risk, or when the threat is localized and can be contained by staying put.
When authorities issue a shelter in place directive, it means they have assessed the situation and determined that remaining indoors offers the best protection from an immediate danger. This could be due to airborne contaminants, an active threat in the vicinity, or extreme weather conditions that make travel dangerous. It is not about building a long-term bunker, but rather about rapidly creating a temporary, safe haven within your existing structure.
The primary purpose of shelter in place is to minimize exposure to external hazards. For airborne threats, this means sealing off your immediate environment to prevent contaminated air from entering. For active threats, it means securing your location to prevent intruders. Understanding these nuances is crucial for responding effectively to different types of emergencies.
Shelter or Evacuate? Making the Critical Decision
One of the most challenging aspects of emergency preparedness is knowing whether to shelter in place or evacuate. The decision hinges on the specific nature of the threat, official guidance, and your immediate surroundings. While authorities will often issue clear directives, understanding the rationale behind each choice can empower you to act decisively when every second counts.
Toxic Spill or Chemical Release
When a toxic chemical spill or hazardous material release occurs, particularly if it involves airborne contaminants, shelter in place is often the recommended course of action. Chemicals can spread rapidly, and attempting to evacuate might expose you to the hazard for a longer period or lead you directly into the path of the plume. Remaining indoors, especially in a sealed room, can provide a significant barrier against airborne toxins. Authorities will typically advise you to close all windows and doors, turn off HVAC systems, and seal any gaps.
For more detailed information on specific toxic spill scenarios and how to react, it is important to consult specialized guides and be familiar with the types of industrial or transportation hazards in your local area. The speed of the release, the toxicity of the substance, and wind direction are all factors that influence the safety recommendations.
Nuclear or Radiological Event
In the unlikely but devastating event of a nuclear detonation or a significant radiological release, shelter in place, specifically seeking robust fallout shelter, becomes paramount. The immediate dangers include the blast wave, intense heat, and initial radiation. If you are not in the immediate blast zone, the primary concern quickly shifts to radioactive fallout. Fallout consists of radioactive particles carried by the wind, which can settle on surfaces and contaminate everything they touch. In this scenario, you must immediately get to the most protective interior space available – ideally a basement or a windowless, central room in a sturdy building – and remain there for an extended period, often 24 to 48 hours or longer, depending on the radiation levels and official guidance. The goal is to maximize shielding from gamma radiation and minimize inhalation of radioactive particles. Evacuating immediately after a blast or release could expose you to higher levels of fallout as you travel.
Active Threat or Civil Unrest
An active threat, such as a shooter, or an unfolding situation of civil unrest outside your location, also necessitates a shelter in place strategy. In these scenarios, the primary goal is to minimize your visibility and accessibility to the threat. This is often referred to as "lockdown." The recommended actions include:
- Locking and barricading doors.
- Turning off lights.
- Silencing electronic devices.
- Staying out of sight, away from windows and doors.
- Remaining silent and still.
The immediate objective is to make your location appear empty or inaccessible, preventing the threat from identifying or reaching you. Evacuating could put you directly into harm's way. Only consider evacuation if there is a clear, safe escape route and an explicit directive from law enforcement to do so.
Severe Weather Events (Tornado, Blizzard, Hurricane)
Severe weather events present varied shelter in place requirements:
- Tornadoes: If a tornado warning is issued for your area, you must seek immediate shelter in the lowest level of a sturdy building, such as a basement or an interior room away from windows. The goal is to protect yourself from flying debris. Do not attempt to evacuate unless you are in a mobile home or vehicle and can reach a substantial shelter quickly.
- Blizzards: During a severe blizzard, shelter in place means staying indoors and avoiding all travel. The dangers include extremely low visibility, freezing temperatures, and impassable roads. Focus on staying warm and conserving resources.
- Hurricanes: For hurricanes, the decision is often more complex. Depending on the hurricane's category, storm surge potential, and your proximity to the coast, an evacuation order may be issued. However, if you are inland, outside of flood zones, and your home is structurally sound, sheltering in place is often advised. This involves securing your home, stocking supplies, and moving to an interior room during the storm's peak. The key is to follow local emergency management directives closely, as they will assess the specific risks for your area.
Selecting Your Safe Haven: The Best Room for Shelter in Place
Choosing the right room for shelter in place can significantly enhance your safety. Not all rooms are created equal when it comes to protection from external threats. Your ideal safe haven should embody several key characteristics:
- Interior Room: Prioritize an interior room, ideally one without windows. Rooms with exterior walls or numerous windows are more vulnerable to impacts from debris (in weather events), shattered glass (from blasts or active threats), or easier points of entry for contaminants. A bathroom, closet, or pantry often fits this description well.
- Fewer Windows and Doors: The fewer openings a room has, the easier it will be to seal and secure. Each window and door is a potential entry point for hazards, whether airborne or human.
- Access to Utilities (if applicable): While not always possible or advisable (e.g., in a chemical release where you're turning off HVAC), a room with access to a bathroom, or at least in close proximity, can be beneficial for longer shelter in place periods.
- Sturdy Construction: Look for a room within a structurally sound part of your building. In multi-story buildings, the lowest possible interior room is often best for tornado or blast protection.
- Proximity to Emergency Supplies: Ideally, your chosen room should be where your shelter in place kit is stored, or close enough that you can retrieve it quickly.
- Size: Choose a room that is large enough for all members of your household to comfortably remain for an extended period, but not so large that it is difficult to secure.
Walk through your home now and identify potential shelter in place rooms. Discuss this with your family as part of your overall emergency plan.
Sealing Your Sanctuary: How to Prepare Your Shelter Room
Once you've identified your safe room, the next critical step for certain shelter in place scenarios, particularly those involving airborne hazards like chemical or radiological releases, is to seal it. The goal is to create a temporary barrier against external contaminants. This process, often referred to as "building a clean room," can be done quickly with common household items.
Materials You'll Need
Before an emergency strikes, assemble these crucial materials into an easily accessible shelter in place kit:
- Plastic Sheeting: Heavy-duty plastic sheeting, at least 4-6 mil thick, is ideal. Drop cloths, tarps, or even thick plastic garbage bags can work in a pinch. You'll need enough to cover all windows, doors, and vents in your chosen room.
- Duct Tape: Strong, wide duct tape is your best friend for sealing. Ensure it adheres well to various surfaces (paint, metal, wood). Masking tape or painter's tape is not sufficient.
- Scissors or Utility Knife: For cutting plastic sheeting and tape quickly and accurately.
- Towels or Rags: For stuffing under doors or into larger gaps.
- Measuring Tape (Optional): To pre-cut sheeting to size, though not essential for rapid deployment.
The Sealing Process
- Close and Lock All Windows and Doors: Start by closing and locking all windows and doors in your selected room. This is your first line of defense against both physical threats and airborne particles.
- Turn Off HVAC Systems: Immediately turn off all heating, ventilation, and air conditioning systems. This includes central air, window units, bathroom fans, and any other systems that draw air from outside or circulate it within the building. This prevents potentially contaminated outdoor air from being drawn into your sealed space.
- Seal Windows:
- Cut plastic sheeting to cover the entire window frame, overlapping by several inches on all sides.
- Press duct tape firmly around all four edges of the plastic sheeting, sealing it securely to the wall. Ensure there are no gaps for air to pass through.
- Seal Doors:
- Place towels or rags at the bottom of the door to block the gap between the door and the floor.
- For maximum protection, you can also tape plastic sheeting over the entire door frame, similar to how you sealed windows. This might be necessary if the threat is severe and prolonged. However, be aware that this will make it difficult to exit the room quickly.
- Alternatively, focus on sealing the gaps around the doorframe with duct tape, creating a tighter seal.
- Seal Vents and Other Openings:
- Locate all vents (air conditioning, heating, exhaust) in the room.
- Cover them completely with plastic sheeting and seal all edges with duct tape.
- Don't forget smaller openings like pet doors, mail slots, or even keyholes if they lead directly outside or to unsealed areas.
- Seal Electrical Outlets and Wall Penetrations (Advanced): For very high-risk chemical or biological threats, consider sealing electrical outlets on exterior walls or any other visible penetrations in the walls. These small openings can still allow some air exchange. Use tape or even temporary covers.
Once your room is sealed, stay calm, monitor official comms plan, and conserve your resources. Remember, this is a temporary measure designed to protect you until the immediate danger passes or authorities issue further instructions.
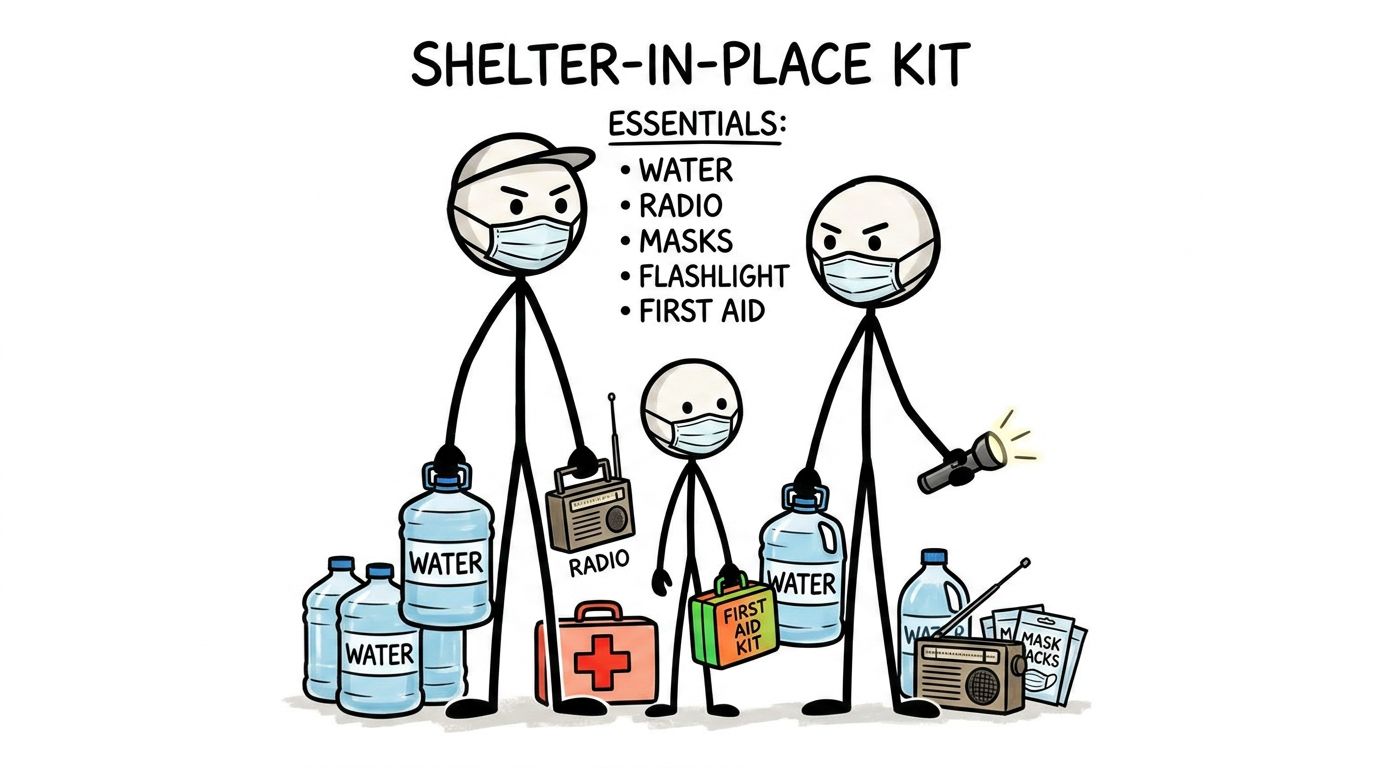
Essential Supplies for Your Shelter in Place Kit
A well-stocked shelter in place kit is just as crucial as the physical act of sealing your room. Unlike an evacuation kit which is designed to be portable, a shelter in place kit can be more comprehensive, as it doesn't need to be carried. It should contain enough supplies to sustain your household for at least 72 hours, though preparing for a week or more is always prudent, especially during a widespread emergency where resupply might be delayed.
Water and Food
- Water: Store at least one gallon of water per person per day for drinking and sanitation. Consider storing extra for pets.
- Non-Perishable Food: A 3-7 day supply of non-cook, non-refrigeration-required food items like canned goods (with a manual can opener), energy bars, dried fruit, nuts, and peanut butter. Choose foods your family will actually eat.
- Pet Food: Don't forget food and water for your furry companions.
First Aid and Medications
- Comprehensive First Aid Kit: Stocked with bandages, antiseptic wipes, pain relievers, anti-diarrhea medication, antacids, and any other common over-the-counter remedies.
- Prescription Medications: A 7-day or longer supply of all necessary prescription medications for every family member. Ensure these are rotated to remain current.
- Medical Supplies: Extra eyeglasses, contact lens solution, hearing aid batteries, or any other specific medical supplies.
Sanitation and Hygiene
- Toiletries: Soap, hand sanitizer, toothbrushes, toothpaste, wet wipes.
- Garbage Bags and Ties: For personal sanitation and waste disposal, especially if plumbing is disrupted.
- Feminine Hygiene Products.
- Diapers/Baby Wipes (if applicable).
Lighting and Power
- Flashlights and Headlamps: Several, with extra batteries. Avoid candles due to fire risk, especially in a sealed room.
- Battery-Powered Radio: A NOAA weather radio with tone alert and extra batteries is essential for receiving emergency broadcasts.
- Power Bank/Solar Charger: For charging cell phones and other small electronic devices. For more extensive preparations, especially for prolonged outages, check out our guide on grid-down preparedness.
Communication and Information
- Whistle: To signal for help.
- Chargers: For all cell phones and devices.
- Copies of Important Documents: In a waterproof, portable container, include copies of identification, insurance policies, birth certificates, deeds, and other vital records.
- Cash: Small bills for purchases if electronic transactions are unavailable.
Comfort and Morale
- Blankets or Sleeping Bags: For warmth and comfort.
- Books, Games, Puzzles: To combat boredom and stress, especially with children.
- Comfort Items: Small toys for children.
Tools and Miscellaneous
- Multi-tool or Basic Tool Kit.
- Duct Tape and Plastic Sheeting: As discussed for sealing your room.
- Dust Masks: N95 masks for filtering airborne particles, if not for chemical protection, then for dust or allergens.
Remember, preparedness is an ongoing process. Regularly check and refresh your shelter in place kit and other emergency supplies. For a more exhaustive approach to general readiness, refer to our comprehensive emergency preparedness guide.
Staying Connected and Informed: Communication During Shelter in Place
During a shelter in place event, isolation can be a significant challenge, but staying informed and connected (within the bounds of safety protocols) is vital. Official communications will guide your actions and let you know when it is safe to leave.
Monitoring Official Channels
- NOAA Weather Radio: This is your most reliable source of information during power outages, as it runs on batteries and provides direct alerts from the National Weather Service.
- Local Radio and TV: If power is available, tune into local news channels or emergency broadcast stations.
- Cell Phones: While cell networks can be overloaded during emergencies, text messages often go through when calls cannot. Reserve phone calls for true emergencies. Sign up for local emergency alert systems (Reverse 911, WEA alerts).
- Internet/Social Media: If internet access is maintained, official government agency websites and verified social media accounts (police, fire, emergency management) can provide updates. Beware of misinformation.
Remember, follow instructions from emergency services, local officials, and credible news sources. Do not rely on rumors or unofficial social media posts.
Conserving Battery Life
If you anticipate power outages or prolonged shelter in place, conserve battery life on all devices:
- Turn off Wi-Fi, Bluetooth, and location services when not needed.
- Lower screen brightness.
- Close unnecessary apps.
- Put phones in airplane mode if you are only using them for reference and not actively seeking communication.
- Use power banks and solar chargers judiciously.
Family Communication Plan
Before an emergency, establish a family communication plan. Designate an out-of-state contact person whom all family members can check in with. This is especially useful if local phone lines are down. Practice this plan with your family so everyone knows what to do.
When the All-Clear Sounds: Safely Exiting Shelter in Place
The decision to end your shelter in place should never be made prematurely. Exiting too early can expose you to lingering dangers or interfere with emergency response efforts. Patience is a virtue in these situations.
Official Notification
The most important rule is to wait for official notification from emergency services or local authorities that it is safe to leave your shelter in place. This announcement will typically be broadcast via the same channels that issued the initial directive (radio, TV, emergency alerts). Do not assume the danger has passed just because things seem quiet or you haven't received an update in a while.
Gradual Re-entry
Once the all-clear is given, do not immediately throw open all windows and doors, especially if the shelter in place was due to an airborne hazard. Instead:
- Ventilate Gradually: Slowly open windows and doors to air out the room. If it was a chemical or radiological event, consider running your HVAC system for a short period (with the fan only, no heating/cooling unless directed) to help circulate air and exchange indoor air with fresh outdoor air.
- Check for Damage: Before fully moving about, quickly inspect your home for any visible damage, such as broken windows, leaks, or structural issues.
- Be Mindful of Contamination: If the event involved chemical or radiological agents, there might be residual contamination outside your home. Follow specific instructions from authorities regarding decontamination procedures or precautions when venturing outdoors.
Assessing Your Surroundings
When you do step outside, be cautious:
- Look for Hazards: Be aware of downed power lines, damaged infrastructure, debris, or any other visible dangers.
- Stay Clear of Emergency Scenes: Avoid areas where emergency responders are still working.
- Conserve Resources: Continue to conserve water, food, and fuel until infrastructure is fully restored and supplies are readily available.
Post-Event Actions
After the emergency has fully subsided:
- Replenish Supplies: Immediately restock your shelter in place kit and other emergency supplies.
- Review and Update: Discuss what worked well and what could be improved in your shelter in place plan. Update your family communication plan and kit contents as needed.
- Seek Support: If you or your family experienced trauma or significant stress, seek support from mental health professionals or community resources.
Conclusion
Shelter in place is a vital and often life-saving strategy in a variety of emergency scenarios. By understanding what it means, when to implement it versus evacuate, and how to effectively prepare your home and family, you significantly enhance your ability to remain safe and resilient. Protocol Survival emphasizes that preparedness is not about fear, but about empowerment. Take the time today to assess your risks, gather your supplies, and practice your plan. Your proactive efforts will provide peace of mind and, when an emergency strikes, could make all the difference in your survival and recovery.
Related resource: Nuclear Fallout: First 24 Hours Guide.
Develop emergency preparedness sheltering plans. Review high-rise emergency preparedness strategies. Plan with natural disaster survival guides. Use our supply calculator and check our courses.