⚡ Key Facts
- The 3-Minute Window: According to the American College of Surgeons (ACS) and the Centers for Disease Control and Prevention (CDC), severe arterial hemorrhage can result in complete exsanguination and death in as little as 3 to 5 minutes—far faster than the average municipal Emergency Medical Services (EMS) response time of 7 to 14 minutes.
- Preventable Fatality Leader: The Department of Homeland Security (DHS) reports that uncontrolled bleeding is the number one cause of preventable death in both civilian trauma incidents and military combat.
- Tourniquet Efficacy: Clinical data analyzed by the Committee on Tactical Combat Casualty Care (CoTCCC) demonstrates that modern windlass tourniquets boast an overall survival rate exceeding 90% when applied prior to the patient going into severe hemorrhagic shock.
- Massive National Movement: More than 3.5 million citizens have completed bleeding control training under the national Stop the Bleed campaign, shifting the paradigm of emergency response from passive bystander to active "immediate responder."
When an accidental breach of the femoral artery occurs—whether from a workshop table-saw kickback, high-velocity motor vehicle glass, or penetrating ballistic trauma—the physiological countdown begins instantly. An adult human houses roughly five liters of blood, and losing just 30 to 40 percent of that volume triggers irreversible Class IV hemorrhagic shock. At that rate, life slips away long before sirens become audible in the distance. True survival does not rely on wishing for rapid external rescue; it depends entirely on the deliberate preparation, mechanical competency, and clinical composure of the person standing directly in front of the casualty. For the practical checklist side, use the community emergency preparedness guide.
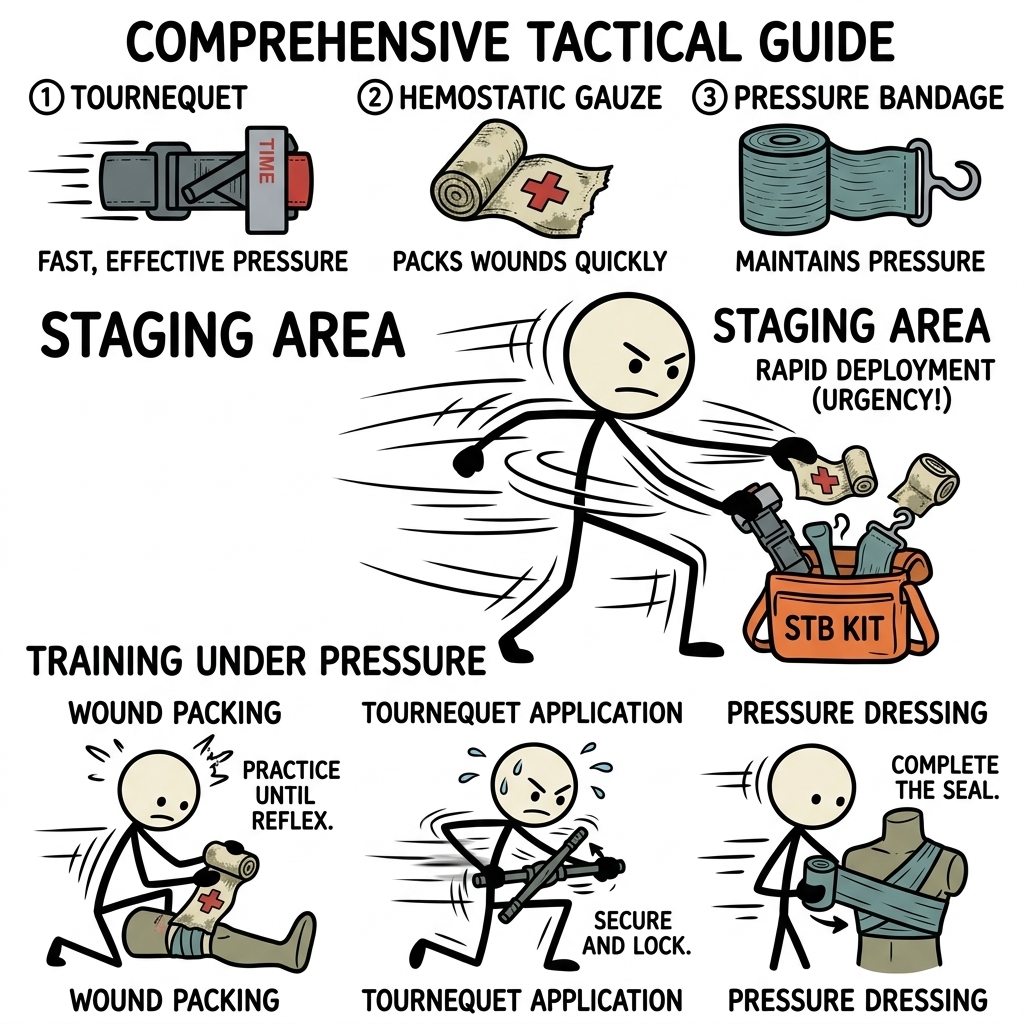
Building a robust capability requires two inseparable pillars: stocking high-grade, battle-tested trauma gear, and forging unshakeable muscle memory through realistic stress inoculation. An improvised rag and a flimsy stick gathered from the roadside fail under real arterial pressure. Similarly, a top-tier medical pouch remains completely useless if panic freezes your hands. This guide breaks down the essential components of a mission-grade stop the bleed kit, exposes the physiological realities of catastrophic blood loss, and outlines the precise training protocols required to execute life-saving interventions under immense physical and psychological pressure. For the practical checklist side, use the neighborhood preparedness network.
The Physiology of Exsanguination: Why Seconds Dictate Survival
To stop blood loss effectively, an operator must understand the internal vascular mechanics at play. The human circulatory system operates as a closed, pressurized circuit driven by the cardiac pump. When a major vessel ruptures, the system experiences catastrophic depressurization. Hemorrhages are clinically categorized into three distinct varieties, each requiring a fundamentally different tier of intervention. For the practical checklist side, use the emergency communication plan.
Capillary bleeding oozes slowly from minor abrasions and stops spontaneously via normal clotting mechanisms. Venous bleeding flows steadily with a dark red hue; while dangerous over extended durations, it can generally be managed with sustained, direct mechanical compression. Arterial bleeding, by contrast, presents as bright, oxygenated red blood pulsing or spurting synchronously with the heartbeat. An open femoral, brachial, or carotid laceration can empty a casualty's circulatory volume at a rate of several hundred milliliters per second. For the practical checklist side, use the family emergency planning guide.
As blood volume plummets, the body immediately initiates a desperate compensatory mechanism. Peripheral vessels constrict to redirect remaining oxygenated flow toward the brain, heart, and lungs. Tachycardia sets in as the heart beats faster to offset the loss of stroke volume. However, without immediate mechanical occlusion of the breach, compensation rapidly breaks down into decompensation. Blood pressure craters, cellular hypoxia triggers systemic lactic acidosis, and the casualty loses consciousness. For the practical checklist side, use the real-world emergency scenarios guide.
The Lethal Triad of Trauma
Trauma surgeons and emergency physicians fear a physiological spiral known as the "Lethal Triad." Once a severely hemorrhaging patient enters this state, mortality rates spike exponentially, even if the primary wound is eventually closed:
- Hypothermia: Blood distributes core thermal energy throughout the body. Massive blood loss drops the casualty's core body temperature rapidly. Even in warm environments, hypoperfusion induces severe hypothermia, which dramatically inhibits the biochemical reactions needed for blood clotting.
- Coagulopathy: The human clotting cascade relies on precise chemical reactions that fail when body temperature drops and blood is diluted. The blood loses its ability to form stable fibrin plugs, leading to uninhibited, continuous bleeding from even minor injury sites.
- Acidosis: When tissues are starved of oxygen due to insufficient blood flow, cells abandon aerobic respiration and pivot to anaerobic metabolism. This shift floods the bloodstream with lactic acid, lowering systemic pH. Acidic blood damages vascular endothelium and further disables clotting enzymes.
Interrupting this vicious cycle requires immediate external mechanical intervention. You cannot afford to wait until EMS reaches your coordinates to begin warming the casualty or packing the wound. Hemorrhage control is the absolute first physical action in trauma medicine because every second of continued perfusion loss brings the casualty closer to irreversible biological collapse.
Anatomy of a Mission-Ready Stop the Bleed Kit
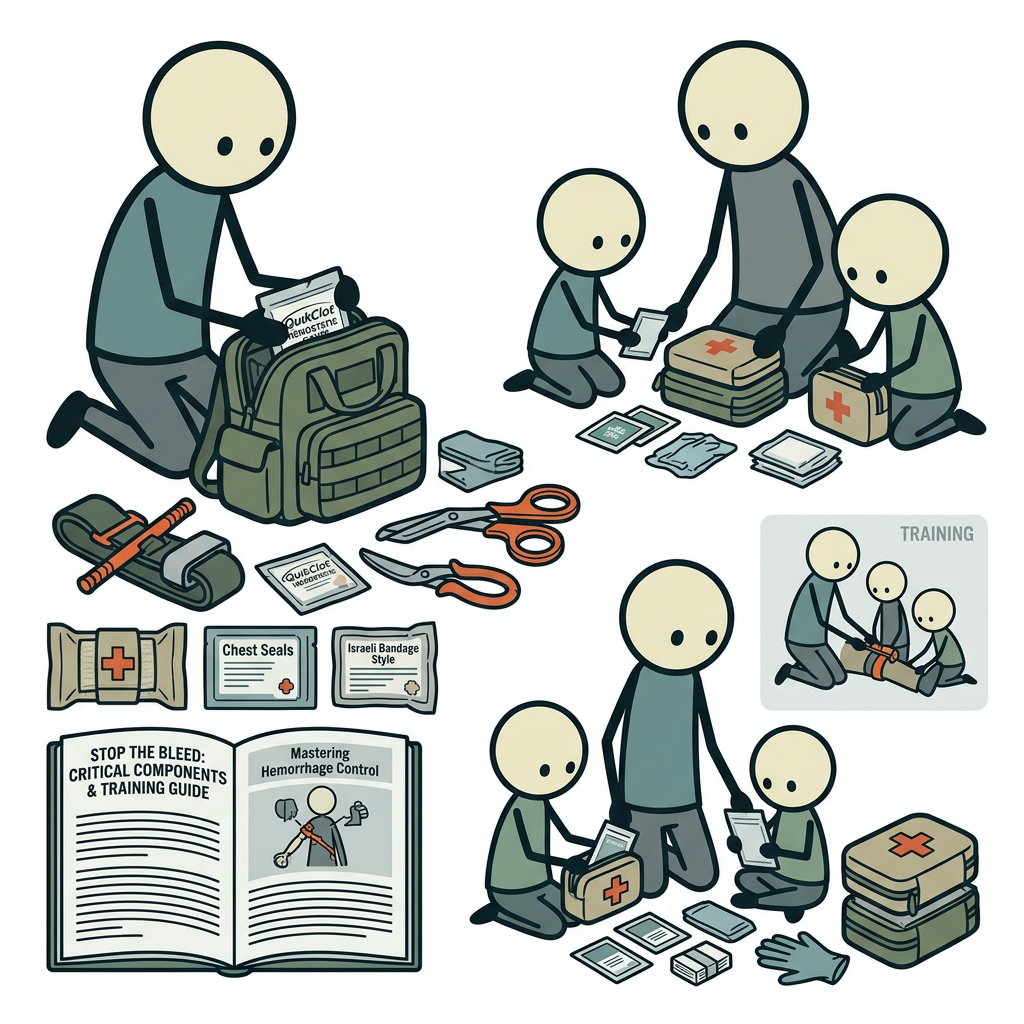
A fatal mistake made by many preparedness practitioners is confusing a standard first aid kit (FAK) with an emergency bleeding kit. A consumer-grade FAK is designed for comfort, sanitation, and low-acuity injuries; it contains adhesive bandages, burn creams, hydrocortisone, tweezers, and light gauze rolls. A dedicated stop the bleed kit—often designated an Individual First Aid Kit (IFAK)—is built exclusively to address life-threatening, massive hemorrhage and penetrating trauma. There are no band-aids here; every single item inside is dedicated to saving a life within a 180-second window.
1. CoTCCC-Approved Tourniquets
The tourniquet is the undisputed sovereign of extremity hemorrhage control. When acquiring tourniquets for your trauma kit essentials, select only models rigorously evaluated and endorsed by the Committee on Tactical Combat Casualty Care. Buying unvetted, cheap knockoffs online from unverified sellers is a life-threatening mistake. Counterfeit devices routinely snap at the windlass or experience structural screw failure precisely when full mechanical occlusion pressure is applied.
Primary CoTCCC-approved options include:
- Combat Application Tourniquet (CAT) Gen 7: The global gold standard. Utilizes an internal friction band with an external windlass mechanism and secure lock-out clip. Highly intuitive, reliable, and easily self-applied with one hand.
- Special Operations Forces Tactical Tourniquet (SOFTT-W): Constructed with high-strength alloy components and a true 1.5-inch constricting band. It offers exceptional durability, functions seamlessly in freezing climates, and unclips easily for application around trapped limbs.
- SAM Medical XT (SAM XT): Features auto-locking technology that clicks like a seatbelt when correct baseline slack is pulled, virtually eliminating the primary cause of tourniquet failure: loose application before windlass rotation.
2. Advanced Hemostatic Dressings
Tourniquets work extraordinarily well on arms and legs, but they cannot be applied to junctional anatomy: the groin, the axilla (armpit), and the base of the neck. For severe arterial bleeding in these anatomical crevices, deep wound packing with hemostatic agents is strictly mandatory.
Modern hemostatics rely on non-exothermic biochemical agents impregnated directly into sterile, Z-folded non-woven gauze. Unlike older generation granular powders, which posed severe inhalation risks and produced tissue-damaging chemical burns, modern gauze agents work safely through intrinsic clotting pathways:
- Kaolin-Based Agents (e.g., QuikClot Combat Gauze): Kaolin is an inert inorganic mineral that instantly activates Factor XII in the human coagulation cascade, accelerating the body’s natural clot-generation speed by several hundred percent upon contact with blood.
- Chitosan-Based Agents (e.g., Celox Gauze, ChitoGauze): Derived from purified marine arthropod shells, chitosan carries a strong positive ionic charge that magnetically attracts and bonds to negatively charged red blood cells and platelets. It forms a dense, mechanical gel plug across the vascular breach completely independent of the patient’s intrinsic clotting cascade—making it exceptionally effective on hypothermic or anti-coagulated patients.
Always procure Z-folded hemostatic gauze rather than rolled configurations. Z-folded material dispenses rapidly and smoothly from the package directly into deep wound tracts without rolling away across the dirt during high-stress handling.
3. High-Performance Pressure Dressings
Once a junctional wound is thoroughly packed with hemostatic gauze, that packing must be anchored with powerful, sustained pressure. Similarly, venous tears and non-arterial lacerations require targeted compression. This role belongs to the pressure dressing.
The standard benchmark is the Israeli Emergency Bandage (or comparable units like the North American Rescue Emergency Trauma Dressing and the TacMed Solutions OLAES Bandage). These devices combine an ultra-absorbent, non-adherent sterile pad with an elasticized wrap and an integrated mechanical pressure bar or fulcrum. When wrapped tightly, the fulcrum redirects tension back down directly over the wound bed, delivering localized pressure equivalent to a firm human hand.
4. Vented Chest Seals
Penetrating trauma between the neck and the navel introduces a lethal complication: tension pneumothorax. When the thoracic wall is punctured, atmospheric air rushes into the pleural cavity through the wound path with each breath, collapsing the lung and exerting pressure on the heart and great vessels. A tourniquet cannot fix this.
Your trauma kit essentials must include a pair of vented chest seals (such as HyFin Vent or Chest Seal Dual Pack). Dual packs are critical because ballistic or penetrating projectiles frequently leave an entry and an exit wound. Modern designs feature multi-channel venting systems that allow trapped air and blood to escape outward under positive pleural pressure, while simultaneously sealing tightly on inhalation to prevent external air from entering.
5. Critical Ancillary Hardware
A true trauma loadout is completed by several small, utilitarian components that support life support protocols:
- Heavy-Duty Trauma Shears: Medical providers cannot treat injuries they cannot see. Cheap plastic-handled shears snap instantly when cutting through denim, leather work boots, or tactical webbing. Carry heavy-duty, fluoride-coated 7.25-inch trauma shears capable of stripping away heavy outerwear in seconds.
- Nitrile Protective Gloves: Pathogen safety remains paramount. Pack two to three pairs of thick, textured nitrile gloves (5-mil minimum). Avoid thin latex, which tears easily under sharp friction and poses allergen risks. Opt for high-visibility or blue/gray gloves rather than black; dark gloves completely hide wet arterial blood during tactical sweeps of the casualty's body.
- Hypothermia Foil Wrap / Mylar Blanket: Combating the aforementioned "Lethal Triad" requires preserving every calorie of body heat. A compact, durable reflective blanket must be wrapped around the patient immediately following hemorrhage control.
- Permanent Marker (Sharpie): Essential for legibly scrawling "TK" and the exact military timestamp (e.g., "TK 14:32") across the casualty's forehead or directly on the tourniquet's dedicated write-strip, informing receiving trauma surgeons precisely how long tissue has been ischemic.
Tactical Application Protocols: From Direct Pressure to Occlusion
Owning a high-performance stop the bleed kit without structured application methodology is akin to buying a fire extinguisher and never learning how to pull the safety pin. When dealing with sudden, profuse bleeding, the sequence of your actions must follow a disciplined, algorithmic priority: Direct Pressure, Wound Packing, and Mechanical Occlusion.
Step 1: Relentless Direct Pressure
Before ripping open packages or reaching for specialized tools, immediately drop your weight and drive sustained, focused pressure directly into the wound breach. Use your thumbs or the heel of your hand, locking your elbows and aligning your shoulders squarely over the patient's wound. If available, immediately place a gloved hand or a barrier between you and the blood. Direct structural compression mechanically closes the torn vessel against the underlying skeletal frame, significantly slowing flow while your gear is deployed.
Step 2: Tourniquet Application Mechanics
If the injury is situated on an extremity and presents catastrophic arterial flow, abort prolonged manual pressure and reach immediately for your tourniquet. The deployment protocol follows a simple, repeatable sequence:
- Hasty ("High and Tight"): If the casualty is in an unstable environment, poorly lit conditions, or wearing heavy clothing, bypass precise wound location diagnostics. Route the tourniquet as high as physically possible on the affected limb—right up against the groin or axilla—directly over the clothing.
- Deliberate Placement: If the limb is fully exposed, ambient light is optimal, and the wound margins are clear, position the band 2 to 3 inches proximal to the injury site. Never place a tourniquet directly over a joint (elbow or knee), as the skeletal bones shield the arterial vessel from effective compression.
- Eliminate the Slack: This is the universal failure point for novices. Pull the constricting band maximally tight before engaging the windlass rod. There must be zero slack; you should not be able to slip even three fingertips beneath the band. If you fail to pull it tight initially, you will run out of windlass rotations before achieving arterial occlusion.
- Rotate and Lock: Twist the windlass rod smoothly until all bright red, pulsatile bleeding completely stops, and the distal peripheral pulse (e.g., radial or pedal) vanishes. Do not stop simply because the patient complains of pain; therapeutic tourniquet application is inherently excruciating. Lock the windlass securely into the retention clip.
- Secure and Document: Wrap the tail band over the windlass, secure the Velcro safety latch, and clearly write the time of application on the designated strip with your permanent marker.
If the windlass has been cranked to maximum mechanical capacity and arterial bleeding continues to weep past the site, do not remove it. Immediately deploy a second tourniquet directly above the first, side-by-side. The compounding surface area of dual bands will almost always conquer stubborn vascular flow in heavy, muscular limbs.
Step 3: Deep Wound Packing and Junctional Mastery
Tourniquets cannot compress injuries in the groin, armpits, or neck. For these anatomical junctions, deep wound packing is your primary life-saving measure.
Expose the wound completely. Using your shears, cut away clothing until the margins are entirely clear. Clear any large, loose surface blood clots with a sweep of your fingers to pinpoint the exact, deepest bleeding crater. Take your Z-folded hemostatic gauze, anchor a small roll or ball of material between your fingertips, and drive it forcefully into the depths of the wound, aiming directly toward the source of bleeding against the underlying bone.
Employ the "power-pack" technique: maintain continuous, unyielding pressure with one hand deep in the cavity while your other hand feeds additional gauze into the void. Do not simply drape gauze across the top like a blanket; you must firmly pack the interior dead space with physical material until the cavity is packed completely full. Once the wound is packed tight, use your full body weight to exert uninterrupted direct pressure for three continuous minutes. This allows the hemostatic minerals to react with the blood and establish a resilient mechanical matrix. Afterward, secure the site with a tight, properly wrapped pressure dressing.
Realistic Bleeding Control Training Under Pressure
Motor learning under extreme stress is governed by the sympathetic nervous system. In high-stakes trauma scenarios, an untrained individual experiences a sudden spike in heart rate (often exceeding 140–160 BPM), auditory exclusion, severe tunnel vision, and a catastrophic loss of fine motor coordination in the fingers. If your bleeding control training consists solely of watching videos or casually slipping a loose tourniquet onto a relaxed partner in a quiet classroom, your skills will deteriorate rapidly during an actual crisis.
To ensure life-saving techniques hold up under stress, you must implement deliberate, progressive training protocols designed to induce realistic physical and psychological pressure.
Stress Inoculation and Scenario Drills
Stress inoculation is the systematic introduction of stressors during skills practice to desensitize the brain to chaos. You can systematically upgrade your muscle memory using several structured drills:
- The 30-Second Tourniquet Drill: A standard CoTCCC benchmark. Place your tourniquet fully staged inside its pouch or kit. On an audible whistle or timer, retrieve the tourniquet, position it, clear all slack, wind down the windlass, and secure the clip on your own non-dominant arm within 30 seconds. Advance the drill by cutting the window down to 20 seconds.
- The Blind/Zero-Light Deployment: Arterial events often occur in poorly lit parking lots, during nighttime highway breakdowns, or amid smoke and dust. Close your eyes entirely or enter a completely dark room. Retrieve your tourniquet and apply it smoothly to a limb purely by touch, relying solely on tactile feedback to orient the windlass and hook the clip.
- Physical Fatigue Inoculation: Elevate your heart rate before attempting fine mechanical interventions. Perform two minutes of maximum-effort burpees, kettlebell swings, or sprint intervals until your breath is short and your hands tremble. Immediately drop down and execute a complete, technically sound wound-packing sequence on a trainer. This conditions your nervous system to focus through physical exhaustion.
- One-Handed Self-Rescue: Assume an explosive blast or machinery accident has rendered your dominant arm completely paralyzed. Using only your non-dominant hand and your teeth, retrieve your emergency bleeding kit, open the package, loop the tourniquet over your disabled arm, tighten the band, and successfully lock out the windlass.
Effective Tools: Building High-Fidelity Tissue Trainers
Practicing wound packing on an open table or a flat mannequin surface fails to simulate the resistance, slippery mechanics, and depth of real human tissue. While professional medical mannequins equipped with computerized bleeding valves are ideal, they are cost-prohibitive for most private citizens. You can construct surprisingly effective, low-cost training platforms at home:
Acquire an inexpensive silicone "wound cube" specifically moulded with through-and-through bullet tracks and deep junctional lacerations. Alternatively, purchase a bone-in pork shoulder or butt from a local butcher. Cut a deep, narrow 3-to-4-inch channel directly down toward the hard bone surface with a utility knife. Lubricate the deep cavity with warm water mixed with cornstarch and red dye to mimic the slick friction characteristics of real vascular tissue.
Practice driving Z-folded gauze into these dense, deep channels with your fingers under timed conditions. You will immediately appreciate how much physical force, continuous finger-walking, and volume of material are truly required to pack a wound cavity completely. This visceral physical feedback is irreplaceable.
Kit Placement, Maintenance, and Environmental Considerations
The finest medical equipment on earth cannot save a life if it remains miles away when an accident occurs. A strategic mindset approaches medical access with the same rigor applied to fire extinguishers: gear must be layered, accessible within arm's reach, and carefully maintained against environmental decay.
Staging and Accessibility
Never lock a stop the bleed kit inside a buried glove compartment, deep underneath luggage in a vehicle trunk, or inside a high, child-proof household cabinet. The kit must be placed where it can be grabbed within seconds. Professional protocol dictates specific staging locations:
- Everyday Carry (EDC): If you carry a commuter bag, backpack, or briefcase daily, ensure an ultra-compact kit containing at least one CoTCCC-approved tourniquet, a pack of hemostatic gauze, and a pair of gloves rides in a designated, exterior-accessible pocket.
- Vehicle Staging: Motor vehicle collisions account for an enormous percentage of civilian arterial injuries. Mount your trauma kit visibly to the driver's side headrest, inside the driver's door panel, or strapped to the overhead sun visor. Ensure every passenger knows its precise location.
- High-Risk Domestic Zones: Keep a kit mounted on the wall in your home workshop, garage, outdoor kitchen, or adjacent to heavy yard-maintenance equipment.
Combating Environmental Degradation
Medical supplies are not indestructible. Environmental exposure slowly degrades the structural integrity of synthetic polymers, elastics, and adhesives. Vehicle interiors, in particular, fluctuate through extreme thermal cycles—often swinging from freezing temperatures to well over 130°F (54°C) during summer heatwaves.
Heat slowly degrades the elasticity of pressure wraps, embrittles polymer windlass retention clips, and melts the hydrogel adhesive layers on vented chest seals, rendering them incapable of adhering to sweaty, bloody skin. Inspect your staged kits every six months. Swap out vehicle-stored tourniquets and chest seals annually, cycling older units into your dedicated practice and training bin.
Verify that your tourniquets are staged in the "rapid-deployment" configuration: the band fed through the friction buckle, folded in a flat, accordion layout, with the windlass clip unlatched and the windlass completely free. A tourniquet still wrapped in factory shrink-wrap, with the safety strap securely smoothed down over the windlass, will cost you fifteen critical, irreplaceable seconds when your hands are slick with blood.
The Shift to Immediate Responder
Preparing for catastrophic bleeding is not an exercise in paranoia; it is an act of profound civic responsibility and love for family. In catastrophic trauma, the traditional categorization of the public as mere "bystanders" is an outdated, dangerous concept. When an artery is severed, the individuals already present at the scene are the true first responders. Professional paramedics and tactical teams are, by definition of spatial reality, secondary responders.
By curating an uncompromising, medically sound stop the bleed kit, staging it with strategic discipline, and training your muscle memory through rigorous, realistic stress, you fundamentally alter the outcome of a disaster. You step out of the crowd of horrified onlookers and become an active guardian of life, fully equipped to stand between a severe trauma incident and the grave.
Frequently Asked Questions
What is the difference between a first aid kit and a Stop the Bleed kit?
A standard first aid kit focuses on minor injuries such as small cuts, abrasions, and burns. A Stop the Bleed kit, or trauma bleeding control kit, is dedicated specifically to life-threatening hemorrhages and contains specialized items like tactical tourniquets, hemostatic gauze, pressure dressings, and trauma shears.
Which tourniquet should I include in my bleeding control kit?
You should only include tourniquets recommended by the Committee on Tactical Combat Casualty Care (CoTCCC), such as the Combat Application Tourniquet (C-A-T Gen 7) or the SOF Tactical Tourniquet (SOFTT-W). Avoid cheap, uncertified online counterfeits, as plastic windlasses can snap under operational tension.
What is hemostatic gauze and how does it work?
Hemostatic gauze is medical gauze impregnated with active clotting agents (such as kaolin or chitosan) that accelerate the body's natural coagulation cascade. It is packed directly into deep junctional wounds—such as the groin, armpit, or neck—where a tourniquet cannot be applied.
When should a tourniquet be used instead of direct pressure?
A tourniquet should be applied immediately when there is severe, life-threatening arterial bleeding from an arm or leg, such as spurting blood, blood pooling rapidly, or soaked clothing where direct pressure is insufficient or impractical to maintain.
Where can civilians get certified in Stop the Bleed training?
Civilians can take certified in-person and hybrid courses through the official Stop the Bleed coalition organized by the American College of Surgeons (ACS), the American Red Cross, and local emergency management agencies or fire departments.