⚡ Key Facts
- Unmatched Speed: In the deep ocean, tsunami waves travel at speeds exceeding 500 miles per hour—matching the cruise speed of a commercial jetliner—before slowing down and towering as they hit shallow coastal waters. For the practical checklist side, use the community emergency preparedness guide.
- The Multi-Wave Hazard: A tsunami is not a single wave, but a series of surges (known as a wave train) that can strike over a period of several hours, with the first wave rarely being the largest or most destructive.
- Critical Elevation Thresholds: The National Oceanic and Atmospheric Administration (NOAA) recommends evacuating to an elevation of at least 100 feet above sea level, or moving at least two miles inland if high ground is unavailable.
- Local vs. Distant Events: While a distant tsunami may grant emergency managers hours to coordinate alerts, a local subduction zone earthquake can trigger a devastating wave train arriving at the coastline in as little as 10 to 15 minutes.
For millions of families worldwide, coastal living represents the pinnacle of natural beauty and community connection. However, residing along the margins of the world’s oceans requires a practical, clear-eyed understanding of marine hazards. Among these, tsunamis are arguably the most dynamic and misunderstood. Unlike seasonal weather events that offer days of atmospheric tracking, a tsunami is a sudden-onset geological hazard that demands immediate, decisive action. Surviving a tsunami does not depend on luck; it depends on a household’s structural readiness, situational awareness, and pre-planned evacuation protocols. By understanding how to read the ocean, decode official warning systems, and execute a rapid family emergency plan, your household can live confidently and safely on the coast.
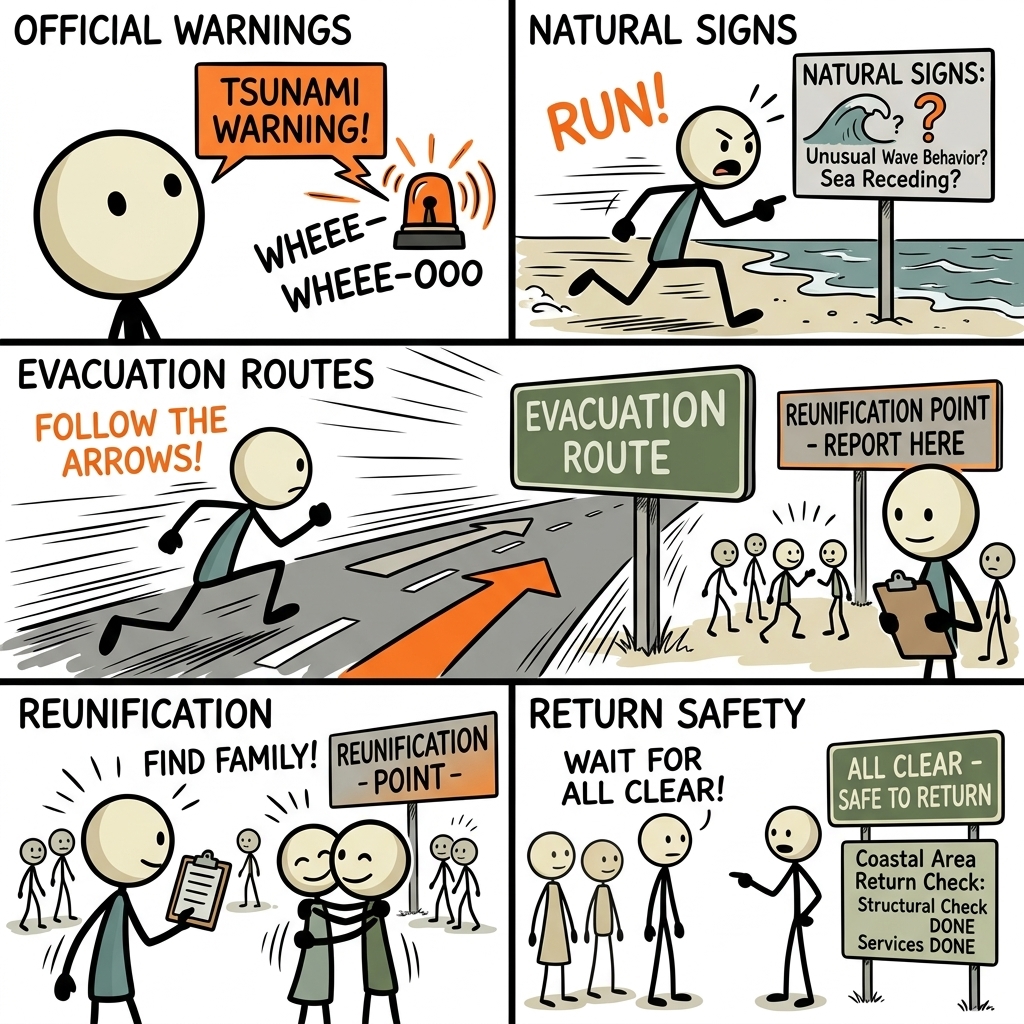
1. Decoding the Warnings: Official Alerts vs. Nature's Clues
When a tsunamigenic event occurs—typically a submarine earthquake, landslide, or volcanic eruption—coastal residents have two primary defense mechanisms: official alerts broadcast by emergency management agencies, and the natural warning signs provided by the earth itself. Understanding both is the foundational pillar of tsunami preparedness.
Official NOAA Tsunami Alert Levels
The National Oceanic and Atmospheric Administration (NOAA) operates two Tsunami Warning Centers in the United States: the National Tsunami Warning Center (NTWC) in Alaska and the Pacific Tsunami Warning Center (PTWC) in Hawaii. These centers continuously monitor seismic activity and deep-ocean pressure sensors (DART buoys). When a threat is detected, they issue four distinct levels of alerts. Knowing the exact meaning of these alerts saves lives:
- Tsunami Information Statement: Issued when an earthquake has occurred in the marine environment, but there is no threat of a destructive tsunami. It is designed to prevent unnecessary panic and inform the public that scientists are actively monitoring the situation.
- Tsunami Watch: Issued when a significant seismic event has occurred, and a tsunami is *possible*. At this stage, there is no immediate danger, but your household should locate your emergency gear, review your evacuation routes, and stay tuned to local media or NOAA Weather Radio.
- Tsunami Advisory: Issued when a tsunami with the potential to produce strong currents or dangerous waves is expected. Wave heights are typically projected to be between 1 and 3 feet. While this may not sound catastrophic, 3 feet of rushing water can easily sweep vehicles off roads and knock adults off their feet. During an advisory, beaches, harbors, and marinas must be evacuated immediately.
- Tsunami Warning: The highest level of alert. It indicates that a dangerous, widespread tsunami is imminent or already occurring. If you are in a designated inundation zone during a warning, you must execute your evacuation plan immediately. Do not wait to see the wave; move inland or to high ground without delay.
The Natural Warning Signs: Feel, See, Hear
While official alerts are highly effective for distant tsunamis (such as an earthquake in Alaska triggering a wave that travels to California), they may not arrive in time if the earthquake occurs right off your local coastline. In a local tsunami scenario, the ground shaking *is* your warning. The United States Geological Survey (USGS) and FEMA advise all coastal residents to memorize the natural "Feel, See, Hear" protocol:
Feel: If you feel a strong earthquake that makes it difficult to stand, or a prolonged, gentle shaking that lasts for a minute or more, do not wait for an official siren or cell phone alert. The earthquake may have generated a tsunami just miles offshore.
See: Prior to a tsunami wave arriving, the ocean often recedes dramatically, exposing the seafloor, reefs, and marine life that are normally submerged. This phenomenon, known as "drawback," occurs because the trough of the tsunami wave reaches land first. Treat a rapidly receding tide as an absolute emergency signal.
Hear: A tsunami wave train is often preceded by a loud, roaring sound, frequently described by survivors as sounding like an oncoming freight train, a low-flying jet engine, or a deep, thunderous rumble. If you hear this sound coming from the ocean, move inland immediately.
2. Mapping Your Escape: Evacuation Planning and Route Design
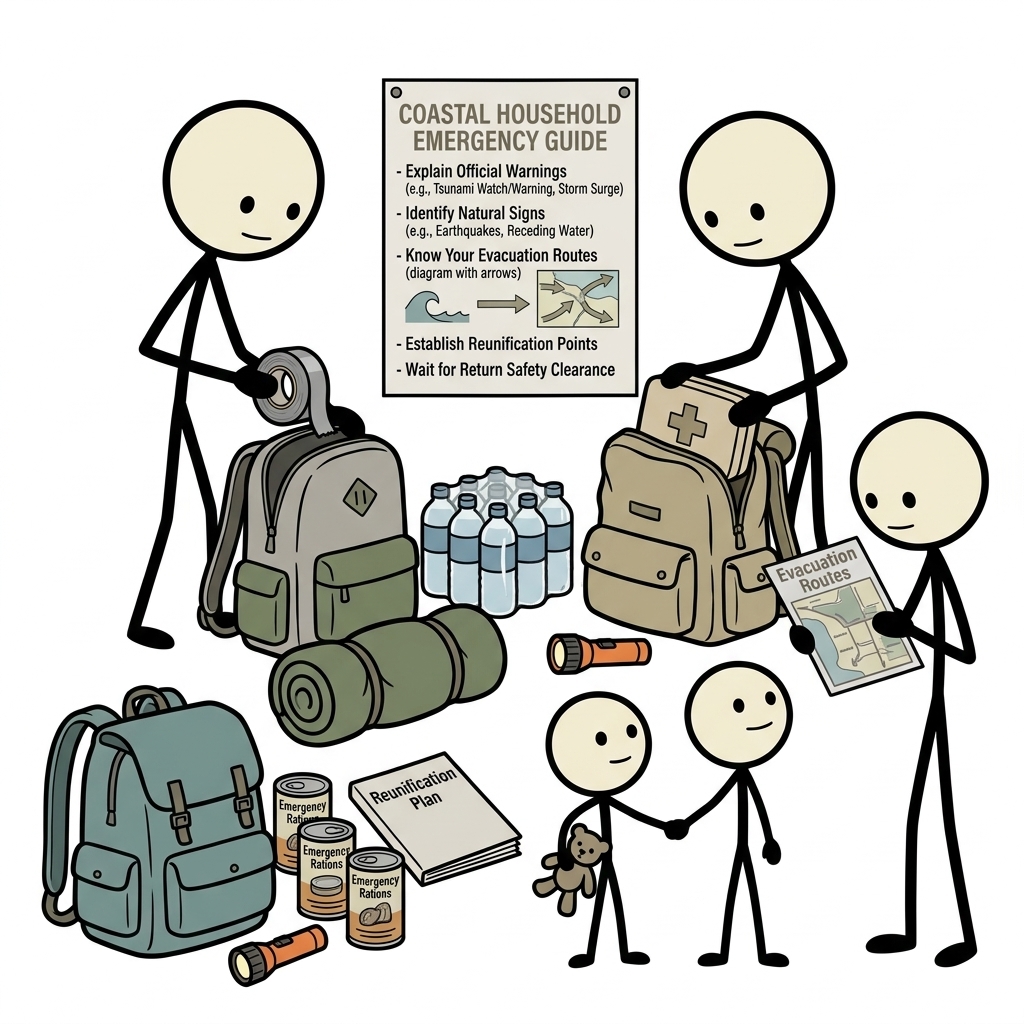
When a tsunami warning is active or natural signs are present, your survival depends entirely on your ability to reach safe ground. This transition cannot be improvised in the dark or amidst the chaos of a major seismic event. It requires a meticulously mapped and practiced evacuation plan.
Identifying Inundation Zones and Assembly Areas
Your first step is to consult your local emergency management agency to obtain a tsunami inundation map for your community. These maps use historical data and advanced computer modeling to show exactly which areas are at risk of flooding during various tsunami scenarios.
Locate your home, your children's schools, and your workplace on these maps. Identify the boundaries of the safe zone—usually designated as "high ground" or an "assembly area" outside the colored inundation zones. Your target destination should be at least 100 feet above sea level, or two miles inland if the terrain is flat. Mark these safe zones clearly on physical paper maps kept in your home and vehicles.
Developing and Scouting Evacuation Routes
Once you know where you are and where you need to go, you must map the routes to get there. Relying on GPS during a disaster is a critical mistake; cell towers may be damaged by the initial earthquake, or networks may be overloaded by thousands of residents trying to communicate simultaneously.
- Establish Multiple Paths: Always map a primary evacuation route and at least two alternative routes. Landslides, fallen power lines, collapsed bridges, or gridlocked traffic can easily render your primary route impassable.
- Plan for Foot Travel: If a local earthquake has struck, roads will likely be cracked, blocked by debris, or jammed with idling cars. Your primary plan should assume you will be evacuating on foot, carrying your emergency supplies. Plan routes that utilize pedestrian paths, parks, or open fields where you are less likely to be trapped by urban debris.
- Account for Vulnerable Family Members: If your household includes infants, elderly relatives, or individuals with mobility challenges, your route must accommodate them. Ensure your path avoids steep stairs or unpaved, muddy trails if you need to push a stroller or wheelchair.
- Conduct Physical Walkthroughs: Walk your evacuation routes as a family during both daytime and nighttime hours. This builds muscle memory and helps you identify potential hazards—such as narrow choke points, unstable masonry walls, or low-lying areas—that aren't visible on a map.
The Strategy of Vertical Evacuation
In low-lying coastal areas where flat geography makes reaching high ground or moving two miles inland impossible within a 15-minute window, vertical evacuation is the recommended alternative. FEMA publication P-646 ("Guidelines for Design of Structures for Vertical Evacuation from Tsunamis") outlines how specially engineered buildings and berms can serve as life-saving refuges.
If you live in such an area, identify reinforced concrete structures that are at least four stories high. Hotels, multi-story parking garages, and engineered municipal buildings are often suitable. If you must use vertical evacuation, move to the third floor or higher. Keep in mind that vertical evacuation is a secondary option; horizontal evacuation to natural high ground remains the safest choice whenever possible.
3. The Tsunami Preparedness Checklist: Gear and Actionable Steps
When the ocean begins to rise, you will not have time to gather documents, search for flashlights, or pack food. A robust coastal emergency plan relies heavily on pre-positioned supplies. Utilizing a comprehensive tsunami preparedness checklist ensures that your household can grab what is necessary and move within seconds.
When designing a comprehensive tsunami preparedness emergency preparedness plan, households must divide their supplies into two categories: a lightweight, portable "go-bag essentials guide" for immediate evacuation, and a larger "Shelter-in-Place" kit for the post-disaster recovery phase when utilities and supply chains are disrupted.
| Category | Essential Item | Purpose & Specifications |
|---|---|---|
| Hydration & Nutrition | Water & High-Calorie Rations | 1 gallon of water per person per day (minimum 3 days in Go-Bag). High-calorie, non-perishable food bars that require no cooking or water. |
| Communication | NOAA Weather Radio | Hand-crank or battery-powered radio with S.A.M.E. (Specific Area Message Encoding) technology to receive localized alerts. |
| Navigation & Light | Headlamps & Physical Maps | Hands-free LED headlamps with extra batteries. Laminated local evacuation maps showing high-ground assembly areas. |
| First Aid & Hygiene | Trauma Kit & Sanitation | Tourniquets, pressure bandages, antiseptic wipes, and a 14-day supply of critical prescription medications. Wet wipes and heavy-duty waste bags. |
| Personal Security | Waterproof Document Pouch | Passports, property deeds, insurance policies, medical records, and emergency contact lists stored on a waterproof USB and physical paper. |
Integrating Your Tsunami Preparedness Checklist into Daily Life
Having the gear is only half the battle; keeping it accessible and functional is what ensures safety. Implement these three maintenance rules to ensure your tsunami preparedness emergency preparedness supplies are always ready:
- The "Grab-and-Go" Location: Store your household Go-Bags in an easily accessible location near your primary exit door or in the trunk of your vehicle. Never bury them in closets or behind seasonal storage.
- Semi-Annual Rotations: Set a recurring calendar reminder twice a year (coinciding with daylight saving time changes) to inspect your kits. Replace expired food, rotate water supplies, check battery charges, and update any prescription medications or legal documents.
- Footwear Readiness: Earthquakes and tsunamis frequently occur in the middle of the night. Keep a sturdy pair of closed-toe shoes and a flashlight directly next to or under the bed of every family member. Walking through glass and seismic debris barefoot can instantly cripple your ability to evacuate.
4. Reunification Strategies in the Chaos
One of the most terrifying aspects of a sudden disaster is the potential for family members to be separated. Children may be at school, parents at different workplaces, and extended family members elsewhere in the community. Without a clear, pre-established reunification plan, family members often make dangerous, impulsive decisions—such as driving back into inundation zones to search for loved ones.
Establishing Communication Protocols
During a major disaster, local cellular networks almost always fail or become severely congested. However, text messages often go through when voice calls cannot, as they require significantly less bandwidth. Teach every member of your household to "text, don't talk" during an emergency.
Crucially, you must designate an Out-of-State Contact. Choose a relative or friend who lives hundreds of miles away from your coastal region, outside the zone of seismic impact. If local lines are down, long-distance routing often still functions. In an emergency, each family member should send a single text message to this designated contact: "I am safe at [Location]. Moving to high ground." The out-of-state contact then acts as a central clearinghouse, updating everyone on each other's status.
Pre-Determined Meeting Locations
Your reunification plan must include three distinct meeting places, depending on the nature of the evacuation:
- Immediate Meeting Place: A spot right outside your home (such as a specific neighbor's driveway or mailbox) in case of a localized emergency like a house fire.
- neighborhood preparedness network Assembly Point: A location just outside your immediate neighborhood, such as a park or school parking lot, in case you cannot return to your street.
- Regional Tsunami Assembly Area: A designated safe zone on high ground, well outside the inundation zone, where all family members will head if a tsunami warning is issued. Agree beforehand that if you are separated, everyone will independently make their way to this specific high-ground location. Do not attempt to travel back down into the inundation zone to meet up.
School and Childcare Coordination
If you have school-aged children, familiarize yourself with the school district's specific tsunami evacuation plans. Most schools located in coastal zones have strict, pre-planned evacuation routes to high ground.
Do not attempt to drive to the school to pick up your children during an active tsunami warning. Doing so adds to traffic gridlock and delays their evacuation. Instead, trust the school's emergency protocols and meet your children at their designated high-ground relocation facility once the immediate danger has passed.
5. Safe Return Protocols: Navigating the Aftermath
The danger of a tsunami does not end when the first wave recedes. In fact, the post-impact environment can be just as hazardous as the initial surge. Returning home prematurely is one of the leading causes of injury and death following a tsunami event.
Waiting for the Official "All Clear"
A tsunami is not a single wave; it is a series of surges that can continue for 12 to 24 hours or longer. The second, third, or even fifth wave can be substantially larger than the first. Additionally, the water pulling back out to sea (the backwash) carries immense force, dragging debris, vehicles, and structures with it.
Never assume that because the water has receded, it is safe to return. Remain at your high-ground assembly area until local emergency management officials, NOAA, or law enforcement broadcast an official, explicit "All Clear" signal. This may take a day or more. Patience is a life-saving tool.
Assessing Structural and Environmental Hazards
When you are finally cleared to return to your neighborhood, approach your property with extreme caution. The physical forces of a tsunami can severely compromise buildings and infrastructure in ways that are not immediately obvious.
- Inspect Structural Integrity: Before entering any building, check the exterior for signs of structural shifting, cracked foundations, leaning walls, or sagging rooflines. If the building has been inundated by water, the drywall, insulation, and support beams may be compromised. When in doubt, have a professional inspector evaluate the structure before stepping inside.
- Detect Gas and Electrical Risks: Broken gas lines and damaged electrical systems pose a severe fire hazard. If you smell gas, hear a hissing sound, or suspect a leak, do not enter the home. Turn off the main gas valve if it is safe to do so, and contact the utility company. Never use matches, lighters, or open flames near a flooded structure. Treat all downed power lines as live and stay at least 30 feet away from them.
- Beware of Waterborne Hazards: Tsunami waters are highly contaminated. They carry raw sewage, industrial chemicals, heavy metals, agricultural runoff, and sharp debris. According to the Centers for Disease Control and Prevention (CDC), contact with floodwaters can lead to wound infections, skin rashes, and severe gastrointestinal illnesses. Wear heavy-duty rubber boots, puncture-resistant gloves, and N95 masks when cleaning up debris to protect yourself from mold, bacteria, and toxic dust.
- Sanitize Food and Water Supplies: Municipal water systems are often compromised during a tsunami due to pipe breakages and treatment plant flooding. Do not drink tap water until local authorities declare it safe. Boil water vigorously for at least one minute, or use certified water purification tablets. Discard any food items—including canned goods—that have come into contact with tsunami floodwaters, as they may be contaminated with microscopic pathogens or chemical toxins.
An Empowered Approach to Coastal Security
Living near the ocean is a privilege that brings immense joy, but it also demands a commitment to resilience. Tsunami preparedness is not about living in a state of constant fear or anxiety; rather, it is about establishing a practical, structured safety net that allows your household to thrive. By understanding the science behind the warnings, mapping your routes, organizing your emergency supplies, and establishing clear family emergency communication plan protocols, you transform vulnerability into absolute readiness. Armed with the right knowledge and a practiced plan, your family can enjoy the beauty of coastal living with confidence, knowing you are fully prepared to meet the challenges of the sea.
Frequently Asked Questions
What should a tsunami preparedness plan include?
Start with the immediate safety steps, the supplies and records your household needs, a communication plan, and a regular review schedule. Follow local official guidance during an active emergency.
How often should I review tsunami preparedness preparations?
Review them at least twice a year and whenever your household, medication, location, or local risks change. Replace expired supplies and practice key steps.
Where can I find reliable emergency guidance?
Use local emergency management alerts and established public-health or emergency-management agencies. A blog guide should support, not replace, official real-time instructions.