⚡ Key Facts
- The 90% Rule: According to the Insurance Institute for Business & Home Safety (IBHS), up to 90% of home ignitions during wildfires are caused directly or indirectly by wind-blown embers, not the main flame front. For the practical checklist side, use the community emergency preparedness guide.
- Ember Travel Distance: The National Fire Protection Association (NFPA) warns that embers can loft on convective wind currents and travel up to 5 miles ahead of an active wildfire, bypassing traditional firebreaks. For the practical checklist side, use the neighborhood preparedness network.
- Zone 0 Criticality: FEMA reports that maintaining a non-combustible 0-to-5-foot perimeter around a structure (Zone 0) is the single most effective landscaping step to prevent home loss. For the practical checklist side, use the emergency communication plan.
- Class A Roof Performance: Research from the Federal Emergency Management Agency (FEMA) shows that homes with Class A-rated roofs are over 70% more likely to survive a wildfire than those with unrated roofs. For the practical checklist side, use the family emergency planning guide.
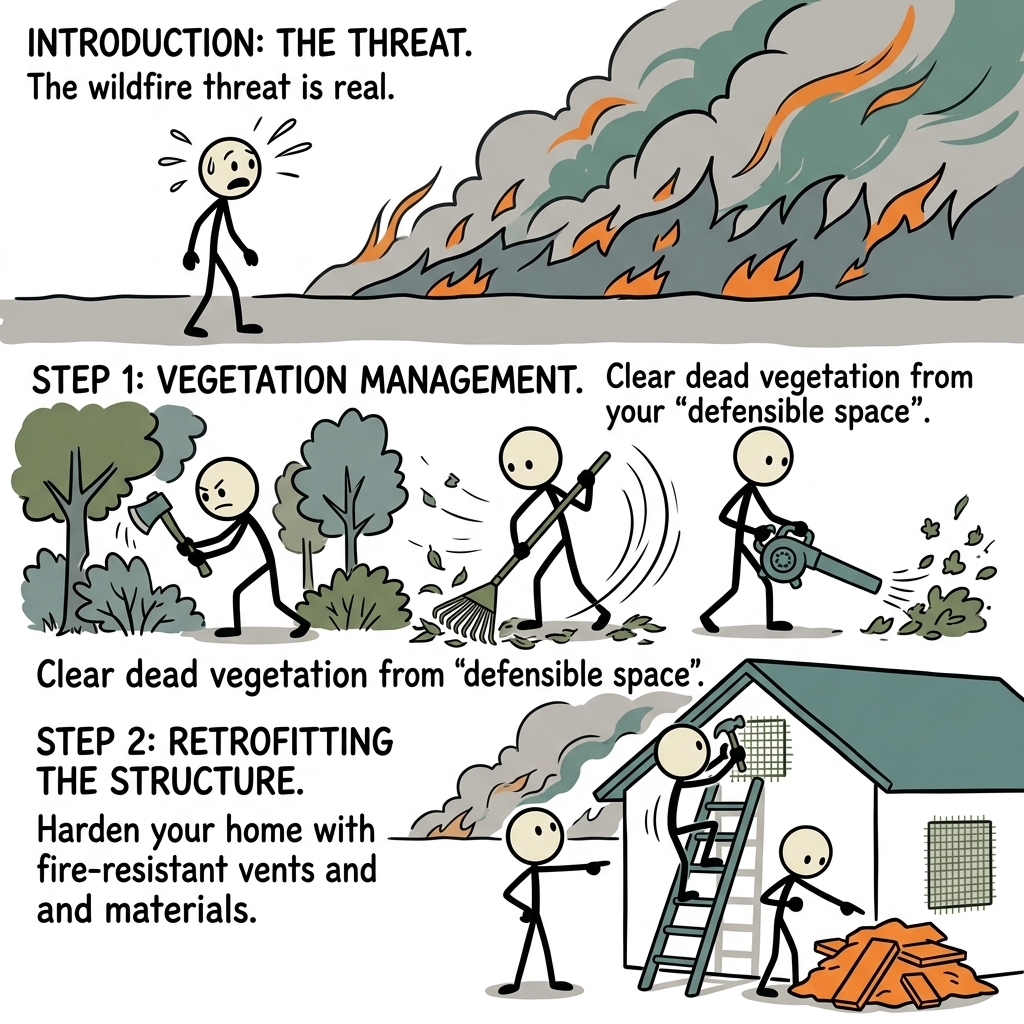
Imagine a wildfire burning two miles away. The air is thick with smoke, and the orange glow on the horizon is terrifying, but you believe you have time. Suddenly, a gust of wind carries a shower of glowing, superheated pine cone scales and bark fragments directly onto your property. One of these tiny embers slips through a standard attic vent, landing on dry fiberglass insulation. Within minutes, your attic is ablaze from the inside out, long before the actual forest fire ever reaches your street. This is the reality of the Wildland-Urban Interface (WUI). Creating an ember resistant home is not about building an impenetrable bunker; it is about systematic, strategic engineering designed to eliminate the vulnerabilities that turn flying embers into structure-destroying blazes. For the practical checklist side, use the real-world emergency scenarios guide.
The Science of Wildfire Ignition: Why Embers are the Real Enemy
To prepare your home effectively, you must first understand how wildfires actually destroy structures. Many homeowners mistakenly believe that a wall of flame must sweep through their yard to ignite their house. However, data from the United States Geological Survey (USGS) and the National Oceanic and Atmospheric Administration (NOAA) indicates that direct flame contact accounts for only a small fraction of home losses. Instead, the primary threat is the "ember shower"—millions of tiny, burning wood particles lofted high into the air by convective heat columns and driven forward by high winds.
When these embers land, they behave like heat-seeking missiles. They seek out dry leaves in gutters, gaps under roof shingles, unscreened foundation vents, and combustible materials stacked against the home. Once they find a fuel source, they smolder quietly, eventually growing into localized fires that breach the home's envelope. Understanding this mechanism is the foundation of modern wildfire home hardening. By systematically identifying and sealing these entry points, you can dramatically increase your home's chances of survival, even if the surrounding landscape is actively burning.
---Roof and Gutter Protection: Hardening the Highest-Risk Surface

Your roof is the largest horizontal surface on your home, making it the primary landing pad for falling embers. If your roof is made of combustible materials, or if it has structural gaps, it presents an immediate, catastrophic vulnerability during a wildfire event.
Upgrading to Class A Fire-Rated Roofing
The first step in roof hardening is ensuring your roof material has a Class A fire rating, which is the highest rating available under ASTM E108 testing standards. Class A materials are designed to withstand severe fire exposure originating from outside the building.
- Asphalt Fiberglass Shingles: Modern composition shingles are widely available with Class A ratings. They contain a fiberglass mat that resists flame penetration.
- Metal Roofing: Standing-seam steel, aluminum, or copper roofs are inherently non-combustible and offer exceptional protection against embers. They are highly recommended for high-hazard wildfire zones.
- Clay and Concrete Tiles: These materials are non-combustible but require special attention. The gaps at the eave ends of clay tiles must be sealed with bird stops (metal or mortar closures) to prevent embers from blowing underneath the tiles where they can ignite the wood roof decking.
Securing the Roof Edge and Valley Junctions
Even with a Class A roof, vulnerabilities exist where different planes meet. Roof valleys collect debris like pine needles and leaves. When embers land in these valleys, they ignite the debris, creating a concentrated heat source directly on top of the roofing material. Install heavy-duty metal valley flashing to protect these vulnerable channels. Additionally, ensure that your roof has a metal drip edge installed along the eaves. This prevents embers from blowing upward under the edge of the shingles and igniting the exposed wood of the fascia or roof sheathing.
Non-Combustible Gutters and Gutter Guards
Gutters are notorious debris traps. During a wildfire, dry leaves in a vinyl gutter will quickly ignite, and the melting vinyl can drop burning liquid onto the ground below, igniting siding or foundation plants. To harden your gutters:
- Replace Vinyl with Metal: Install aluminum or steel gutters. While metal gutters will still collect debris, they will not melt or contribute fuel to the fire.
- Install Fine-Mesh Metal Gutter Guards: Avoid plastic or vinyl gutter screens. Instead, choose high-quality stainless steel micro-mesh gutter guards. These guards prevent leaves and pine needles from entering the gutter while allowing water to flow. Make sure the guards are securely fastened so wind cannot blow them loose.
- Keep Gutters Clean: No guard is 100% maintenance-free. Regularly clear any accumulated debris from the top of the guards, especially during high-wind fire seasons.
Ember-Resistant Venting: Stopping the Trojan Horse
Traditional home building codes emphasize maximizing attic and crawlspace ventilation to prevent moisture buildup and rot. Unfortunately, standard vents are essentially open doorways for flying embers. Upgrading your venting system is one of the most critical fire safe house improvements you can make.
The Danger of Standard 1/4-Inch Mesh
For decades, building codes required attic and crawlspace vents to be covered with 1/4-inch wire mesh to keep out rodents. However, testing by the IBHS has proven that 1/4-inch mesh allows embers to pass through easily. Once inside the attic or crawlspace, these embers find dry wood framing, cardboard storage boxes, and paper-faced fiberglass insulation, leading to rapid, hidden structural fires.
Upgrading to ASTM E2886 Compliant Vents
To protect your home's interior voids, replace all standard vents with specialized, ember-resistant vents that comply with the ASTM E2886 standard. These advanced vents utilize a multi-layered defense system:
- Micro-Mesh Screening: They feature corrosion-resistant stainless steel mesh with openings no larger than 1/16 to 1/8 inch, which physically blocks the majority of flying embers.
- Intumescent Materials: Many high-performance vents contain an intumescent matrix or baffle system. When exposed to the intense radiant heat of an approaching fire, this material swells up to 30 times its original volume, completely sealing the vent opening and blocking both embers and hot gases from entering.
- Baffle Designs: Some vents use mechanical baffles that force air to take a tortuous, winding path, causing heavy embers to lose momentum and fall out of the airflow before they can reach the interior.
Key Vent Locations to Harden
Do not overlook any ventilation pathways. You must address every vent on your home's exterior:
| Vent Type | Vulnerability | Hardening Solution |
|---|---|---|
| Soffit Vents | Under-eave vents draw air upward, pulling embers directly into the attic space. | Replace with ASTM E2886 approved soffit vents or install ember-resistant retrofit screens. |
| Gable Vents | Located on vertical walls, these are highly exposed to wind-driven ember showers. | Install heavy-duty ember-resistant gable vents with integrated metal baffles. |
| Ridge Vents | Embers landing on the roof peak can slide under the ridge cap and enter the attic. | Ensure ridge vents have a built-in, non-combustible filter or replace with fire-rated models. |
| Crawlspace & Foundation Vents | Embers swirling near the ground can enter the crawlspace, igniting floor joists. | Replace with 1/8-inch stainless steel mesh vents or intumescent foundation vents. |
Windows and Doors: Sealing the Envelope
During a wildfire, the intense radiant heat can shatter glass long before flames touch the home. Once a window breaks, wind-driven embers can enter the living space, igniting furniture, curtains, and flooring.
The Critical Role of Tempered Glass
Standard single-pane glass is highly susceptible to thermal shock. When exposed to radiant heat, the uneven expansion causes the glass to crack and fall out in as little as one to two minutes. Double-pane windows offer better protection because the outer pane shields the inner pane from immediate heat exposure.
However, for true wildfire zone home upgrades, you should install multi-pane windows with at least one pane of tempered glass. Tempered glass is heat-treated to be up to four times stronger than standard annealed glass. It can withstand significantly higher temperatures and thermal stress before breaking. Ideally, the exterior pane should be tempered, providing a robust shield against both heat and flying debris.
Upgrading Exterior Doors and Hardware
Exterior doors must be able to resist flame penetration and radiant heat. Hollow-core wood doors offer virtually no fire resistance and should be replaced immediately.
- Material Selection: Choose doors constructed from solid wood (minimum 1-3/4 inches thick), metal-clad insulated steel, or fiberglass with a fire-rated mineral core.
- Weatherstripping: Install heavy-duty, high-temperature silicone or neoprene weatherstripping around the entire perimeter of the door. This prevents draft currents from pulling fine embers through the cracks between the door and the frame.
- Garage Doors: The garage is a common point of entry for embers. Install flexible, high-temperature weatherstripping along the bottom, sides, and top of the garage door. Ensure the door fits tightly against the tracks to eliminate gaps. If your garage door has windows, ensure they are made of tempered glass.
Landscaping for Ember Resistance: Managing the Zones
Hardening the structure of your home is only half the battle; you must also manage the surrounding fuel supply. The Federal Emergency Management Agency (FEMA) and the National Fire Protection Association (NFPA) advocate for a three-zone defensible space system designed to slow the spread of fire and prevent embers from finding fuel near your walls.
Zone 0: The Ember-Resistant Zone (0 to 5 Feet)
This is the most critical zone. It encompasses the immediate perimeter of your home, including under decks and stairways. The goal of Zone 0 is to eliminate any material that could be ignited by an ember and hold a flame against your home's siding.
- Remove Organic Mulch: Replace wood chips, bark, and pine needles with non-combustible materials such as gravel, river rock, crushed stone, or concrete pavers.
- Clear Vegetation: Do not plant shrubs or trees within this zone. Remove any climbing vines from the exterior walls. Keep this zone completely free of dead leaves, twigs, and weeds.
- Relocate Combustibles: Never store firewood, patio furniture cushions, plastic trash cans, or lawnmowers within this 5-foot perimeter. Move firewood piles at least 30 feet away from any structure.
Zone 1: The Lean, Clean, and Green Zone (5 to 30 Feet)
This zone is designed to limit the transmission of fire from the outer landscape toward your home. Here, you want to keep vegetation healthy, hydrated, and spaced out.
- Create Vertical Spacing: Prune low-hanging tree branches up to a height of 6 to 10 feet from the ground (or 1/3 of the tree's total height for smaller trees). This prevents ground fires from climbing into the tree canopy (known as "ladder fuels").
- Create Horizontal Spacing: Ensure that tree crowns are spaced at least 18 feet apart in this zone. This prevents fire from jumping easily from canopy to canopy.
- Maintain Lawns and Groundcover: Keep lawns mowed to a height of 4 inches or less. Irrigate plants regularly to keep them green and high in moisture content. Remove any dead or dying plants immediately.
Zone 2: The Reduced Fuel Zone (30 to 100+ Feet)
The goal of Zone 2 is to disrupt the path of an approaching wildfire, reducing its intensity before it reaches your home's immediate defenses.
- Thin Out Vegetation: Remove accumulated dead wood, fallen branches, and dense underbrush.
- Space Out Trees: Maintain a minimum of 12 feet of space between tree crowns in this zone (increasing to 20-30 feet on steep slopes, as fire travels faster uphill).
- Create Fuel Breaks: Use driveways, gravel pathways, or stone walls to create natural barriers that interrupt the continuity of fuel.
Selecting Fire-Resistant vs. Pyrophytic Plants
There is no such thing as a completely "fireproof" plant, but some species are much more fire-resistant than others due to their tissue structure, moisture retention, and chemical composition.
| Plant Type | Fire-Resistant Species (Recommended) | Pyrophytic Species (Avoid Near Home) |
|---|---|---|
| Trees | Deciduous hardwoods (Maple, Oak, Cherry, Birch) - high moisture content, low resin. | Conifers (Pine, Fir, Cedar, Spruce, Cypress) - contain highly flammable resins and oils. |
| Shrubs | Lilac, Hydrangea, Boxwood, Cotoneaster - dense, fleshy leaves that resist ignition. | Juniper, Rosemary, Eucalyptus, Manzanita - volatile oils make them burn explosively. |
| Groundcover | Sedum, Ice Plant, French Lavender, Ajuga - succulent properties store water. | Ornamental grasses, dry annuals, unmanaged ivy - dry out quickly and form dense thatch. |
Budget-Tiered Action Plan: Prioritizing Your Upgrades
Hardening your home can feel overwhelming, especially if you are working with a limited budget. However, you do not have to complete every upgrade at once to make a significant impact. By prioritizing projects based on cost-effectiveness, you can systematically build protection over time.
Tier 1: Low-Cost / High-Impact (Under $500)
These are "sweat equity" tasks and minor purchases that yield massive safety returns. Most of these can be completed over a single weekend.
- Clean Your Gutters and Roof: Remove all dry leaves, pine needles, and organic debris. This costs nothing but your time and dramatically reduces your ignition risk.
- Establish Zone 0: Rake back wood mulch 5 feet from your foundation. Replace it with inexpensive gravel or leave it bare. Move firewood piles, wooden planters, and patio furniture away from the house.
- Install Retrofit Vent Screens: Purchase rolls of 1/8-inch stainless steel wire mesh from a local hardware store. Cut and staple this mesh over existing attic and crawlspace vents to block larger embers.
- Apply Weatherstripping: Replace worn weatherstripping around exterior doors and garage doors to seal out drafts and embers.
Tier 2: Moderate Upgrades ($500 to $5,000)
These projects require some financial investment but address major structural vulnerabilities. They can be completed by a handy homeowner or a local contractor.
- Upgrade to ASTM E2886 Vents: Replace all critical attic, soffit, and foundation vents with professionally engineered, ember-resistant vents featuring intumescent dampers.
- Install Metal Gutter Guards: Invest in high-quality stainless steel micro-mesh gutter guards to permanently keep debris out of your gutters.
- Replace High-Risk Glazing: If you cannot afford to replace all windows, focus on replacing the windows most exposed to potential fire paths (e.g., those facing heavy vegetation or slopes) with double-pane tempered glass.
- Install a Metal Drip Edge: Have a roofing contractor install a metal drip edge along your eaves to protect the roof sheathing and fascia.
Tier 3: Comprehensive Overhaul ($5,000+)
These are long-term capital improvements that should be integrated into your home maintenance schedule or planned during remodeling phases.
- Install a Class A Roof: If your roof is nearing the end of its lifespan, replace it with a Class A standing-seam metal roof or high-quality composition shingles.
- Replace Siding with Non-Combustible Materials: Replace vinyl or wood siding with fiber-cement siding (such as HardiePlank), stucco, brick, or stone. These materials do not ignite and provide excellent radiant heat protection.
- Install Whole-House Tempered Windows: Replace all windows in the home with modern, energy-efficient, double-pane windows featuring tempered exterior glass.
- Redesign Landscaping: Hire a professional to grade your property, install hardscaping (retaining walls, stone patios), and plant a fully designed, fire-resistant landscape.
Empowering Your Preparedness Journey
Wildfire home hardening is not about achieving absolute invulnerability; rather, it is about tilting the odds of survival in your favor. When a wildfire sweeps through a community, emergency resources are stretched thin. Firefighters must make rapid, difficult decisions about which homes are defensible. By taking proactive steps to install ember-resistant venting, secure your roof and gutters, upgrade your windows, and establish clean, defensible space zones, you make your home vastly easier to protect. These practical, science-backed improvements transform your home from a vulnerable target into a resilient structure capable of standing strong against the embers of the wildland-urban interface.
Frequently Asked Questions
What is the single most effective wildfire home hardening upgrade?
Ember-resistant vents. The majority of wildfire home losses occur when embers enter through vents (attic, crawl space, gable) and ignite materials inside. Replacing standard vents with ember-resistant ones (covered with 1/16-inch metal mesh) is the highest-impact structural change you can make and typically costs $200-500 per home.
How do I protect gutters from wildfire?
Metal gutters are far less vulnerable than vinyl gutters (which melt). Install gutter guards that block debris accumulation — dry leaves in gutters ignite easily. If you have open gutters, clean them before fire season and consider solid cover systems like LeafGuard or similar.
What landscaping changes reduce wildfire risk?
Zone 1 (0-30 feet from home): remove all dead vegetation, clear debris, use non-combustible mulch (gravel, stone), keep plants widely spaced and low. Zone 2 (30-100 feet): thin trees so crowns don't touch, remove ladder fuels (shrubs under trees), cut grass short during fire season. This 'defensible space' is required by law in many high-fire-risk states.