Key Takeaways
- Safety First: The spoon method is the safest non-tool option because it eliminates the risk of sudden slips from sharp blades.
- Contamination Risks: Friction-based methods like the rough surface method carry a high risk of introducing metal shavings and environmental debris into your food.
- Puncture Hazards: Knife and screwdriver methods offer fast results but carry a high risk of severe puncture wounds, which are difficult to treat in grid-down scenarios.
- Tool Redundancy: While knowing how to open a can without a can opener is a vital survival skill, maintaining multiple manual can openers in your emergency kits remains the best practice.
The Reality of Emergency Food Access
In a severe crisis, access to shelf-stable calories is one of the most critical factors for survival. While many families diligently build up their pantries, a common point of failure is tool availability. A disaster can displace you from your home, damage your kitchen, or scatter your supplies. If you find yourself with a pantry full of canned goods but no electricity or specialized tools, you must know how to access those calories safely. Understanding how to open a can without a can opener is a fundamental self-reliance skill that can prevent nutritional deprivation when conventional resources are compromised.
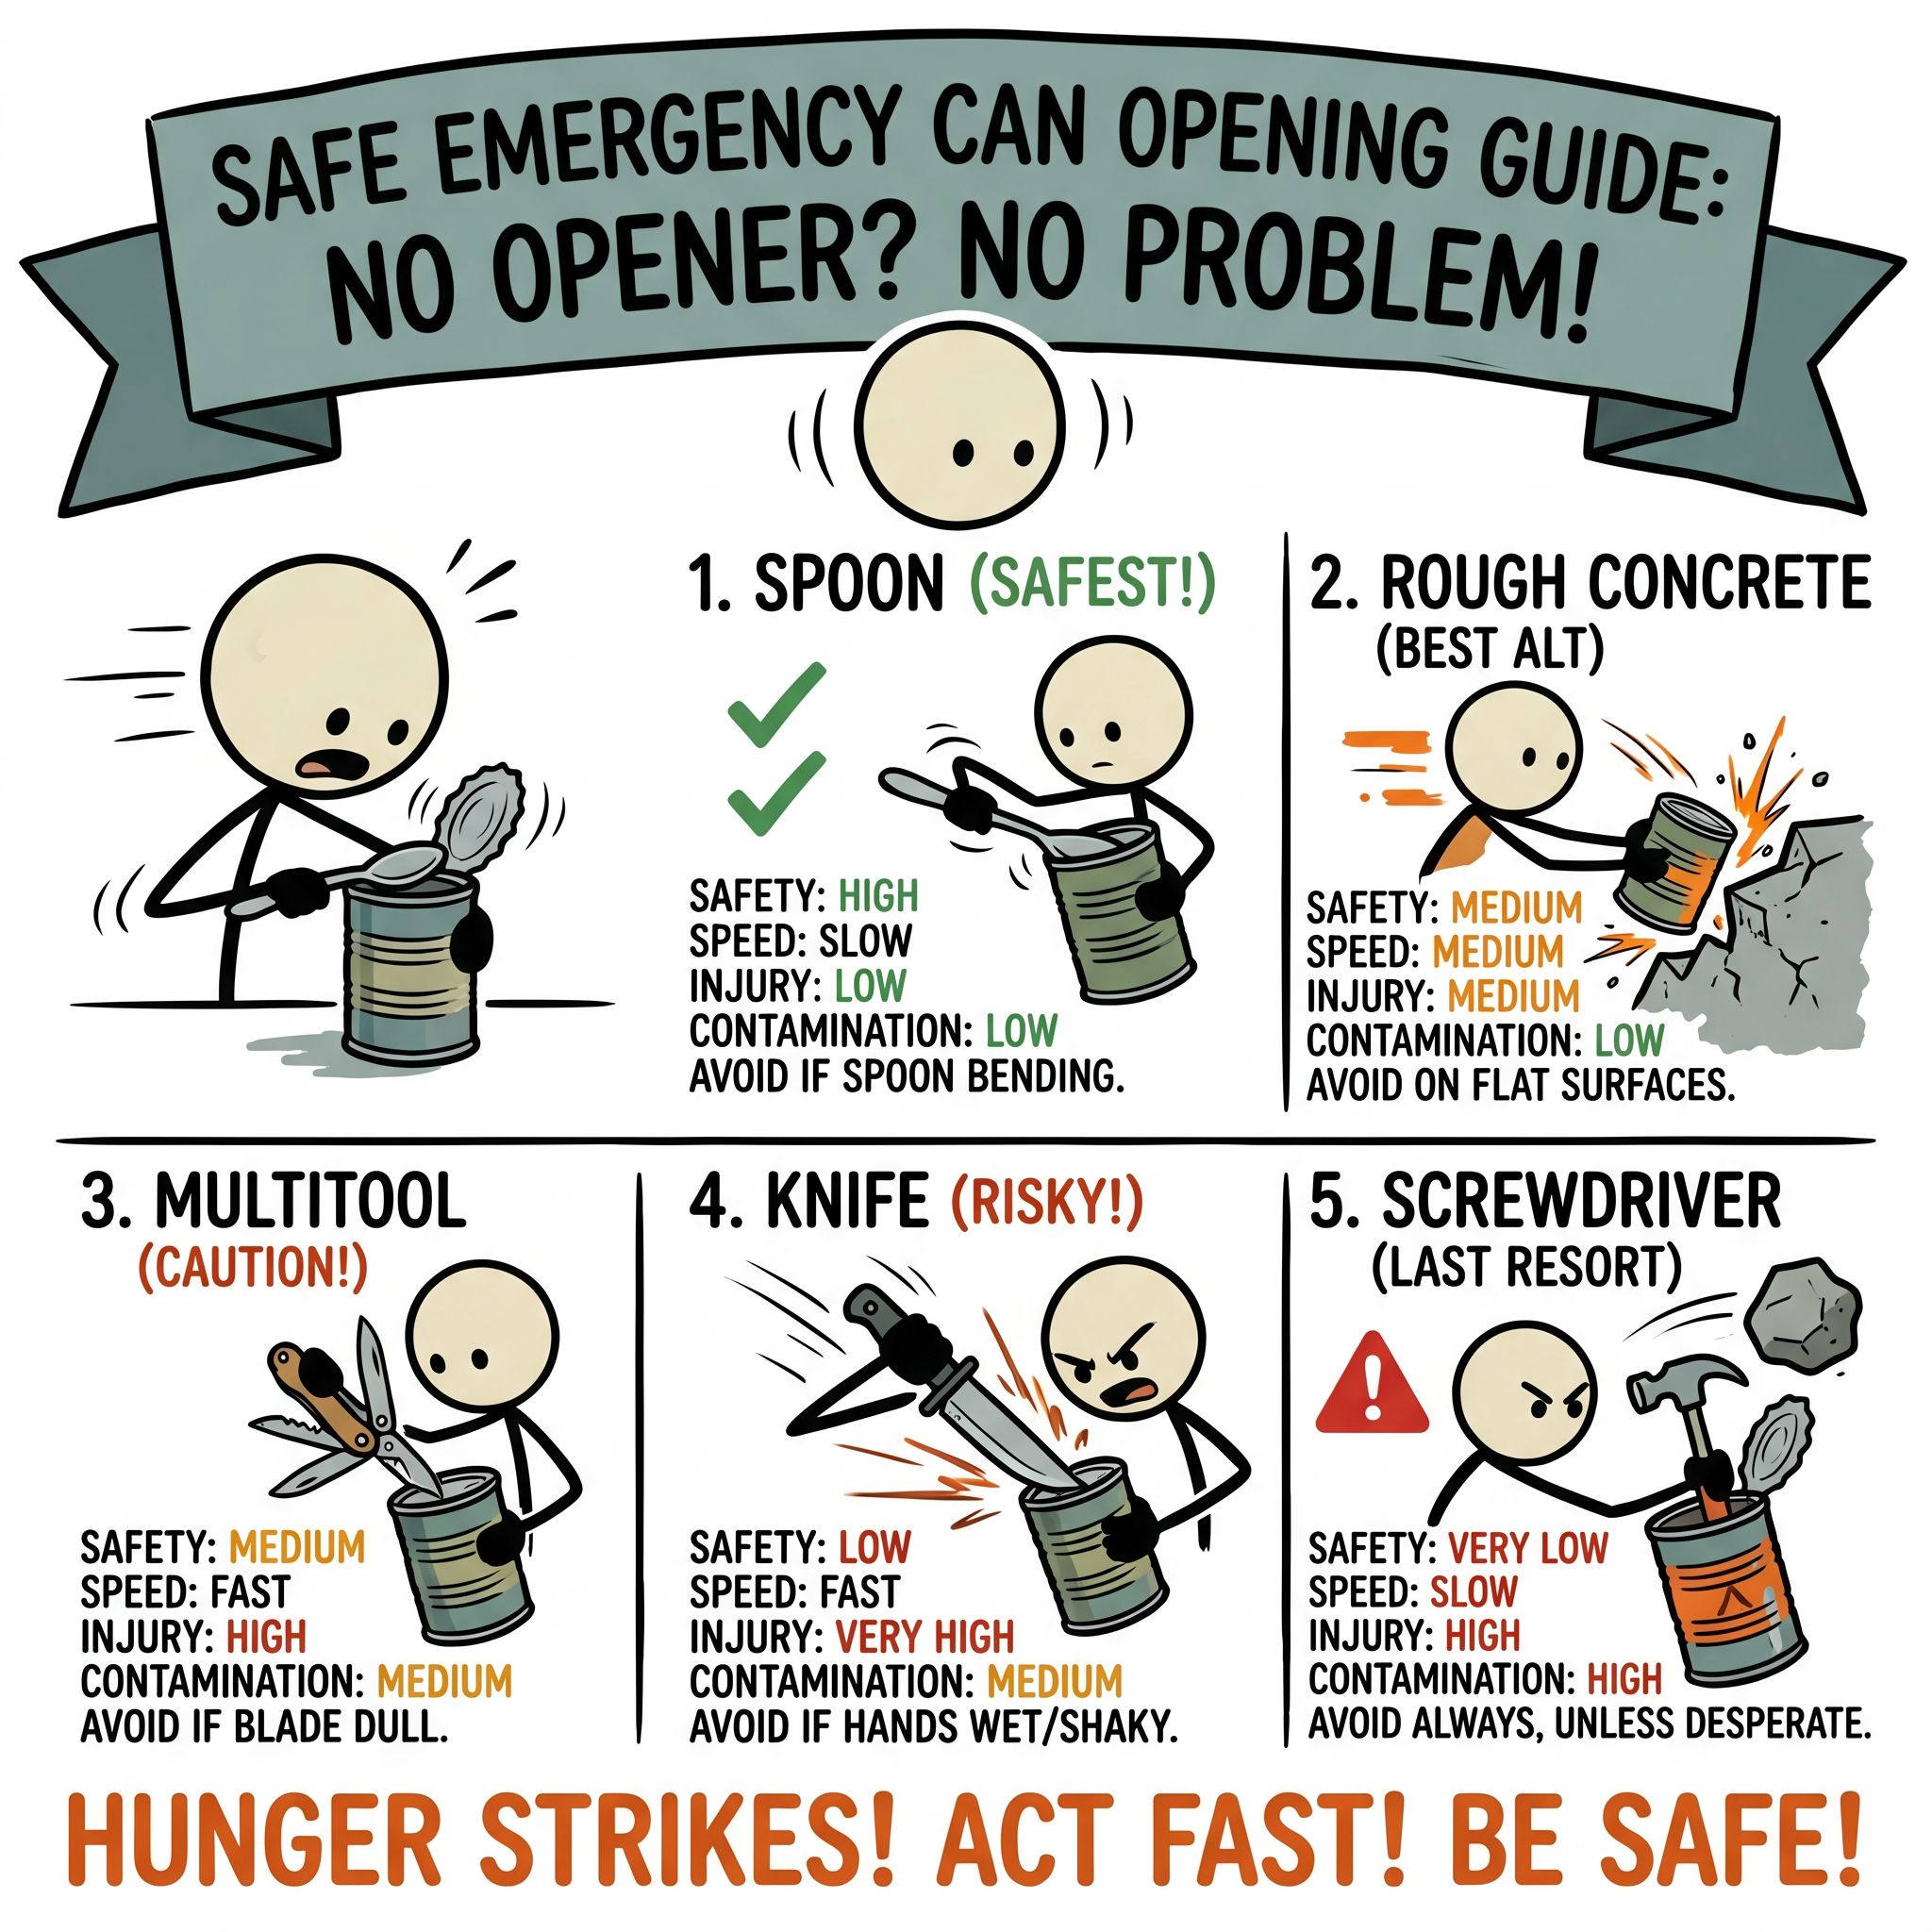
During the critical initial phase of a disaster, which we discuss in detail in our 72-hour rule guide, minimizing physical injury is just as important as securing food. An emergency is the worst possible time to sustain a deep laceration or puncture wound, as emergency medical services may be delayed or unavailable. Therefore, choosing the safest possible method to access your food is a matter of basic survival hygiene. This guide ranks the five most common improvised can-opening methods by safety, speed, injury risk, and food contamination risk, helping you make informed decisions under pressure.
The Anatomy of a Modern Tin Can
To open a can without a dedicated tool, you must understand its structural design. Modern food cans are not solid blocks of metal; they are engineered containers designed to protect food from external pathogens and oxygen. Most cans consist of a cylindrical body and two end pieces. The lid is attached to the body using a double seam, which is a mechanical fold that locks the lid and the body flange together under high pressure.
When you store canned goods as outlined in our emergency emergency food storage guide guide, you are relying on this hermetic seal to keep your food safe for years. To bypass this seal without a standard manual can opener, you have two mechanical choices. You must either pierce the thin metal lid inside the perimeter of the double seam, or you must grind down the outer fold of the double seam itself until the lid separates from the body. Each of the methods below utilizes one of these two mechanical principles.
Improvised Can-Opening Methods Ranked
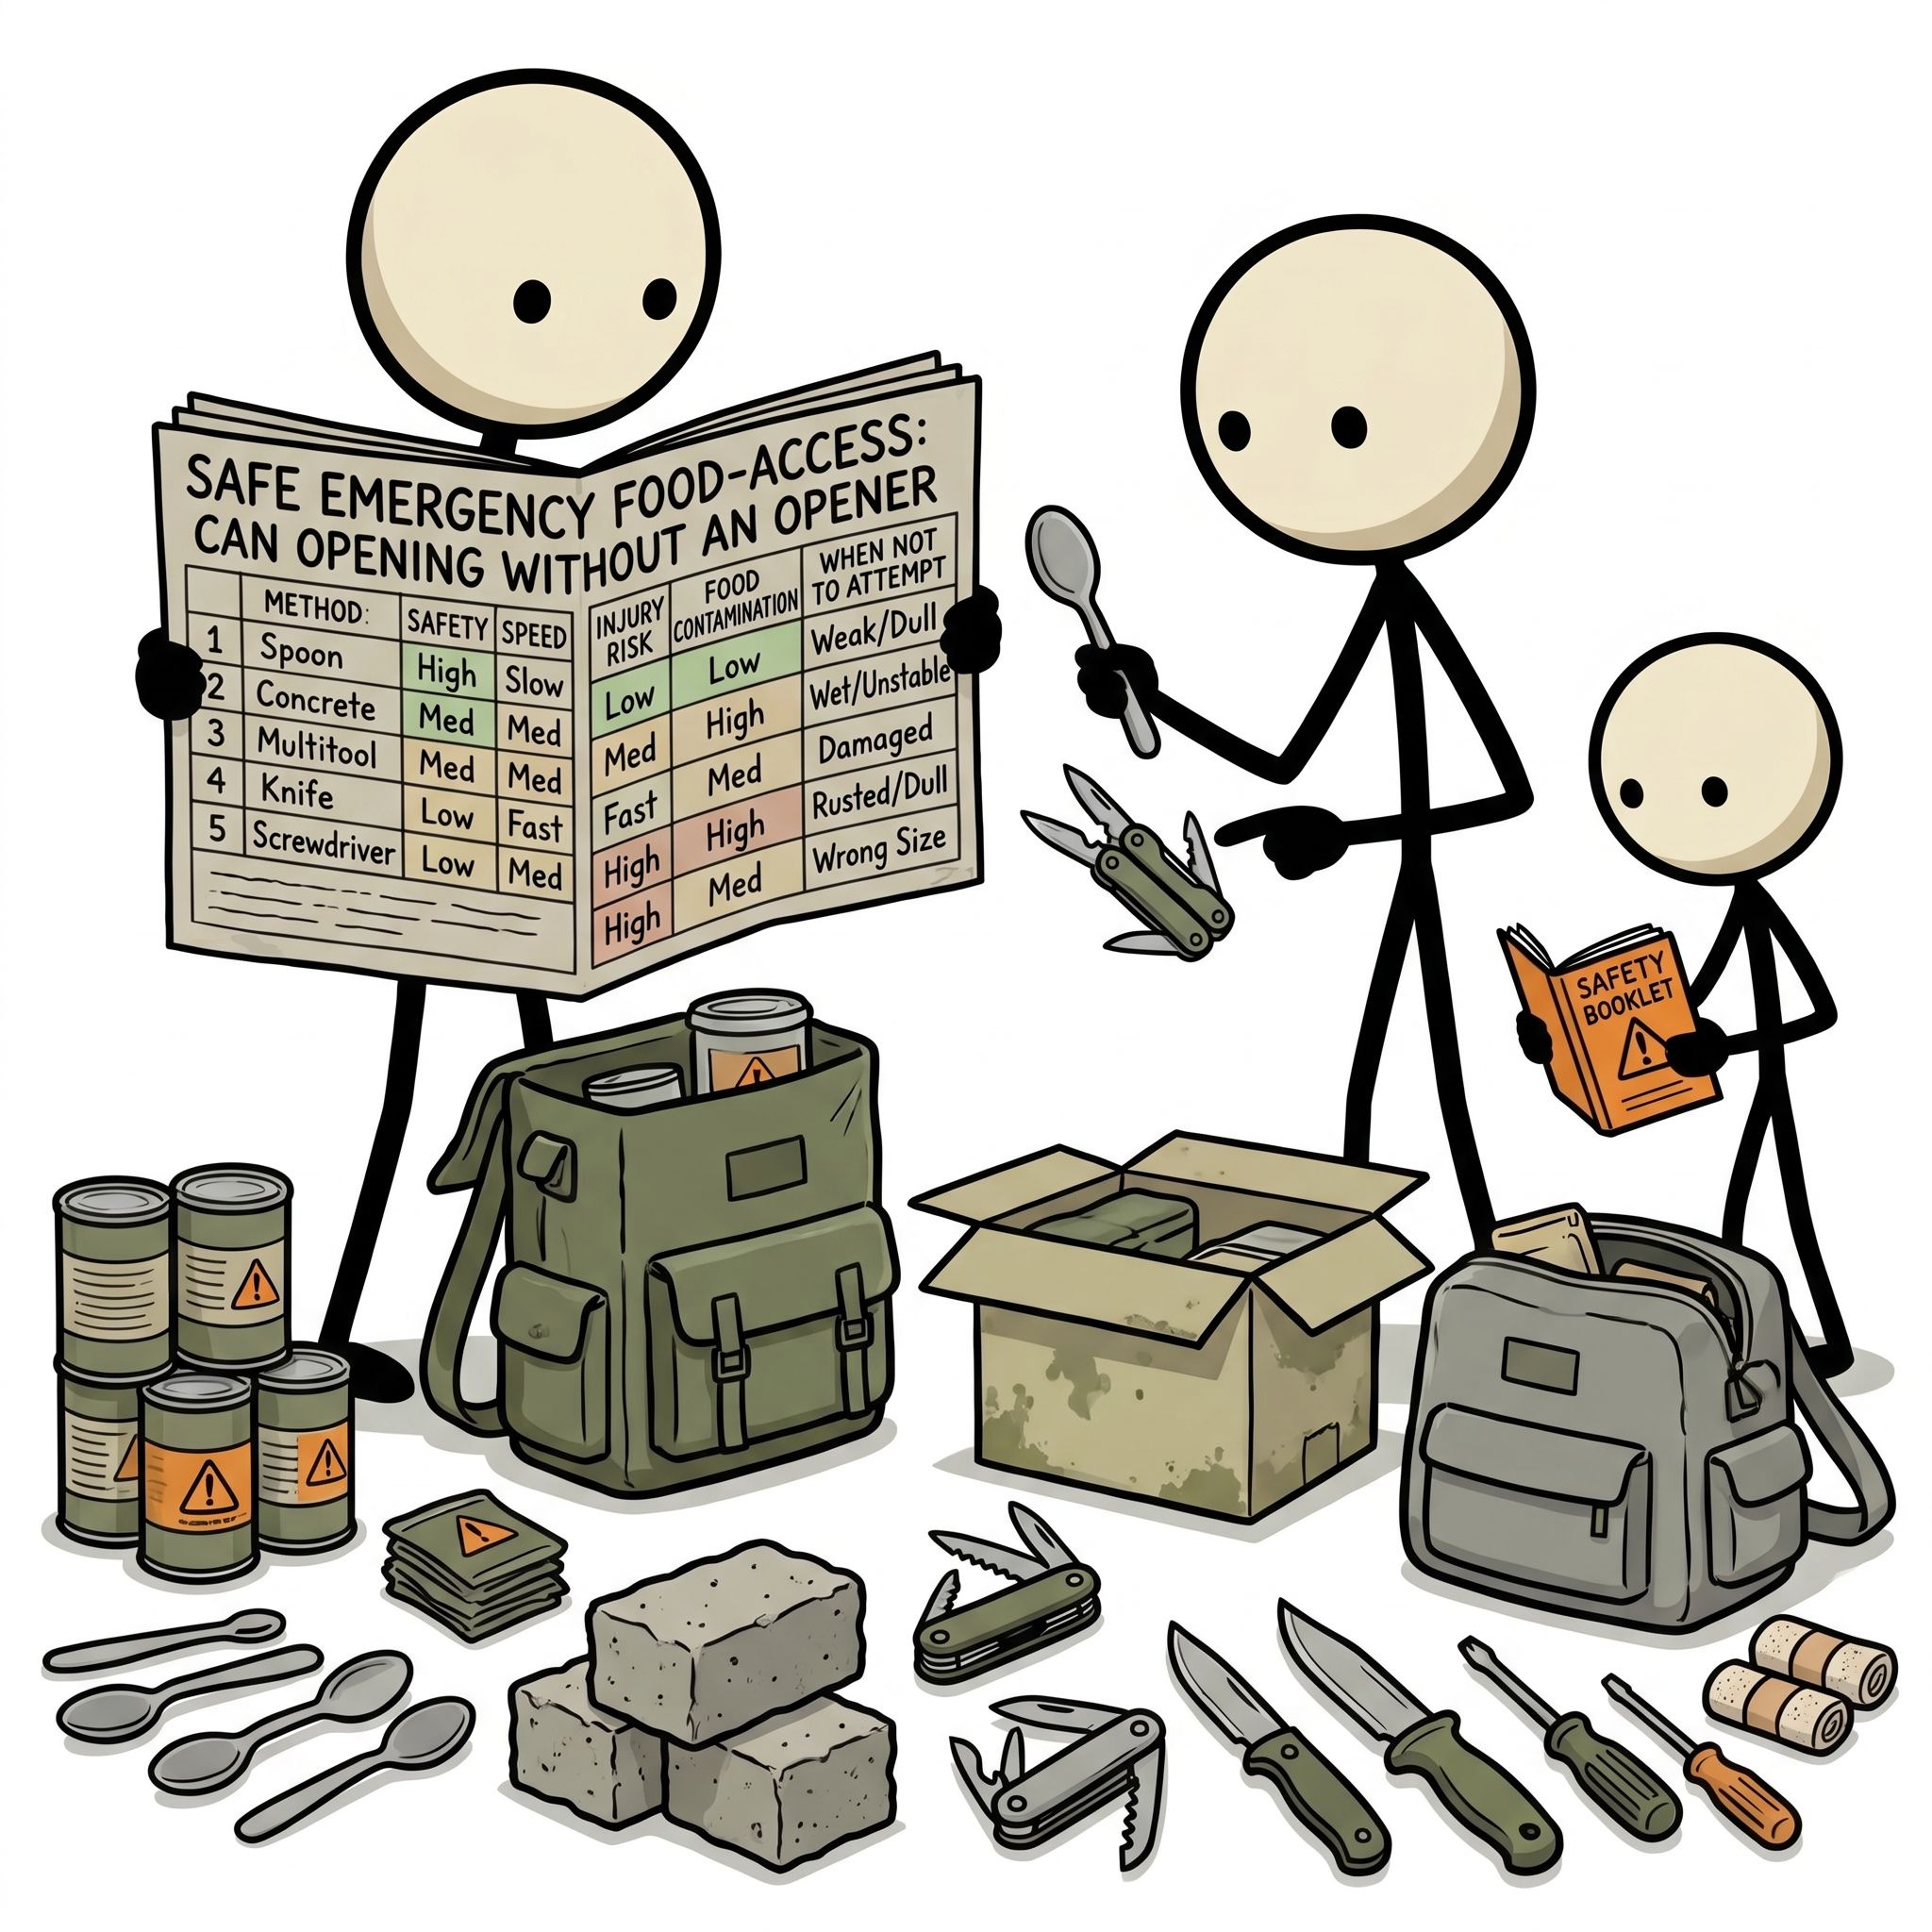
The following table provides a comparative overview of the five primary improvised methods. Each method is evaluated based on its safety profile, execution speed, the risk of physical injury to the operator, and the risk of contaminating the food inside the can.
| Method | Safety Rating | Speed | Injury Risk | Contamination Risk |
|---|---|---|---|---|
| Spoon Method | Excellent | Slow | Very Low | Very Low |
| Multitool (Awl/Can Opener) | Good | Fast | Low | Low |
| Rough Surface Method | Moderate | Moderate | Low | High |
| Screwdriver & Mallet | Poor | Moderate | Moderate | Moderate |
| Knife Method | Dangerous | Fast | Very High | Moderate |
1. The Spoon Method (Ranked: Safest Overall)
The spoon method is the gold standard for opening a can when no sharp tools are available. It relies on concentrated friction to thin and eventually puncture the metal lid. Because a standard metal spoon has no sharp edges, the risk of sustaining a severe cut during this process is incredibly low, making it the safest option for families and untrained individuals.
To execute the spoon method, follow these steps:
- Place the can on a flat, stable surface, such as a sturdy table or the ground. Hold the can firmly with your non-dominant hand.
- Grip the bowl of a sturdy metal spoon in your dominant hand. Your thumb should be pressed firmly into the hollow of the bowl, and your fingers should wrap tightly around the handle to give you maximum control. Only about a half-inch of the tip of the spoon should extend past your grip.
- Position the tip of the spoon on the inner edge of the can lid, right next to the raised outer rim. This is where the metal is thinnest and easiest to penetrate.
- Apply firm downward pressure while rubbing the tip of the spoon back and forth along a small section of the rim (about one inch in length). The friction will quickly wear away the protective coating and begin to groove the metal.
- Continue rubbing until the spoon punctures through the lid. You will feel a distinct pop as the metal gives way.
- Once the initial hole is made, insert the edge of the spoon tip into the opening and work it along the circumference of the lid, using a prying motion to cut through the remaining metal.
The primary drawback of this method is that it requires significant hand strength and patience. It can take several minutes of continuous rubbing to break through the metal, and it may cause mild hand fatigue. However, because it keeps the risk of physical injury and food contamination to an absolute minimum, it is our top-recommended improvised technique.
2. The Multitool Method (Ranked: Best Tool-Based Alternative)
If you have access to a quality pocket multitool, you likely have a highly effective backup option. Most standard multitools include either a dedicated manual can opener attachment or a sharp leather awl. Using these engineered attachments is far safer than using a standard pocket knife because the tool is designed to lock into place and pivot along the rim of the can.
When utilizing a multitool, always ensure that the blade or attachment is fully locked into position before applying pressure. If your tool does not have a locking mechanism, use extreme caution, as the blade can fold back onto your fingers during use. Work slowly, positioning the cutting edge along the inside of the rim and using a gentle rocking motion to cut through the lid. This method is highly efficient and keeps the risk of metal shavings falling into your food relatively low.
3. The Rough Surface Method (Ranked: Best for Tool-Free Scenarios)
The rough surface method, also known as the concrete friction method, is an effective way to open a can when you have absolutely no hand tools available. It relies on wearing down the raised double seam that holds the lid to the can body. By grinding this seam against a rough, abrasive surface, you can break the mechanical seal and pop the lid off entirely.
To execute the rough surface method, follow these steps:
- Locate a flat, highly abrasive surface. Rough concrete, a flat asphalt slab, or a large, coarse rock will work best. Avoid smooth stones, as they will not provide enough friction.
- Place the can upside down on the abrasive surface. The top lid should be in direct contact with the concrete.
- Apply firm, even downward pressure on the bottom of the can with the palm of your hand.
- Rub the can back and forth or in a circular motion against the rough surface. Keep your movements controlled to prevent the can from slipping or tipping over.
- Stop and inspect the can frequently. You are looking for the first signs of moisture or a broken seal along the outer rim. Do not grind too far, as you do not want to sand completely through the lid and spill the contents onto the ground.
- Once you see moisture leaking or notice that the outer seam has been worn flat, place the can upright. Squeeze the sides of the can firmly. The pressure should cause the lid to pop loose, allowing you to pry it open with a stick, a key, or your fingers.
While this method requires no tools, it carries a high risk of food contamination. As you grind the metal against concrete, fine metal filings, concrete dust, and dirt will accumulate around the seal. When the seal breaks, these contaminants can easily migrate into the food. Always wipe the rim of the can thoroughly before popping the lid to minimize this risk.
4. The Screwdriver and Mallet Method (Ranked: Moderate Risk)
This method mimics the action of an industrial punch. It uses a flathead screwdriver and a blunt striking tool, such as a hammer, mallet, or even a heavy piece of wood, to pierce holes along the perimeter of the lid. While it is faster than the spoon method, it requires two distinct tools and carries a moderate risk of injury if the screwdriver slips during a strike.
To perform this method, place the flathead screwdriver vertically against the inner edge of the can lid. Hold the screwdriver handle firmly with your non-dominant hand, keeping your fingers clear of the top of the handle. Lightly tap the top of the screwdriver with your mallet until the flat head punctures the metal. Relocate the screwdriver a half-inch down the rim and repeat the process. Once you have created a series of punctures around the majority of the lid, you can use the flathead screwdriver as a lever to pry the lid upward. Be mindful of the sharp, jagged teeth created by the punctures, as they can easily cut your hands or contaminate the food with small metal flakes.
5. The Knife Method (Ranked: Most Dangerous / Last Resort)
The knife method is frequently depicted in popular survival media, but it is highly dangerous and should only be attempted as an absolute last resort when survival depends on immediate caloric intake and no other options exist. The risk of a knife slipping off the curved, slick surface of a tin can and slicing into your hand or arm is exceptionally high.
If you must use the knife method, follow these strict safety protocols:
- Never use a folding pocket knife unless it has a robust, heavy-duty locking mechanism. A non-locking blade can easily fold backward under pressure, severing your fingers. A sturdy, fixed-blade knife is much safer.
- Place the can on a flat, non-slip surface. Do not hold the can in your lap or try to open it while holding it in the air.
- Position the heel of the knife blade (the part closest to the handle) on the inner edge of the can lid. Do not use the delicate tip of the knife, as the downward force can easily snap the tip off, sending sharp metal fragments flying.
- Grip the handle securely. Using your other hand, gently tap the butt of the knife handle to drive the blade through the lid.
- Once the blade punctures the metal, carefully rock the knife forward and backward to slice through the lid. Work your way slowly around the perimeter, keeping your hands and body completely out of the path of the blade in case it slips.
The risk of severe lacerations, severed tendons, and tool damage makes this method highly unfavorable. Additionally, the slicing action of a high-carbon or stainless-steel blade against tin can metal can dull or chip your knife, ruining a vital survival tool that you may need for other tasks.
Mitigating Food Contamination Risks
When you open a can using improvised tools, you are bypassing the clean, controlled environment of a kitchen. The risk of food contamination is a serious concern that is often overlooked in survival training. Consuming metal shavings, rust, dirt, or concrete dust can lead to gastrointestinal distress, internal micro-lacerations, or bacterial infections, which can rapidly degrade your physical condition in an emergency.
To minimize these risks, always clean the exterior of the can before you begin. Wipe away any dirt, rust, or moisture from the lid. If you are using the rough surface method, keep a clean rag or paper towel nearby to wipe away the slurry of metal filings and concrete dust that forms during grinding. Once the can is open, inspect the food carefully under good lighting. If you see visible metal fragments or debris, carefully spoon out the contaminated sections before consuming the rest of the food.
Furthermore, consider the state of the food itself. If you are forced to use improvised methods, you must still verify that the food inside is safe. Never attempt to open or consume food from cans that are swollen, severely bulged, deeply rusted along the seams, or spraying pressurized liquid upon puncture. These are clear indicators of bacterial activity, including the potentially fatal botulinum toxin, which cannot be made safe by boiling. If you suspect a can is compromised, discard it immediately and refer to your no-cook emergency food plan for safer alternative options.
Wound Management and Emergency First Aid
Because opening cans without proper tools carries an inherent risk of injury, you must be prepared to manage cuts and puncture wounds immediately. A deep cut from a rusty can lid or a slipped knife blade can easily become infected, especially in a grid-down scenario where clean water and sterile medical supplies are limited.
If an injury occurs, immediately stop what you are doing and apply direct pressure to the wound with a clean cloth to stop the bleeding. Once the bleeding is controlled, flush the wound thoroughly with clean, potable water. Do not use dirty water, as this will introduce bacteria deep into the tissue. Clean the skin around the wound with soap and water, apply an antiseptic ointment if available, and cover it with a sterile bandage. Watch the wound closely over the following days for signs of infection, such as increased redness, swelling, warmth, or throbbing pain. If you have a deep puncture wound, a tetanus booster may be necessary as soon as medical services are accessible.
Proactive Preparedness: Building Redundancy
While mastering these manual bypass skills is excellent for self-reliance, the best family emergency plan relies on redundant preparation rather than improvised execution. Relying on improvisations should always be your backup plan, not your primary strategy. You can easily avoid the dangers of these methods by integrating low-cost, highly durable tools into all of your emergency gear.
When building out your supplies on a budget, as discussed in our prepping on a budget guide, manual can openers are some of the most cost-effective lifesavers you can buy. A military-style P-38 or P-51 can opener is incredibly small, virtually indestructible, and costs very little. These tiny metal tools use a simple folding blade to safely and quickly walk around the rim of a can, requiring minimal effort and posing almost zero risk of injury.
Every emergency kit should have multiple layers of redundancy. We recommend placing a standard rotary manual can opener in your home emergency pantry, and packing at least two P-38 or P-51 openers in your mobile kits. As detailed in our Go-Bag Builder checklist, these compact openers take up virtually no space and add negligible weight to your pack, ensuring that you will never have to resort to high-risk methods like the knife or screwdriver techniques unless every other system has failed.
Summary of Best Practices
If you find yourself in a situation where you must open a can without a proper tool, prioritize your safety by choosing the method that matches your available resources and physical capabilities. Always start with the safest option first:
- Check for a pull-tab: It sounds obvious, but always double-check the can for a built-in pull-tab before attempting any alternative methods.
- Use a spoon if available: If you have no tools but have access to utensils, the spoon method is your safest path to the food, despite the physical effort required.
- Use a locking multitool next: If you have a multitool with a dedicated can opener or awl, use it slowly and carefully, ensuring the blade is locked.
- Resort to friction only when toolless: Use the rough surface method if you have no tools at all, but be extremely diligent about wiping away metal shavings and concrete dust before eating.
- Avoid knives and screwdrivers: Only use knives or screwdrivers if you are facing an immediate survival situation and have no other means of accessing food. Work slowly, keep your hands clear of the blade path, and never use a non-locking folder.
By understanding the mechanics of container construction and prioritizing safety and sanitation, you can confidently navigate food-access challenges during any emergency, keeping your family nourished and injury-free.
Frequently Asked Questions
What is the safest way to open a can without a can opener?
The spoon method is usually the safest improvised option because it avoids stabbing motions, but it is slow and still creates sharp metal edges.
Should I use a chef knife to open a can?
Only as a last resort. Knife methods are faster but carry a much higher puncture and slip risk, especially under stress or in low light.
Can concrete open a can?
A rough concrete surface can wear down the sealed rim until the lid loosens, but the outside of the can must be cleaned first to reduce contamination.
What should I store instead of relying on hacks?
Store two manual can openers: one in the kitchen and one taped or packed with emergency food. Choose sturdy openers with large handles.
Are pull-tab cans enough for preparedness?
Pull-tabs help, but they can fail. Keep a backup opener and practice using it before relying on canned food in a blackout or evacuation.