⚡ Key Facts
- Unmatched Caloric Density: Traditional pemmican provides up to 3,500 calories per pound, making it the most weight-efficient, energy-dense survival food known to history. For the practical checklist side, use the community emergency preparedness guide.
- Decade-Long Shelf Life: When prepared correctly using rendered saturated fats (tallow) and completely dehydrated lean meat, pemmican can last for 15 to 50 years without artificial preservatives or refrigeration. For the practical checklist side, use the neighborhood preparedness network.
- Historically Proven: Originally developed by Indigenous North Americans, pemmican sustained the fur trade of the 18th and 19th centuries and powered legendary polar expeditions led by Amundsen and Peary.
- Perfect Nutritional Balance: Unlike modern high-carb survival bars, pemmican delivers a clean, ketogenic fuel source consisting of roughly 50% fat and 50% protein by weight, preventing insulin spikes and sustaining physical endurance.
- Aligns with Federal Guidelines: While FEMA and the Red Cross recommend maintaining a minimum 3-day supply of non-perishable food, homemade pemmican serves as a superior, nutrient-dense alternative to commercial freeze-dried meals for long-term emergency stockpiles.
Imagine a scenario where the power grid fails permanently, supply chains collapse, and your survival depends entirely on the food you have stockpiled. In a prolonged disaster, commercial freeze-dried meals and canned goods will eventually run out or expire. To truly secure your family's nutritional independence, you must look to the past. For centuries, Indigenous peoples of North America and early wilderness explorers relied on a legendary, hyper-dense survival ration that requires no refrigeration, no cooking, and can withstand decades of storage: pemmican. By mastering the art of making this ancient superfood, you gain access to an emergency ration that delivers maximum caloric density with an unparalleled survival food shelf life.
The Rich History of Pemmican: The Original Wilderness Fuel
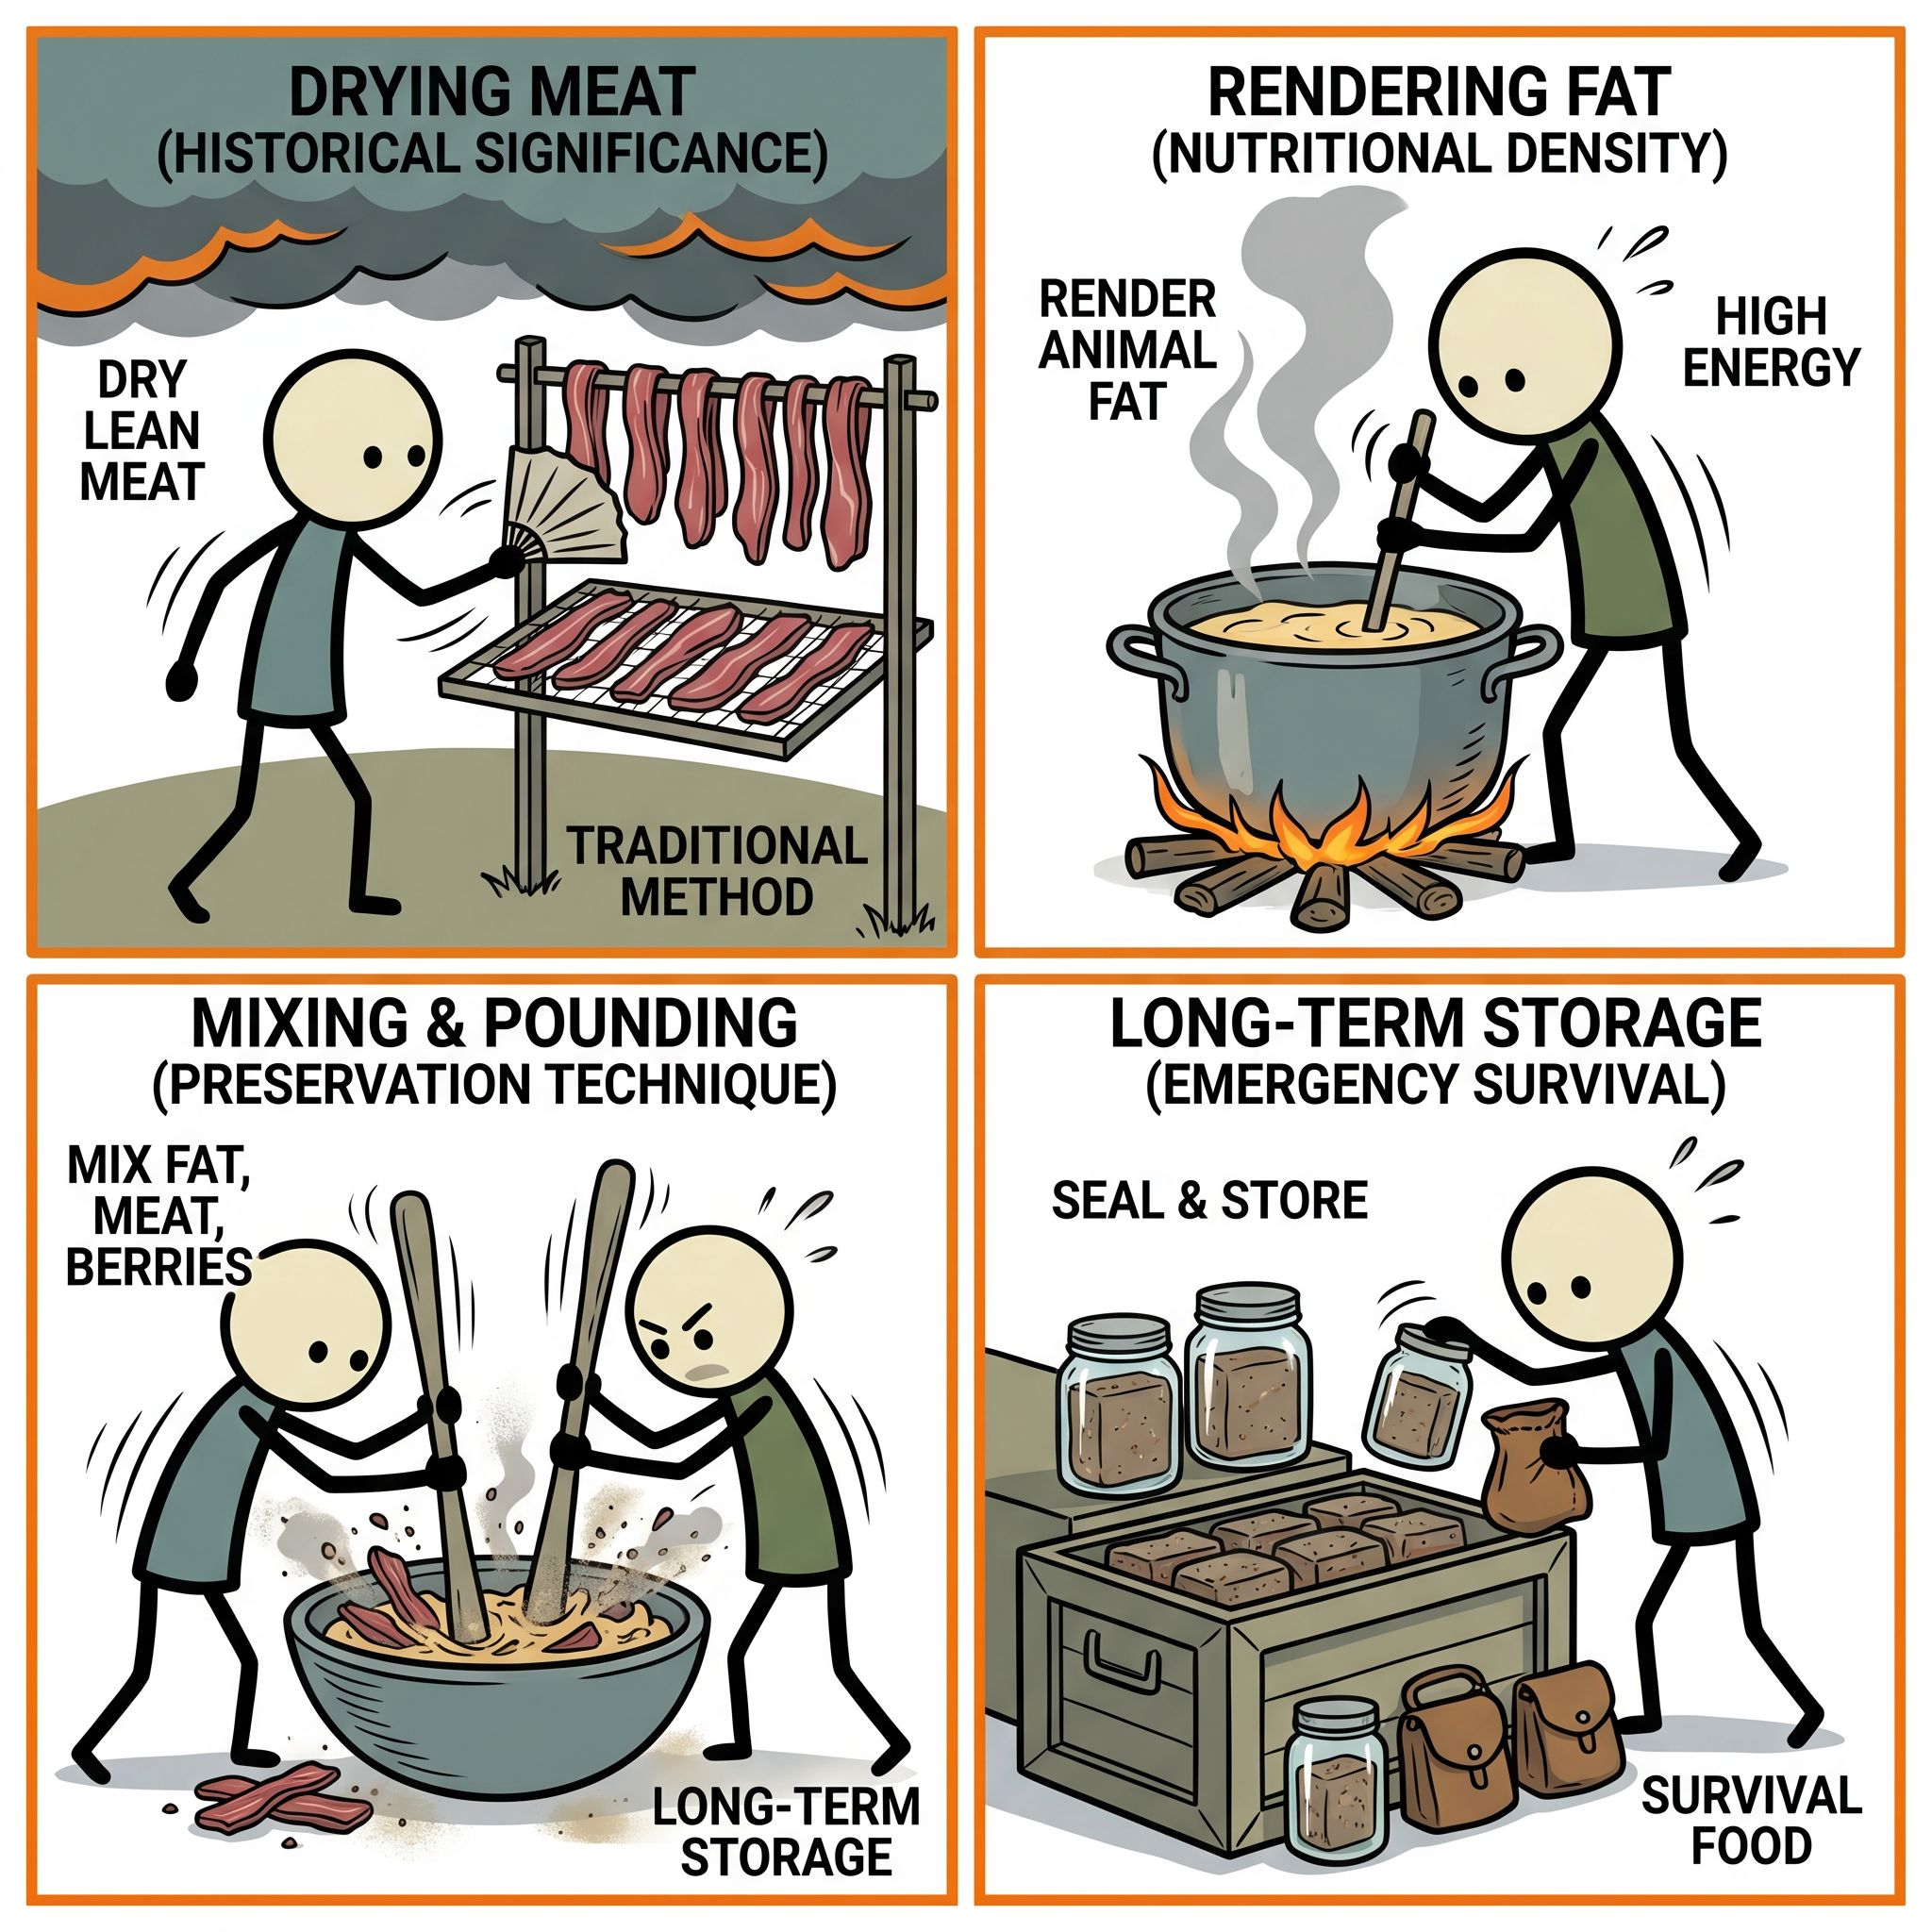
The word "pemmican" is derived from the Cree word pimîhkân, which itself comes from pimî, meaning "fat" or "grease." Developed by the Indigenous peoples of the Great Plains—including the Cree, Ojibwe, Blackfoot, and Lakota—pemmican was a technological marvel of food preservation. It allowed tribes to preserve the massive bounty of seasonal bison hunts for use during lean winter months and long journeys. The traditional method involved drying lean bison meat over smokey fires, pounding it into a fine powder with rocks, and mixing it with melted tallow (rendered fat) in a one-to-one ratio by weight.
By the late 18th century, pemmican had become the literal fuel of the North American fur trade. The North West Company and the Hudson’s Bay Company purchased metric tons of pemmican from Métis and Indigenous hunters to sustain their voyageurs. These men paddled canoes for 12 to 15 hours a day, carrying heavy packs across portages. Without the massive caloric payload of pemmican, the exploration and mapping of the Canadian and American frontiers would have been physically impossible. In fact, pemmican was so vital to the geopolitical economy of the era that it sparked the "Pemmican War" of 1814, a violent conflict over emergency food storage guide lines in the Red River Colony.
During the golden age of polar exploration, legendary explorers like Roald Amundsen, Robert Falcon Scott, and Ernest Shackleton relied heavily on pemmican. Amundsen, the first man to reach the South Pole, attributed much of his success to his carefully calculated rations, which featured pemmican as the primary source of energy for both his men and his sled dogs. In an environment where every ounce of weight mattered and temperatures dropped below -50°F, pemmican provided the dense, life-saving fats required to prevent hypothermia and starvation.
The Nutritional Science of Pemmican
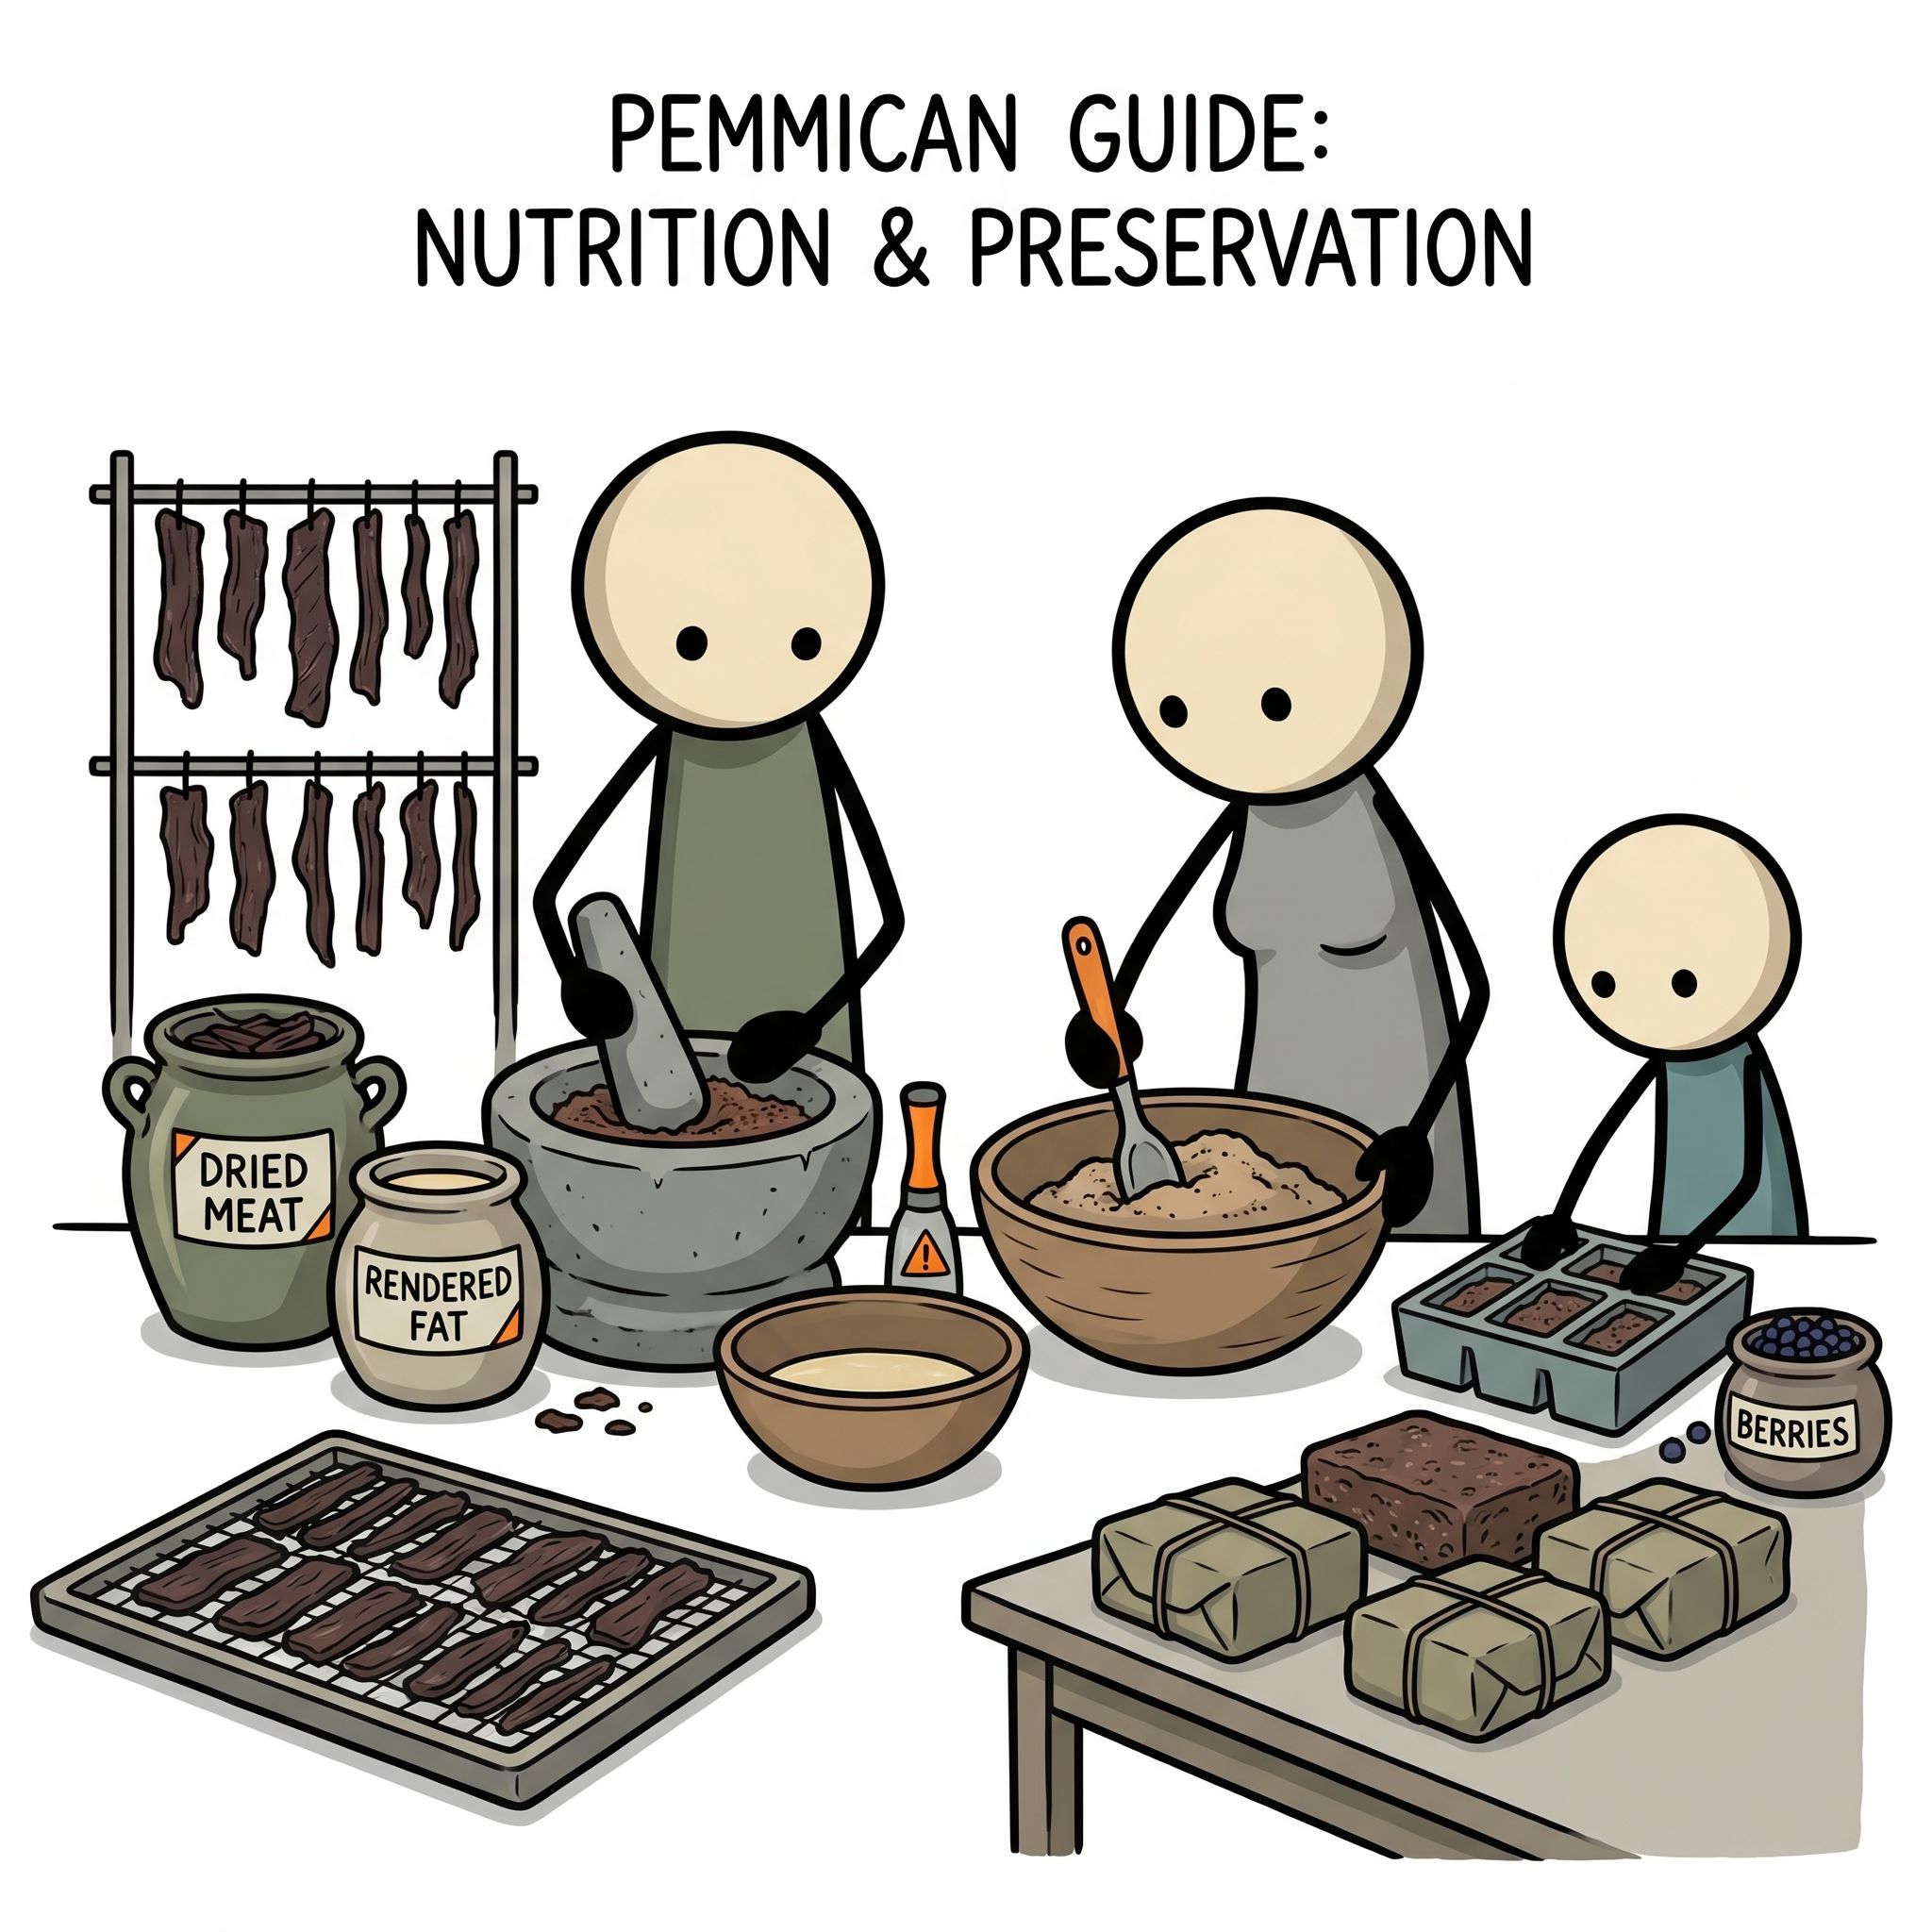
To understand why you should learn how to make pemmican for your modern emergency pantry, you must understand its nutritional profile. Most modern survival foods, such as MREs, emergency food bars, and freeze-dried meals, are heavily reliant on carbohydrates. While carbohydrates provide quick energy, they cause rapid spikes and crashes in blood glucose, leading to fatigue, mental fog, and increased hunger. In a high-stress survival situation, you need sustained, long-burning fuel.
Pemmican is a pure ketogenic food. By weight, traditional pemmican is roughly 50% dried lean protein and 50% rendered fat. However, because fat contains 9 calories per gram while protein contains only 4, approximately 70% to 80% of the calories in pemmican come from fat. This macronutrient split is ideal for human survival. When the body adapts to burning fats for fuel (ketosis), it gains access to a stable, highly efficient energy source that protects muscle mass and enhances cognitive clarity.
| Nutritional Metric | Traditional Pemmican (per 100g) | Standard Commercial MRE (per 100g) | Standard Freeze-Dried Meal (per 100g) |
|---|---|---|---|
| Caloric Density | ~550 - 680 kcal | ~130 - 150 kcal | ~380 - 420 kcal |
| Fat Content | ~40g - 50g | ~5g - 8g | ~8g - 12g |
| Protein Content | ~40g - 45g | ~6g - 8g | ~12g - 15g |
| Carbohydrates | ~0g - 5g (if berries added) | ~15g - 20g | ~55g - 65g |
| Average Shelf Life | 15 to 50 years (cool/dry) | 3 to 5 years (at 70°F) | 25 to 30 years (sealed) |
In addition to macronutrients, traditional pemmican is packed with essential micronutrients. Beef or bison tallow is rich in fat-soluble vitamins A, D, E, and K, as well as conjugated linoleic acid (CLA), which has potent anti-inflammatory properties. The dehydrated lean meat retains its iron, zinc, selenium, and B-complex vitamins (especially B12). Unlike modern processed foods, pemmican provides these nutrients in their most bioavailable, natural forms, ensuring your body can absorb them during times of physical duress.
The Science of Preservation: Why Pemmican Doesn't Spoil
The secret to pemmican’s legendary survival food shelf life lies in basic food chemistry, specifically the concepts of water activity ($a_w$) and lipid oxidation. Understanding these scientific principles is crucial for anyone attempting a diy pemmican project, as improper preparation can lead to spoilage and foodborne illness.
Water Activity ($a_w$) and Pathogen Prevention
According to the Centers for Disease Control and Prevention (CDC) and the United States Department of Agriculture (USDA), bacteria, mold, and yeast require moisture to reproduce. Water activity ($a_w$) measures the vapor pressure of water in a food substance compared to pure water. Most pathogenic bacteria, such as Clostridium botulinum and Salmonella, cannot grow in environments with a water activity level below 0.85. Mold and yeast are halted at levels below 0.60.
When you make traditional pemmican, you dehydrate the lean meat until it is completely brittle. This process reduces the water activity of the meat to well below 0.50. Without moisture, microbial life cannot survive or replicate. This is why you must never use standard beef jerky to make pemmican; commercial jerky is intentionally left pliable and moist (often containing 15% to 20% water), which will cause your pemmican to rot from the inside out.
The Protective Role of Rendered Saturated Fat
The second layer of preservation is the rendered fat, specifically tallow. When lean meat powder is mixed with hot, liquid tallow, the fat coats every single microscopic fiber of the dry meat. This creates an airtight, hydrophobic barrier. Because oxygen cannot penetrate the fat barrier to reach the meat, aerobic bacteria and molds are completely locked out.
Furthermore, the type of fat used is of paramount importance. Saturated fats, such as beef suet or bison suet, are highly stable at room temperature because their carbon chains are fully saturated with hydrogen atoms. This molecular structure makes them highly resistant to rancidity caused by lipid oxidation (exposure to oxygen, light, and heat). Unsaturated fats, such as vegetable oils, pork lard, or poultry fat, contain double bonds that easily break down when exposed to air, turning rancid within months. Therefore, utilizing pure, rendered beef or bison suet is non-negotiable for long term food storage.
The Step-by-Step DIY Pemmican Recipe
To ensure your emergency food supply is safe, nutritious, and shelf-stable, you must follow a precise, hygienic protocol. This traditional pemmican recipe is designed to yield a highly stable product using modern kitchen equipment while respecting historical techniques.
Required Ingredients and Equipment
Before beginning, gather the following high-quality ingredients and tools. Do not substitute ingredients if you want to achieve a multi-decade shelf life.
- Lean Meat: 4 to 5 pounds of ultra-lean beef (such as eye of round, London broil, or top round) or game meat (bison, venison, or elk). Ensure there is absolutely no marbled fat within the meat.
- Beef Suet: 2 to 3 pounds of raw beef suet (the hard, crumbly fat found around the kidneys of cattle). Do not use standard trimmings or steak fat, as they contain too much moisture and unsaturated fats.
- Dehydrator or Oven: A food dehydrator capable of holding 150°F to 160°F, or a conventional oven with a low-temperature setting.
- Food Processor or Meat Grinder: To pulverize the dried meat into a fine powder.
- Heavy Saucepan or Dutch Oven: For rendering the suet.
- Fine Mesh Strainer and Cheesecloth: To filter impurities out of the rendered fat.
- Optional Additions: 1 cup of completely dehydrated, unsweetened berries (such as blueberries, saskatoon berries, or cranberries). Note: Berries must be bone-dry, not chewy, to prevent introducing moisture.
Step 1: Selecting and Slicing the Meat
Start by trimming every trace of visible surface fat, silver skin, and connective tissue from your meat. Any fat left on the meat during the drying phase is unrendered "wet" fat, which contains water and will turn rancid, ruining your long term food storage efforts. Once trimmed, slice the meat as thinly as possible—ideally between 1/8 and 1/16 of an inch. Slicing is easiest if you partially freeze the meat for 30 to 45 minutes beforehand.
Step 2: Dehydrating the Meat to Brittleness
Lay the meat slices flat on your dehydrator trays. If using an oven, place the slices on wire racks set inside baking sheets. To comply with USDA food safety guidelines for jerky, heat the meat to an internal temperature of 160°F to kill any pre-existing pathogens. Dehydrate the meat at 150°F to 160°F for 12 to 18 hours.
The meat is ready only when it is completely brittle. If you bend a slice and it bends or stretches, it is not dry enough. It must snap cleanly like a dry twig or a potato chip. If there is any pliability, return it to the dehydrator. Once dry, let the meat cool completely to room temperature in a dry environment.
Step 3: Pulverizing the dried meat
Break the brittle meat strips into smaller pieces and place them into your food processor or high-powered blender. Pulse and grind the meat until it is reduced to a fluffy, fibrous powder. Historically, this was done by pounding the meat with rocks on a bison hide. Your goal is a texture resembling coarse flour or shredded lint. If you have large, hard chunks of meat left over, sift them out and regrind them. If you are adding dried berries, grind them into a powder separately and mix them thoroughly with the meat powder at this stage.
Step 4: Rendering the Suet into Tallow
Rendering is the process of melting raw fat to separate the pure lipids from water and cellular membranes. Chop the raw beef suet into tiny cubes, or run it through a coarse meat grinder. Place the chopped fat into a heavy saucepan or Dutch oven over very low heat (between 225°F and 250°F). Do not rush this process; high heat will scorch the fat, ruining its flavor and chemical stability.
As the fat melts, it will bubble gently. This bubbling is the water evaporating out of the fat. Allow the mixture to simmer slowly for several hours until the bubbling completely stops and the remaining connective tissues turn crispy and golden brown (these are called "cracklings"). Once the bubbling stops, you have successfully driven off all moisture.
Turn off the heat and let the liquid fat cool slightly. Line a fine-mesh strainer with several layers of cheesecloth and place it over a clean, dry, heat-safe bowl. Pour the melted fat through the strainer to filter out all solid particles. The resulting liquid should be a clear, golden amber color. This is pure, rendered tallow.
Step 5: Mixing and Proportioning
To achieve the perfect structural and nutritional balance, you must weigh your ingredients. The golden ratio of traditional pemmican is 1:1 by weight—one part dried meat powder to one part liquid tallow. For example, if you have 8 ounces of meat powder, you will need exactly 8 ounces of liquid tallow.
Place your meat powder in a large mixing bowl. Slowly pour the warm liquid tallow (which should be warm but not scalding hot) over the powder. Use a heavy spoon or your hands (wearing clean, heat-resistant gloves) to thoroughly fold the mixture together. The dry meat powder will rapidly absorb the liquid fat. The final consistency should resemble wet sand or cookie dough. If the mixture is too dry and crumbly, add a small amount of warm tallow. If it is swimming in liquid fat, add a bit more meat powder.
Step 6: Setting and Portioning
While the mixture is still warm and malleable, press it firmly into molds. You can use silicone baking molds, a glass baking dish lined with parchment paper, or even heavy-duty Ziploc bags. Press the mixture down firmly to eliminate any trapped air pockets, as air pockets can harbor oxygen and lead to localized oxidation.
Let the pemmican cool and solidify at room temperature. Once hardened, it will be firm to the touch, resembling a dense, greasy block of chocolate. Cut the pemmican into convenient, single-serving bars or squares (approximately 2 to 4 ounces each) using a sharp knife.
Long-Term Preservation and Storage Techniques
While pemmican is inherently resistant to spoilage, your storage methodology dictates its ultimate shelf life. To achieve a survival food shelf life of 20+ years, you must protect the fat from its three primary enemies: oxygen, light, and fluctuating temperatures.
Packaging for the Decades
For short-term use (up to one year), wrapping pemmican bars in wax paper and storing them in a cool, dark pantry is sufficient. However, for long term food storage, you must employ advanced packaging techniques:
- Vacuum Sealing: Place individual pemmican bars into heavy-duty vacuum-seal bags. Vacuum sealing removes the ambient oxygen, drastically reducing the rate of lipid oxidation. Ensure the bars are fully cooled and solid before sealing so the vacuum pressure does not squeeze the fat out of the bags.
- Mylar Bags with Oxygen Absorbers: This is the gold standard of emergency food preservation. Place your vacuum-sealed pemmican bars inside a multi-layer Mylar bag. Add a food-grade oxygen absorber (sized appropriately for the bag volume) to eliminate any residual oxygen that might permeate the plastic over time. Seal the Mylar bag using a hot iron.
- Glass Mason Jars: Alternatively, you can pack pemmican tightly into clean, sterilized glass canning jars. Use a vacuum jar-sealer attachment to draw out the air. Glass is completely impermeable to oxygen and moisture, making it an excellent barrier, though it is fragile.
Environmental Controls
FEMA and the Federal Emergency Management Agency emphasize that food storage areas should be kept cool, dry, and dark. The ideal storage temperature for pemmican is between 40°F and 60°F. While pemmican can withstand high heat without spoiling (historic voyageurs carried it through humid summers in canvas sacks), prolonged exposure to high temperatures will cause the tallow to soften or melt, which can compromise the structural integrity of the fat barrier. A cool, dark basement, root cellar, or climate-controlled pantry is the perfect location for your stockpile.
How to Identify Spoiled Pemmican
Before consuming any stored food, perform a sensory inspection. Spoiled pemmican is incredibly rare if the meat was dried properly and pure suet was used, but it can occur if moisture was introduced during packaging. Use the following diagnostic steps:
- The Smell Test: Fresh pemmican has a mild, rich, slightly beefy and buttery aroma. If you open a package and detect a sharp, sour, metallic, or paint-like odor, the fat has oxidized and gone rancid. While rancid fat won't necessarily kill you, it can cause severe gastrointestinal distress and is highly unpalatable.
- The Visual Inspection: Look closely at the surface of the bar. If you see any fuzzy green, white, or black patches, mold has grown. This only happens if water activity was too high. Moldy pemmican must be discarded immediately; do not attempt to scrape the mold off, as its microscopic roots (hyphae) penetrate deep into the bar.
- The Texture Test: Pemmican should be firm and slightly waxy. If a bar has turned into a slimy, wet mass at room temperature, it indicates bacterial decomposition due to excess moisture. Discard it.
Customizing Your Pemmican for Palatability
While traditional pemmican consists strictly of meat and fat, some preppers prefer to customize their batches to improve flavor, texture, or nutritional variety. However, every modification carries a trade-off regarding shelf life.
The Addition of Dried Berries
Historically, berries were added to pemmican intended for rapid consumption or for trade. Berries add vitamin C, which historically protected fur traders and explorers from scurvy. If you choose to add berries, they must be completely dehydrated until they are hard and crunchy, then ground into a powder. Never use commercial dried fruits like raisins or craisins from the grocery store; these are treated with humectants, oils, and sugar, and contain far too much moisture for long-term preservation.
Spices, Salt, and Honey
Many modern palates find plain pemmican to be bland or excessively greasy. You can safely add dried spices to your meat powder before mixing it with the tallow. Excellent options include:
- Sea Salt: Salt is a natural preservative and enhances flavor. Add 1 to 2 teaspoons of fine sea salt per pound of meat powder.
- Black Pepper and Garlic Powder: These add a savory kick that cuts through the richness of the fat. Ensure they are completely dry spices.
- Cayenne Pepper: Capsaicin acts as a mild natural antioxidant and adds warmth, which can be incredibly comforting in cold-weather Survival Scenarioss.
Warning on Honey and Wet Sweeteners: Never add raw honey, maple syrup, or molasses to your pemmican mixture. While honey is self-preserving on its own, its high water content (usually around 17% to 20%) will raise the water activity of the pemmican, creating a breeding ground for bacteria like Clostridium botulinum.
Integrating Pemmican into Your Emergency Plan
Pemmican is not merely a passive stockpile item; it is an active tool for physical resilience. To maximize its utility, integrate it into your existing disaster preparedness frameworks.
The Ultimate Bug-Out Bag Ration
When assembling a 72-hour emergency kit, as recommended by the Red Cross, weight and volume are your primary constraints. Standard canned foods are incredibly heavy and consist mostly of water. Freeze-dried meals require you to carry extra water and a heating source to reconstitute them. A 12-ounce block of pemmican provides over 2,000 calories of ready-to-eat, nutrient-dense fuel, requiring no water to prepare and taking up less space than a standard paperback book. It is the ultimate lightweight, high-calorie ration for your Go-Bag Builder or vehicle emergency kit.
Physical Conditioning and Energy Management
If you are forced to evacuate on foot or engage in heavy manual labor during an emergency, your caloric needs will skyrocket. According to military nutrition guides, an active adult male in a survival scenario can easily burn 4,000 to 5,000 calories per day. Consuming high-sugar survival bars under these conditions leads to rapid glycogen depletion and physical exhaustion. Pemmican provides a steady stream of ketones, allowing your body to maintain peak physical exertion and cognitive focus for hours on end without a "crash."
Preserving the Past to Secure Your Future
In an era dominated by fragile, just-in-time supply chains and highly processed, short-lived convenience foods, mastering the skills of our ancestors is the ultimate form of self-reliance. Knowing how to make pemmican is more than just learning a historical recipe; it is acquiring a vital survival technology that bridges the gap between nutrition and extreme preservation. By selecting the right cuts of lean meat, meticulously dehydrating them to eliminate moisture, rendering pure saturated suet, and packaging the final product to lock out oxygen, you create a nutritional fortress that can stand guard in your pantry for decades. Start small, perfect your technique, and build a stockpile of traditional pemmican that guarantees your family will never go hungry, no matter what challenges the future may bring.
Frequently Asked Questions
What is pemmican?
Pemmican is a traditional, highly concentrated survival food made from a mixture of dried, powdered lean meat and rendered fat (tallow), sometimes with dried berries added.
How long does pemmican actually last?
When properly prepared and stored in a cool, dark, and dry place, pemmican can easily last 5 years or longer without refrigeration.
What is the correct ratio of meat to fat for pemmican?
The standard ratio is 1:1 by weight of completely dry, powdered meat to rendered liquid tallow.
Can you use pork fat, lard, or butter to make pemmican?
No. You must use rendered beef or bison tallow (suet). Other fats like pork lard or butter contain too much moisture and unsaturated fats, which will cause the pemmican to go rancid quickly.
How should pemmican be stored for long-term survival?
Store pemmican in airtight packaging, such as vacuum-sealed bags or glass jars, and keep it in a cool, dark, and dry location.